Beginning Android Development Part One: Installing Android Studio
Learn how to download and install Android Studio in this Beginning Android Development Tutorial. By Megha Bambra.
4.9 (8) · 1 Review
Update Note: This beginning Android developmen tutorial is now up to date with the latest version of Android Studio. Updates by Megha Bambra. Original tutorial by Matt Luedke. Previous updates by Darryl Bayliss.
Update Note: This beginning Android developmen tutorial is now up to date with the latest version of Android Studio. Updates by Megha Bambra. Original tutorial by Matt Luedke. Previous updates by Darryl Bayliss.

Clearly there’s a demand for Android app development since there are over one billion active devices around the globe. To say that it’s an exciting platform and space to make apps for is an understatement.
Getting Started
There aren’t any prerequisites for this beginning Android development tutorial, other than a willing mind and a Mac — you can certainly develop for Android on PC, but these instructions are tooled for Mac-based developers.
You’ll learn how to set up all the tools you need and will walk away as an Android developer-in-training. Here’s what you’ll do in this beginning Android development tutorial:
- Download and install Android Studio.
- Set up testing for your app on devices and emulators.
- Create a simple “Hello World!” Android app that prints to your device’s or emulator’s screen.
- Import a sample project into Android Studio.
Installing Android Studio
One of the most important parts of getting started with any new platform is setting up your environment, and it’s no different with Android.
It’s important to take your time and follow each step methodically. Even if you follow the steps perfectly, you may have to troubleshoot a small issue or few. Your system configuration or product versions can make for unexpected results.
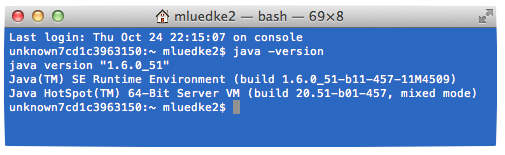
With all of this in mind, let’s quickly check that you have the Java Development Kit (JDK) installed. To check, you’ll use trusty old Terminal.
Note: You’ll learn the essential steps for this tutorial in the next few paragraphs, but if you’d like to deepen your knowledge of Terminal, you’ll find a good introductory tutorial about it in this blog from teamtreehouse.com.
Note: You’ll learn the essential steps for this tutorial in the next few paragraphs, but if you’d like to deepen your knowledge of Terminal, you’ll find a good introductory tutorial about it in this blog from teamtreehouse.com.
In a nutshell, using Terminal is kind of like looking under your car’s hood. It’s how you really get to know the machine face-to-face, without any complex graphical interface to interfere.
You can find the Terminal app quite easily on a Mac: open Launchpad and type terminal into the search at the top of the screen and select Terminal when it shows up.

Once you have the Terminal open, type in java -version. You should see some output that mentions a version number, like below.
If that’s not what you see, then you don’t have the JDK installed. Terminal might tell you -bash: java: command not found, or it could say No Java runtime present, requesting install. and trigger a pop up that will lead you down the yellow brick road…to Oracle’s website.
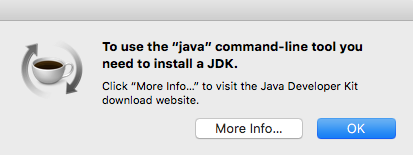
You can either click More Info… or head over to Oracle to download the JDK from Oracle.
Install the JDK if needed, and once you’re done, head over to the Android Studio page and click the Download Android Studio button.
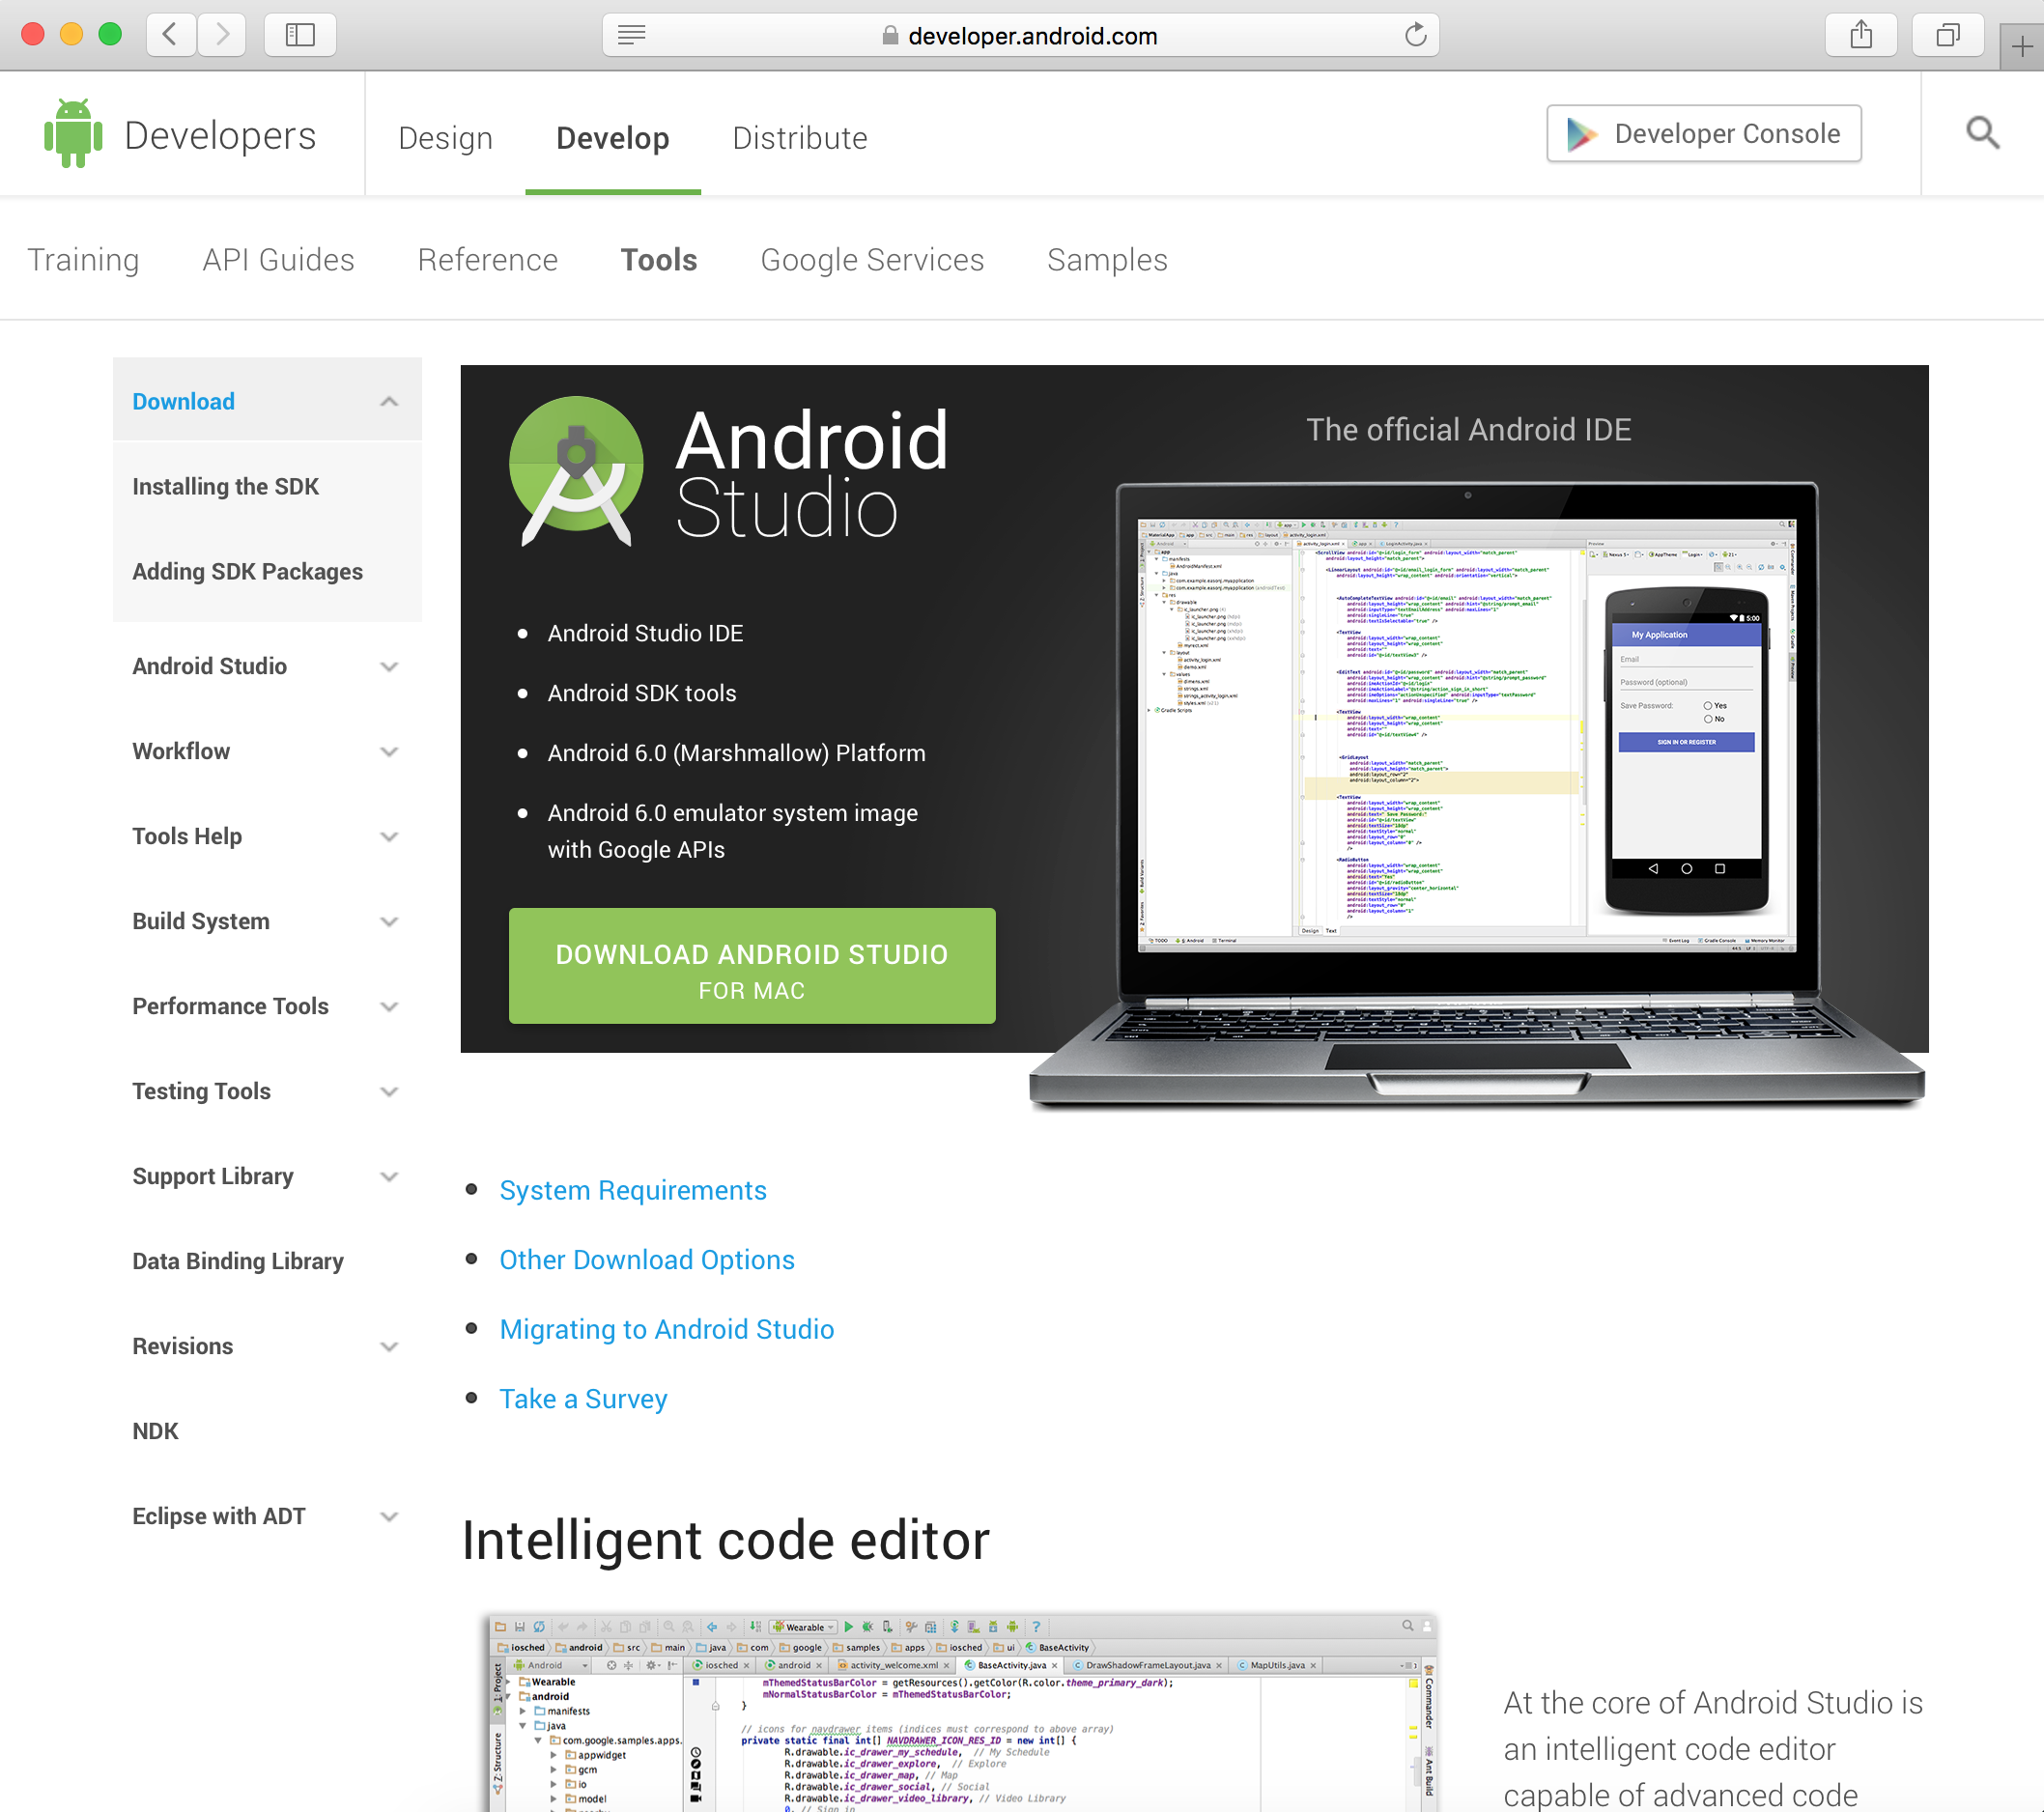
Google constantly updates this page, so the version you see may very well be newer than the screenshot above. Once you click the button, you’ll see a request to agree to the terms and conditions.

After reading these carefully (everybody takes the time to fully read these, right?) accept and click the blue button underneath titled Download Android Studio. Once the download is complete, you can install Android Studio similar to how you install any other program.
The download page will redirect to a page that contains installation instructions for OS X, Windows and Linux Operating Systems. If the instructions don’t appear, then you can view them here.
Once installation wraps itself up, go ahead and launch Android Studio!

The setup wizard will greet you the first time it loads.

Click Next to move to the Install Type screen. This whole process will probably take several minutes.

Check the box for Standard and click Next.
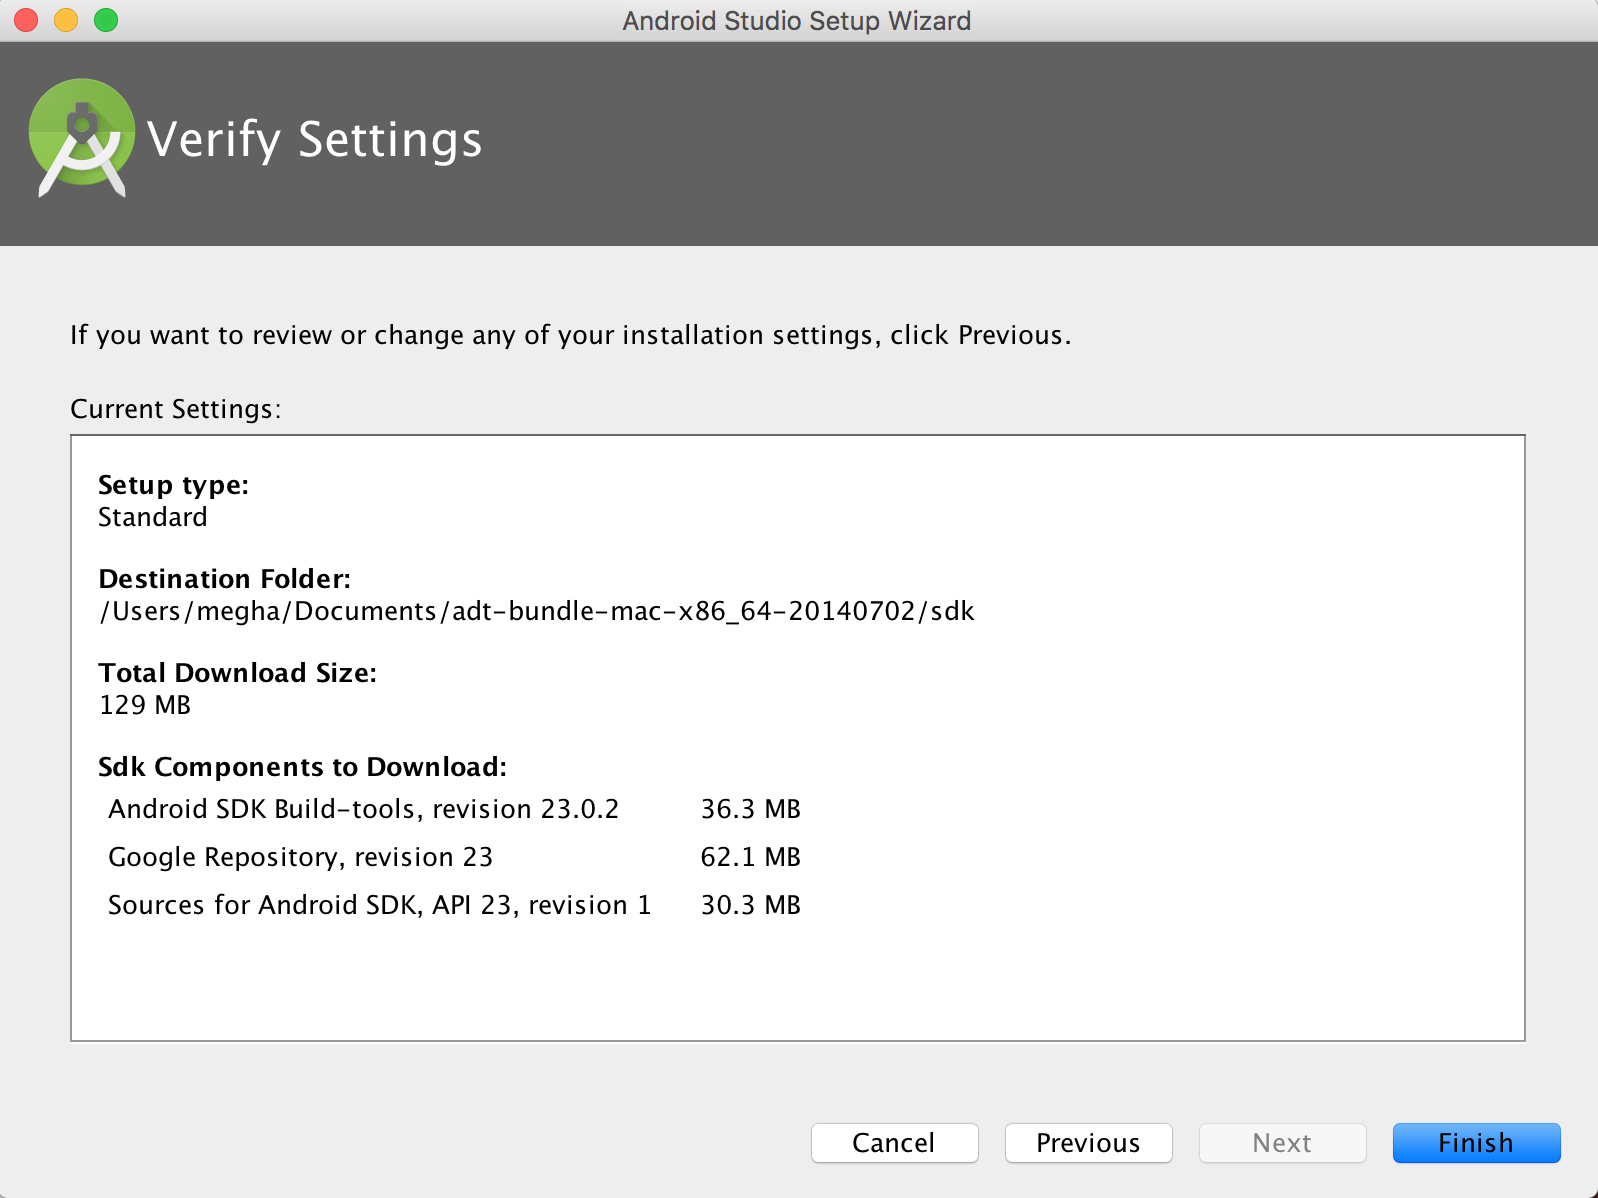
On the Verify Settings window, you’ll have an opportunity to confirm your setup. Click Finish to start downloading the SDK components. Once everything downloads, click Finish.

After a few minutes, you’ll have the welcome screen, which serves as your gateway to building all things Android.

Even though you just downloaded it, it’s possible that it’s not the latest version. Check whether any updates are available by clicking check for updates at the bottom of the welcome screen. If an update is available, a window like the screenshot below will appear. Select Update Now and let it do its thing.

The Android SDK Manager
Each version of Android has its own SDK (Software Development Kit) that enables you to create applications for the Android platform. Since you just went through the setup wizard, you’ll already have the latest version of the SDK available to you.
Installing a New SDK
However, it’s useful to know how to install additional versions of the SDK so that you can develop for all supported versions of Android.
SDKs also allow you to create AVDs (Android Virtual Devices) that are customized to your personal configuration for the purpose of testing your app.
From the Android Studio welcome screen, click Configure.

The menu will slide across and present the Configure menu. Select the SDK Manager option.

Once it launches, you’ll see a window like the one below:

The first tab of this window, SDK Platforms, lists the Android SDK platform available for download.
Enable the Show Package Details option to see individual SDK components, such as the platform itself and the sources pertaining to the API level like system image. Take note of the checkbox next to the SDK platform; it will be pre-selected if an update is available.
By default, the SDK Manager installs the latest packages and tools. Select the SDKs as shown in the screenshot above. If you wish to install other SDKs, just select them for installation.

The SDK Tools tab lists developer tools and documentation along with the latest versions. Similar to the first tab, checking the Show Package Details will display available version of SDK tools.
The first three components in this list, for example, are Android SDK Build Tools, Android SDK Tools and Android SDK Platform-Tools. Each contains components that are designed to assist in the development of Android and work across multiple SDKs. Go with the default selection on this tab.

The SDK Update Sites tab displays the update sites for Android SDK tools and add-ons. You’re not limited to what’s listed because you can add other sites that host their own Android SDK add-ons, and then download them from those sites.
For the purpose of setting up correctly, select the options that are checked in the screenshot above. Click Apply at the bottom if it’s active. You’ll be presented with a confirmation dialog for the chosen packages; accept and continue. Click OK to close out the window.
The window will disappear and the SDK Manager will download and install the selected items. Once it’s done, click Finish. You’ll be directed back to the SDK Manager window where clicking OK will take you back to the Welcome to Android Studio.
Now the fun begins!