Drawing with PencilKit: Getting Started
In this PencilKit tutorial, you’ll learn to use PencilKit and an application where users can draw on a canvas using provided tools. By Christine Abernathy.
Apple introduced PencilKit in iOS 13, making it easy to use Apple Pencil to add drawing features to iOS apps. Before iOS 13, integrating Apple Pencil was more complicated. PencilKit allows you to easily build apps that create drawings or annotate documents.
Low latency and efficient drawing are two highlights of PencilKit. Drawing with it feels fluid and responsive. PencilKit provides a rich palette to help users pick the right tools for drawing. These include different brush types, an eraser and a lasso selection tool. These combine to make PencilKit the de facto choice for creating drawing apps.
In this tutorial, you’ll learn the basics of PencilKit by building out MasterThis. The sample app lets you flex your artistic side as you practice drawing masterpieces. Once satisfied, you can share your rendition with future admirers.

Getting Started
Click the Download Materials button at the top or bottom of this tutorial to download the starter project. Now, open MasterThis.xcodeproj in the starter folder. Build and run the project. You should see a blank screen waiting for you to unleash your creative brilliance:

Tap + in the top left to show the list of masterpieces available for you to practice drawing with. Double-tap one to select it:

Tap anywhere outside the pop-up to dismiss it and get ready to draw. However, the app’s not quite ready for you. Fortunately, you’re an iOS developer and a super hero so you should be ready to go.

You’ll be adding functionality to turn that empty black hole into a canvas fit for Picasso.
Take a look at the key files in MasterThis to familiarize yourself with the project:
- DrawingView: Where the drawing (magic) happens.
- Rendition: Your rendition’s data model, which will host your drawing data.
Get ready to work!
Add a Canvas View
Any good artist knows that you typically draw on a canvas. The PencilKit equivalent is PKCanvasView. It captures Apple Pencil input and presents it on the screen. PKCanvasView is a subclass of UIScrollView, so it allows bounds that are larger than the visible area.
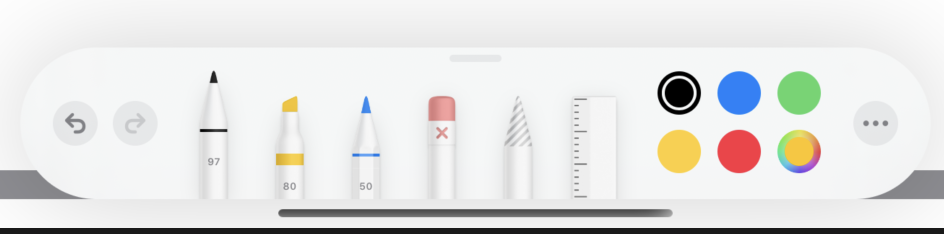
PKCanvasView can present a tool picker to the user. The tool picker contains the artist’s brushes, pens, ink, paint and other required drawing tools. Users can pick which tool they want to use.
You may choose not to present a picker and instead pre-select the tools available for drawing. This may make users very sad, but hey, whatever makes sense for your app. For example, you can pre-select PKInkingTool to draw lines on a canvas view.
Start by adding PKCanvasView to the starter app.
Right-click Views in Project navigator, then select New File…. Choose the iOS ▸ User Interface ▸ SwiftUI View template, and click Next. Name the file CanvasView.swift and click Create.
PKCanvasView is a UIKit view. To use it in SwiftUI, you need to wrap it in a SwiftUI view that conforms to UIViewRepresentable.
Importing the Framework
Add the following after the import SwiftUI:
import PencilKit
Here, you import the PencilKit framework.
Delete the CanvasView_Previews definition and replace CanvasView implementation with the following:
struct CanvasView {
  @Binding var canvasView: PKCanvasView
}
This creates a single property representing a canvas view. The canvasView property is a @Binding, which indicates another object owns it.
Add the following delegate extension to the end of the file:
extension CanvasView: UIViewRepresentable {
  func makeUIView(context: Context) -> PKCanvasView {
    canvasView.tool = PKInkingTool(.pen, color: .gray, width: 10)
    #if targetEnvironment(simulator)
      canvasView.drawingPolicy = .anyInput
    #endif
    return canvasView
  }

  func updateUIView(_ uiView: PKCanvasView, context: Context) {}
}
In this code, you conform to UIViewRepresentable and implement the two required methods. SwiftUI uses these to create and update the canvas view.
The drawingPolicy property on PKCanvasView controls what kinds of input the canvas view accepts. By default, it listens only for pencil input. This doesn’t work for devices that don’t support an Apple Pencil, such as an iPhone or the simulator. You set the policy to anyInput in the simulator environment to facilitate testing. If you want to support finger drawing in general, remove the conditional compilation instructions.
makeUIView(context:) adds a gray pen inking tool to allow the user to draw. The pen has a base width of 10. What’s a base width?

The final width applied to a drawing depends on the ink type selected and the Apple Pencil input. A marker’s final width will be thicker than a pen. If a user applies more force on the screen, the final width will be wider.
You don’t need your UIKit to react to any changes in the SwiftUI view, so keep updateUIView(_:context:) empty.
Now that you have the SwiftUI representation of your canvas view, you can integrate it into your main view.
Go to DrawingView.swift and add the following after the SwiftUI import:
import PencilKit
This imports the PencilKit framework.
Initializing the Canvas View
Now, add the following at the end of the state properties list:
@State private var canvasView = PKCanvasView()
Here, you initialize the property that represents the PencilKit canvas view. Later on, you’ll want to control this view from DrawingView so you can make updates to it.
Next, in body, replace:
Rectangle()
With:
CanvasView(canvasView: $canvasView)
You set up your CanvasView instance here and pass in a binding to the canvasView property.
Select iPad in the Scheme simulators list if it isn’t selected. Then, open the SwiftUI canvas if it isn’t already open. Use Adjust Editor Options ▸ Canvas at the top right of the editor or press Option-Command-Return. Click Resume in the preview pane. You should see a white canvas:

Click Live Preview to run the app:

Using your mouse, draw on the canvas. You should see something like this:

Ah, so satisfying. You’re making progress.

If you have access to an iPad and Apple Pencil, build and run the app on your device. Apply different forces when you draw and see how the thickness of the drawing changes:

You’ve still got a ways to go. You’ve probably noticed by now that there’s no way to erase drawing mistakes.

How about adding the ability to start afresh?