How to Submit An App to Apple: From No Account to App Store – Part 1
How to submit an app to the Apple App Store from beginning to end. In the first half of this two-part series, you’ll learn how to set up an Apple Developer Account, generate certificates and prepare your app for the store. By Rony Rozen.
Registering Devices
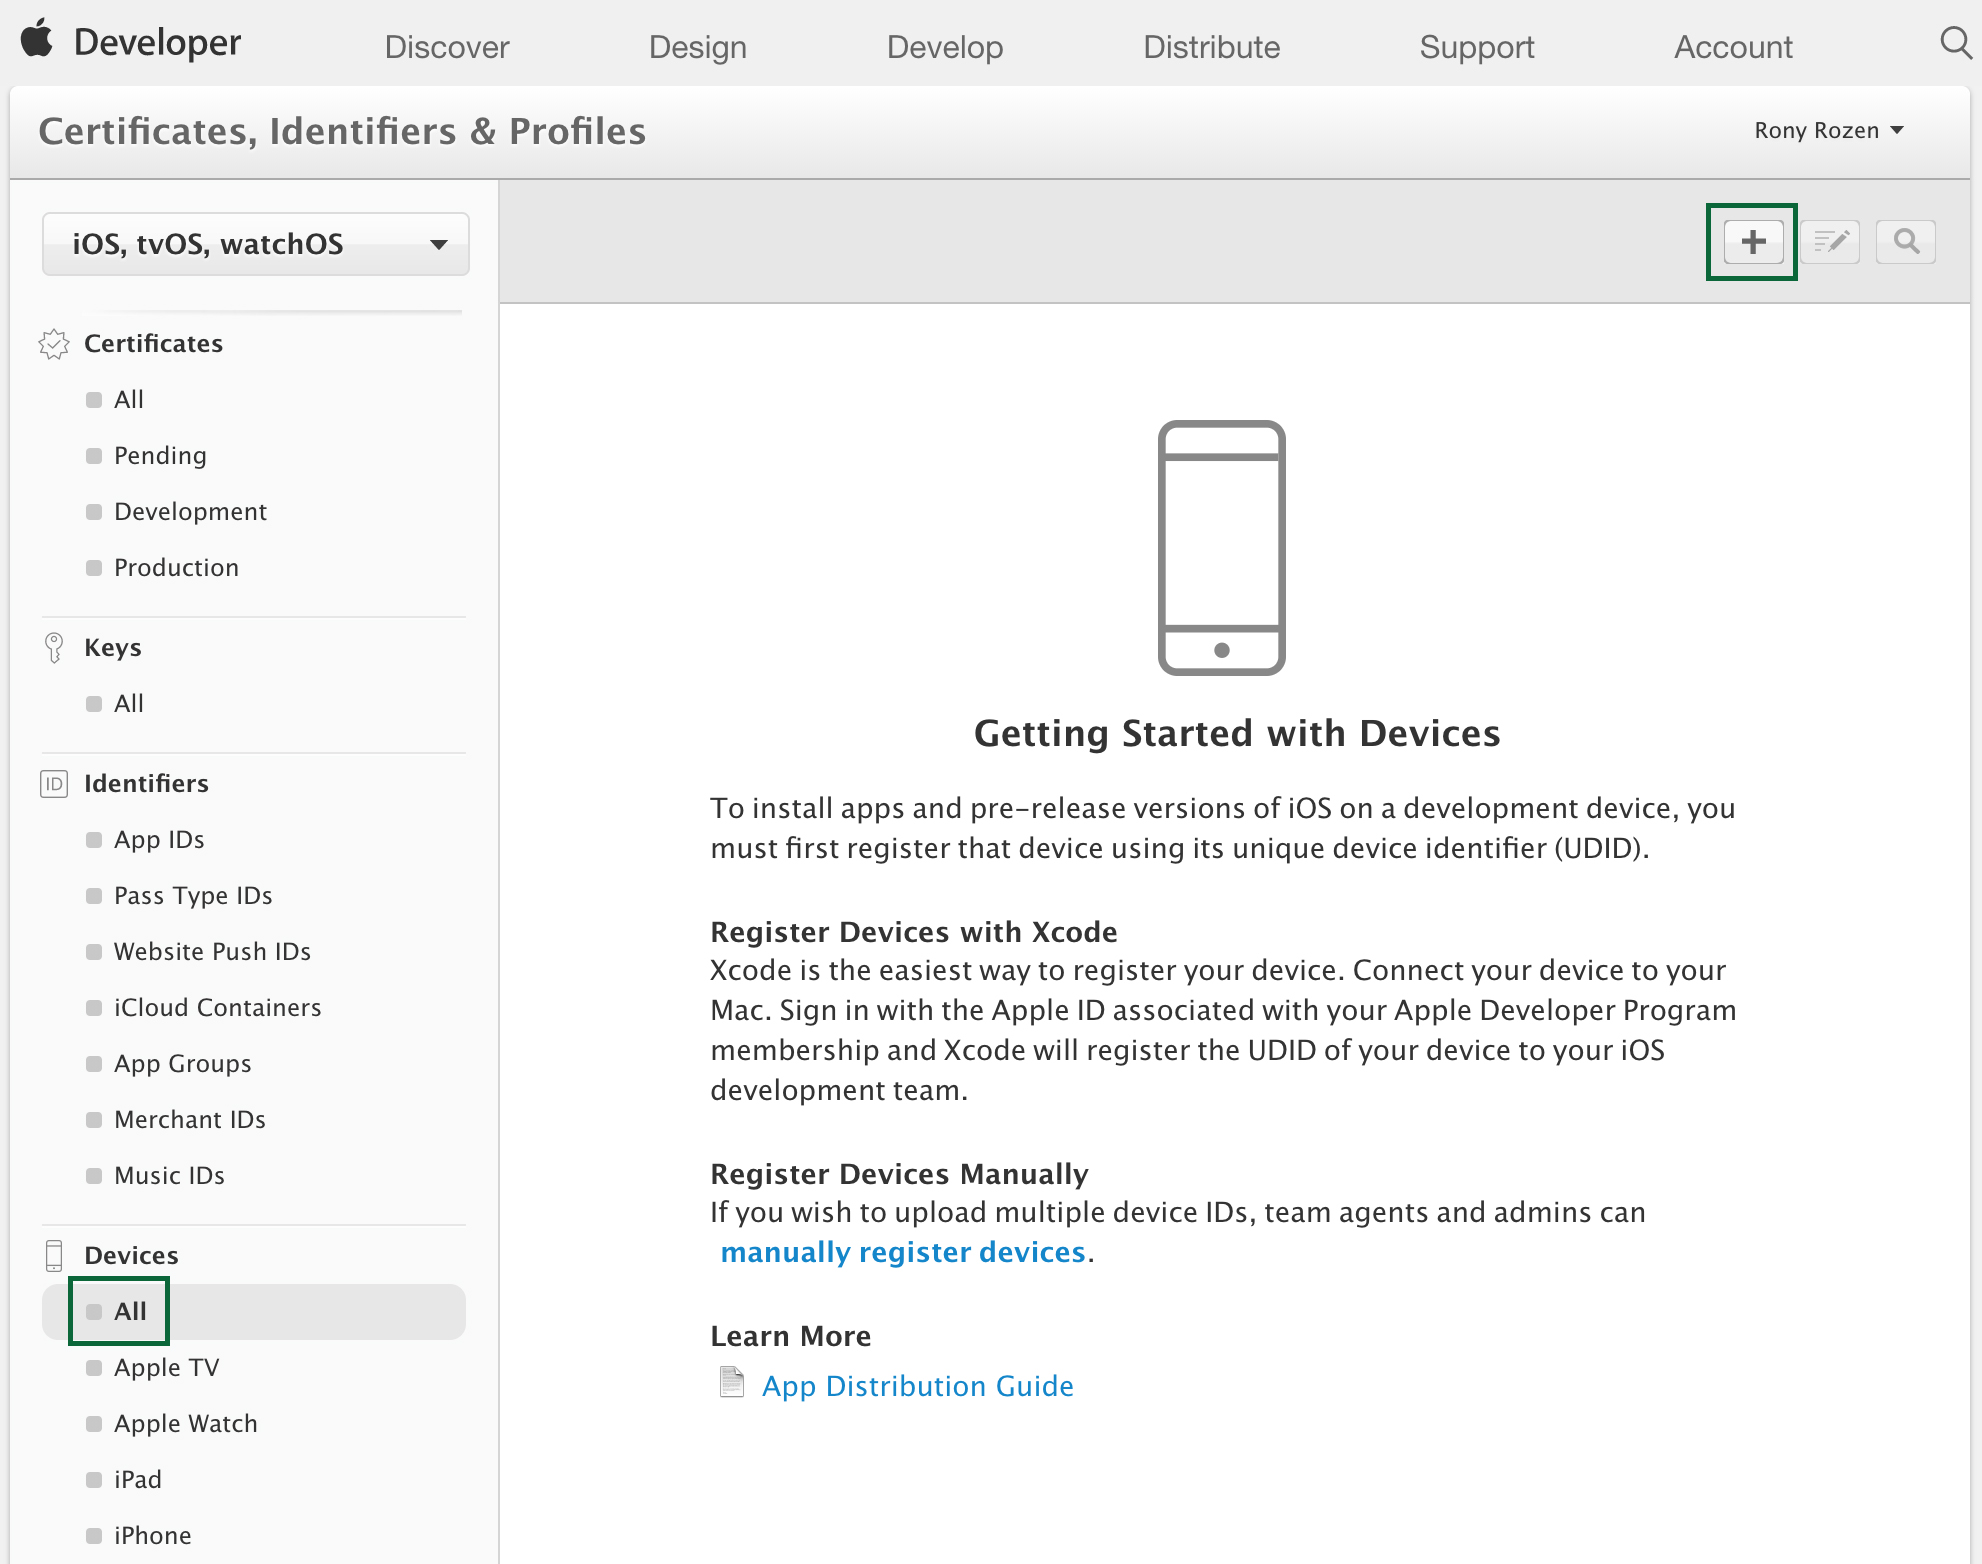
The next step is to register your devices. In your browser on the left-side menu, click Devices\All and then, on the right, +:
You need to get the UDID of the device(s) you want to use to run your apps. There are many ways to get a device’s UDID: there are free apps available that will do it for you, or you can use Xcode’s organizer. Here, you’ll get the UDID using iTunes.
Open iTunes and plug the device into your computer. Select the device from the menu bar under the player controls. iTunes will display your device name, capacity, version and serial number. Click on the serial number and it will change to your device’s UDID:

Now simply right-click on the number and select Copy to copy the UDID to your clipboard.
Go back to your browser, enter a device name (which can be anything you want) and paste the UDID into the appropriate field. When you’re done, click Continue

You will now be prompted to confirm the registration. Click Register.
Your device is now registered, and will appear in your list of devices:

You can come back later to register additional devices, belonging to friends and beta testers.
Note: Apple allows you to register up to 100 devices of each type (iPhones, iPads, AppleTVs, etc.) per year to your account. If you register a device and later remove it, it still counts towards your total for the year. At the end of the year, when you renew your membership, you’ll get the chance to decide which registered devices to carry over to the next membership year and which to remove (making room for new devices). At any given moment, you can’t have more than 100 devices of each type.
Note: Apple allows you to register up to 100 devices of each type (iPhones, iPads, AppleTVs, etc.) per year to your account. If you register a device and later remove it, it still counts towards your total for the year. At the end of the year, when you renew your membership, you’ll get the chance to decide which registered devices to carry over to the next membership year and which to remove (making room for new devices). At any given moment, you can’t have more than 100 devices of each type.
Creating App IDs
Now that your device is registered, you need to create an App ID. Every app you build will need its own App ID. On the side menu, click Identifiers\App IDs:

You’ll see a brief explanation of the App ID concept. In a nutshell, an App ID is a combination of a 10-character “seed” prefix generated by Apple, and a suffix created by you, defined as a Bundle ID search string. Together they create a unique identifier for your app.
Here are some important things to know about App IDs:
- If you want to share keychain information between your apps, you can elect to have all of your apps share the same seed prefix. For example, say you have a suite of apps that all make use of the same website via a login. If the apps share the same seed prefix, and one app saves the user’s login information to the iOS keychain, any other app in the suite can get this login information from the keychain.
- You can create two different types of App ID: an Explicit App ID, or a Wildcard App ID. Explicit App IDs must be used when you wish to incorporate services such as in-app purchases or iCloud. Wildcard App IDs should be used when you want to use the same App ID for multiple apps.
- In an Explicit App ID, the Bundle ID search string has to be unique for each of your apps. It will be used by Apple’s push notifications service, for in-app purchases and for other services such as iCloud storage.
- Apple recommends that you use “a reverse-domain name style string” for the Bundle ID. For an Explicit App ID, the suggested format is “com.domainname.appname”; for a Wildcard App ID, the suggested format is “com.domainname.*”.
- Remember, if you use a Wildcard App ID, you won’t be able to use any of the neat services normally available, such as push notifications or in-app purchases. You might not plan to use these services now, but if you change your mind, you won’t be able to change your App ID without creating a new app.
Now that you know all about App IDs, it’s time to create one. On the right side of the screen click +.
Fill out the description (usually just your app’s name). The seed ID will usually be your Team ID. Now, make sure Explicit App ID is selected, and enter the Bundle ID – remember to use a reverse-domain name style string for this, including the name of the app at the end. Click Continue when done:

You will be prompted to confirm your values, click Register at the bottom. Then you will see a Registration Complete message.
You are now ready to create the provisioning profiles.
Provisioning Profiles
On the side menu, click Provisioning Profiles\All:

You’ll see a brief explanation describing getting started with iOS provisioning profiles. A provisioning profile brings together a certificate, an App ID and device identifiers. When you get back to Xcode (you’re almost there), you’ll use the provisioning profile you created to bring everything together.
You use Development provisioning profiles to build and install versions of your app during your development process. You use Distribution provisioning profiles when you submit your apps to the App Store.
On the right side of the screen click on the +.
Choose iOS App Development, then click Continue:

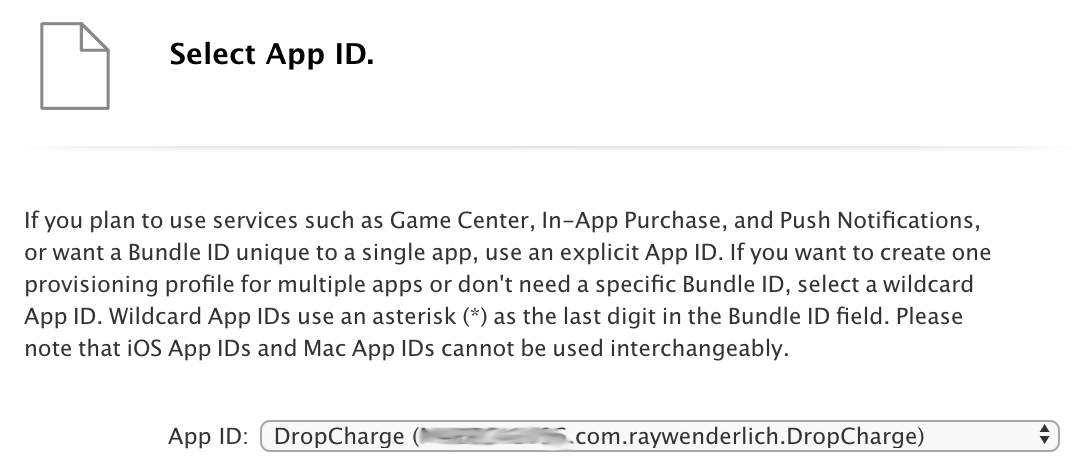
The next screen asks you to select an App ID for this new profile. Choose the one you just created and click Continue:
The following screen asks you to select the certificates for the profile. If you have multiple members on a team, they can be selected here. Select your certificate and click Continue:

The next screen asks which registered devices this profile should include. Select the relevant device(s) and click Continue:

Finally, enter a name for this profile. You will use the name you specify to identify the profile among other profiles, so make it as descriptive as possible. Click Continue:

The final page shows your generated profile and allows you to download it. Go ahead and click Download.

Since you are already here, go ahead and generate the distribution profile. You won’t actually need this profile until you’re ready to submit the app for approval, but since you’re here, it’s worth doing now. Click Add Another at the bottom:

Under Distribution, select App Store and click Continue:

The next steps are the same as for the development profile. Follow the screens along, name the distribution profile something descriptive and unique, and download it as you did the development profile.
Now find the files you just downloaded on your computer, and double-click each of them in turn, causing Xcode to launch. Verify the profiles are there by opening a project or starting a new one for this test. Click on the Project in the left pane. Select General and make sure the Bundle Identifier is the same as the App ID you created earlier (otherwise, the provisioning profile won’t match).
Select Build Settings, select All, search for “signing” and change the value for Code Signing Style to Manual. Then, click the word None next to the entry Provisioning Profile. Your profiles will be listed:
