Getting Started with PhotoKit
In this tutorial, you’ll learn how to use PhotoKit to access and modify photos, smart albums and user collections. You’ll also learn how to save and revert edits made to photos. By Corey Davis.
Sign up/Sign in
With a free Kodeco account you can download source code, track your progress, bookmark, personalise your learner profile and more!
Create accountAlready a member of Kodeco? Sign in
Sign up/Sign in
With a free Kodeco account you can download source code, track your progress, bookmark, personalise your learner profile and more!
Create accountAlready a member of Kodeco? Sign in
Contents
Getting Started with PhotoKit
30 mins
- Getting Started
- Prepping the Photos App
- Getting PhotoKit Permissions
- Modifying Info.plist
- Requesting Authorization
- Understanding Assets
- Asset Data Models
- Fetching Assets and Asset Collections
- Prepping the Collection View
- Updating the Cell
- Fetching Images from Assets
- Displaying Album Assets
- Modifying Asset Metadata
- Change Requests
- Photo View Controller Change Observer
- Registering the Photo View Controller
- Photos View Controller Change Observer
- Registering the Photos View Controller
- Album View Controller Change Observer
- Album View Controller Registration
- Editing a Photo
- Saving Edits
- Undoing Edits
- Where to Go From Here?
The Photos app manages image assets in iOS through a set of APIs known as PhotoKit. If you’ve been wondering how to build an app like Photos or just access the photo library, PhotoKit is the answer. This tutorial will focus on iOS, but PhotoKit is also available for macOS, Catalyst and tvOS.
You’ll work on NoirIt, an app that applies a gorgeous noir filter to your photos. To accomplish this, you’ll:
- Learn about PhotoKit’s permission model.
- Access image asset data.
- Learn how to access user collection and smart album data.
- Display image assets.
- Modify asset metadata.
- Edit an asset’s image.
- Save a modified image asset.
- Revert a modified image asset to the original image.
Getting Started
Download the starter project by clicking the Download Materials button at the top or bottom of the tutorial.
Start by opening NoirIt.xcodeproj inside the starter folder. Expand the Resources folder and open Main.storyboard.
The layout of the app is pretty straightforward. There is an album collection view controller, a photos collection view controller and a photo detail view controller.
Build and run.
It might not be much to look at now, but it will be soon.
Prepping the Photos App
Before you start, create an album in Photos so you have at least one album to view in NoirIt later.
- Open Photos app. There is a bug in Photos when running on a simulator which might cause it to crash. If it does, re-open it.
- Tap Albums on the tab bar.
- Tap the + at the top of the screen.
- Select New Album.
- Name it My Cool Pics and tap Save.
- Select a few photos to add to the the new album.
- Navigate back to the main albums view and see your new album.
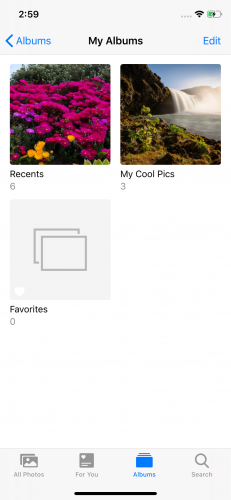
That is all you need to do in Photos.
Getting PhotoKit Permissions
As with many iOS APIs, PhotoKit uses a permissions model. It presents users with a dialog box asking for permission for the app to access their images. Before you dive into accessing and modifying images, you must get permission. You do so using PHPhotoLibrary
, a shared object that manages access to the photo library.
Modifying Info.plist
Your first step is to add a key to Info.plist describing why you want permission to access the library.
- Open Info.plist.
- Right-click Information Property List and select Add Row. A new line appears.
- Enter the key NSPhotoLibraryUsageDescription and press enter.
- In the value column, enter To add a noir filter. When iOS requests permission to access the library for the first time, it displays this information.
Your Info.plist should look like this:
Requesting Authorization
Open AlbumCollectionViewController.swift. Find getPermissionIfNecessary(completionHandler:)
and replace its implementation with:
// 1
guard PHPhotoLibrary.authorizationStatus() != .authorized else {
completionHandler(true)
return
}
// 2
PHPhotoLibrary.requestAuthorization { status in
completionHandler(status == .authorized)
}
- The first thing you do is get the current authorization status from
PHPhotoLibrary
. If it’s already authorized, call the completion handler with a value oftrue
. - If permission was not previously granted, request it. When requesting authorization, iOS displays an alert dialog box asking for permission. It passes back the status as a
PHAuthorizationStatus
object in its completion handler. Call your completion handler and returntrue
if the status value is.authorized
, otherwise returnfalse
.
PHAuthorizationStatus
is an enum, which can also return notDetermined
, restricted
, denied
and, new to iOS 14, limited
. You might want to check for these and handle them appropriately. For now, keep NoirIt simple.
viewDidLoad()
is already calling this method, so build and run. iOS asks for permission to access the photo library when NoirIt launches. If you are using, iOS 13 tap OK or on iOS 14, tap Allow Access to All Photos.
Understanding Assets
Even though you eventually will be getting images, it’s important to understand that you mostly work with assets in PhotoKit. Think about how you interact with the Photos app. Sure, you look at images, but there is also metadata such as favorites and geocoded location data. And there are more than images. Photos contains LivePhotos and video. Stuffing these things into UIImage
doesn’t make sense. And that is where PHAsset
comes in.
PHAsset
is metadata describing an image, LivePhoto or video. It is immutable and doesn’t contain the image itself, but does provide the information you need to get the image. It also contains tons of information, such as creation and modification dates, location data, favorite and hidden status, burst data and much more. As you’ll soon see, PHAsset
is a real workhorse.
Sometimes you work with a group of assets. These are usually returned as a PHAssetCollection
object.
Asset Data Models
Open AlbumCollectionViewController.swift. Near the top of the file, add the following under the declaration for the sections
property:
private var allPhotos = PHFetchResult<PHAsset>()
private var smartAlbums = PHFetchResult<PHAssetCollection>()
private var userCollections = PHFetchResult<PHAssetCollection>()
You might say to yourself, “Hey, self, what are these PHFetchResult
things? I thought I was getting PHAsset
s and PHAssetCollection
s?” A simplified way of thinking of PHFetchResult
is to consider it an array, which it is, in essence. It contains all the same methods and conventions of arrays, such as count()
and index(of:)
. Plus, it intelligently handles fetching data, caching it and re-fetching it as needed. You’ll be fine if you think of PHFetchResult
as an intelligent array of assets or collections. These properties are the app’s data store.
Fetching Assets and Asset Collections
Still within AlbumCollectionViewController.swift, find fetchAssets()
and add the following code to it:
// 1
let allPhotosOptions = PHFetchOptions()
allPhotosOptions.sortDescriptors = [
NSSortDescriptor(
key: "creationDate",
ascending: false)
]
// 2
allPhotos = PHAsset.fetchAssets(with: allPhotosOptions)
// 3
smartAlbums = PHAssetCollection.fetchAssetCollections(
with: .smartAlbum,
subtype: .albumRegular,
options: nil)
// 4
userCollections = PHAssetCollection.fetchAssetCollections(
with: .album,
subtype: .albumRegular,
options: nil)
- When fetching assets, you can apply a set of options that dictate the sorting, filtering and management of results. Here, you create a sort descriptor that sorts assets by creation date from newest to oldest.
-
PHAsset
provides functionality for fetching assets and returning the results as aPHFetchResult
. Here, you pass it the options created above and assign the result toallPhotos
. - The Photos app automatically creates smart albums, such as Favorites and Recents. Albums are a group of assets and, as such, belong in
PHAssetCollection
objects. Here you fetch smart album collections. You won’t sort these, sooptions
isnil
. - Accessing user created albums is similar, except that you fetch the
.album
type.
With your data store now populated, the next task is to update the UI.
Prepping the Collection View
You now have assets, so it’s time to do something with them. Add the following to the end of the class:
override func collectionView(
_ collectionView: UICollectionView,
numberOfItemsInSection section: Int
) -> Int {
switch sections[section] {
case .all: return 1
case .smartAlbums: return smartAlbums.count
case .userCollections: return userCollections.count
}
}
Here you return the number of items in each section so the collection view knows how many items to display in each section. Except for the “all photos” section, this is a good example of how you treat PHFetchResult
as an array.
Updating the Cell
Next, replace the code in collectionView(_:cellForItemAt:)
with the following:
// 1
guard let cell = collectionView.dequeueReusableCell(
withReuseIdentifier: AlbumCollectionViewCell.reuseIdentifier,
for: indexPath) as? AlbumCollectionViewCell
else {
fatalError("Unable to dequeue AlbumCollectionViewCell")
}
// 2
var coverAsset: PHAsset?
let sectionType = sections[indexPath.section]
switch sectionType {
// 3
case .all:
coverAsset = allPhotos.firstObject
cell.update(title: sectionType.description, count: allPhotos.count)
// 4
case .smartAlbums, .userCollections:
let collection = sectionType == .smartAlbums ?
smartAlbums[indexPath.item] :
userCollections[indexPath.item]
let fetchedAssets = PHAsset.fetchAssets(in: collection, options: nil)
coverAsset = fetchedAssets.firstObject
cell.update(title: collection.localizedTitle, count: fetchedAssets.count)
}
// 5
guard let asset = coverAsset else { return cell }
cell.photoView.fetchImageAsset(asset, targetSize: cell.bounds.size) { success in
cell.photoView.isHidden = !success
cell.emptyView.isHidden = success
}
return cell
- First, dequeue an
AlbumCollectionViewCell
. - Create variables to hold an asset, which is used as the album cover image, and the section type. Then, process the cell based on its section type.
- For the “all photos” section, set the cover image to
allPhotos
‘s first asset. Update the cell with the section name and count. - Because
smartAlbums
anduserCollections
are both collection types, handle them similarly. First, get the collection for this cell and section type from the fetch result. After that, get the collection’s assets usingPHAsset
‘s ability to fetch assets from a collection. Get the collection’s first asset and use it as the cover asset. Finally, update the cell with the album title and asset count. - If you don’t have a cover asset, return the cell as it is. Otherwise, fetch the image from the asset. In the fetch completion block, use the returned success state to set the hidden property on both the cell’s photo view and default empty view. Finally, return the cell.
Build and run. You now see an entry for All Photos, each smart album in the library and each user collection. Scroll to the bottom to see your My Cool Pics album.
Not too bad, but what happened to the cover images? You’ll fix this next.
Fetching Images from Assets
That default album image is kind of boring. It would be nice to see an image from the album.
In the previous step, you called fetchImageAsset(_:targetSize:contentMode:options:completionHandler:)
to get the asset’s image. This is a custom method added to UIImage
in an extension. Right now, it doesn’t have any code to fetch images and always returns false
. To fix this, you’ll use PHImageManager
. The image manager handles fetching images from assets and caching the results for quick retrieval later.
Open UIImageView+Extension.swift and replace the code in fetchImageAsset(_:targetSize:contentMode:options:completionHandler:)
with:
// 1
guard let asset = asset else {
completionHandler?(false)
return
}
// 2
let resultHandler: (UIImage?, [AnyHashable: Any]?) -> Void = { image, info in
self.image = image
completionHandler?(true)
}
// 3
PHImageManager.default().requestImage(
for: asset,
targetSize: size,
contentMode: contentMode,
options: options,
resultHandler: resultHandler)
- If
asset
isnil
, then returnfalse
and you’re done. Otherwise, continue. - Next, create the result handler that the image manager will call when the image request is complete. Assign the returned image to
UIImageView
‘simage
property. Call the completion handler with a value oftrue
, indicating that the request is complete. - Finally, request the image from the image manager. Provide the asset, size, content mode, options and result handler. All of these, except for
resultHandler
, are provided by the calling code.size
is the size at which you would like the image returned.contentMode
is how you would like the image to fit within the aspect ratio of thesize
. The default value isaspectFill
.
Build and run. Your albums now have cover images!
If you select any of the albums, the next view is empty. Your next task awaits.
Displaying Album Assets
Displaying all assets for an album is simply a matter of requesting each image from PHImageManager
. The PhotosCollectionViewController
is already set up to do this using the fetch image asset extension that you just worked on. To get this working, you only need to set up the segue to pass the fetch result.
In AlbumCollectionViewController.swift, find makePhotosCollectionViewController(_:)
and replace its code with:
// 1
guard
let selectedIndexPath = collectionView.indexPathsForSelectedItems?.first
else { return nil }
// 2
let sectionType = sections[selectedIndexPath.section]
let item = selectedIndexPath.item
// 3
let assets: PHFetchResult<PHAsset>
let title: String
switch sectionType {
// 4
case .all:
assets = allPhotos
title = AlbumCollectionSectionType.all.description
// 5
case .smartAlbums, .userCollections:
let album =
sectionType == .smartAlbums ? smartAlbums[item] : userCollections[item]
assets = PHAsset.fetchAssets(in: album, options: nil)
title = album.localizedTitle ?? ""
}
// 6
return PhotosCollectionViewController(assets: assets, title: title, coder: coder)
Now:
- Get the selected index path.
- Get the section type and item for the selected item.
-
PhotosCollectionViewController
needs a list of assets and a title. - If the user selects the “all photos” section, use
allPhotos
as the assetsassets
and set the title. - If the user selects an album or user collection, then use the section and item to get the selected album. Fetch all assets from the album.
- Create the view controller.
Build and run. Tap All Photos in the album view. You now see a collection of all your photos.
Tap one of the photos.
Things are coming into focus!
Modifying Asset Metadata
Change Requests
The ability to modify assets is a key component of NoirIt. Take a first pass at asset modification by allowing users to mark a photo as a favorite. PHAssetChangeRequest
facilitates the creation, modification and deletion of assets.
Open PhotoViewController.swift and add this code in toggleFavorite()
:
// 1
let changeHandler: () -> Void = {
let request = PHAssetChangeRequest(for: self.asset)
request.isFavorite = !self.asset.isFavorite
}
// 2
PHPhotoLibrary.shared().performChanges(changeHandler, completionHandler: nil)
- You create a code block to encapsulate the change. First, create a change request for the asset. Next, set the request’s
isFavorite
property to the opposite of the current value. - Instruct the photo library to perform the change by passing in the change request block. You do not need the completion handler here.
Next, replace the code in updateFavoriteButton()
with the following:
if asset.isFavorite {
favoriteButton.image = UIImage(systemName: "heart.fill")
} else {
favoriteButton.image = UIImage(systemName: "heart")
}
Check the PHAsset
‘s favorite status by using the isFavorite
property and set the button image to either an empty heart or a filled heart.
Build and run. Navigate through the app and select your favorite photo. Tap the favorite button and … nothing happens. So what went wrong?
Photo View Controller Change Observer
PhotoKit caches the results of fetch requests for better performance. When you tap the favorite button, the asset updates in the library, but the view controller’s copy of the asset is now out of date. The controller needs to listen for updates to the library and update its asset when necessary. Do this by conforming the controller to PHPhotoLibraryChangeObserver
.
At the end of the file, after the last curly brace, add:
// 1
extension PhotoViewController: PHPhotoLibraryChangeObserver {
func photoLibraryDidChange(_ changeInstance: PHChange) {
// 2
guard
let change = changeInstance.changeDetails(for: asset),
let updatedAsset = change.objectAfterChanges
else { return }
// 3
DispatchQueue.main.sync {
// 4
asset = updatedAsset
imageView.fetchImageAsset(
asset,
targetSize: view.bounds.size
) { [weak self] _ in
guard let self = self else { return }
// 5
self.updateFavoriteButton()
self.updateUndoButton()
}
}
}
}
- The change observer has only one method:
photoLibraryDidChange(:)
. Every time the library changes, it calls this method. - You need to check if the update affects your asset. Use
changeInstance
, a property that describes the library changes, by calling itschangeDetails(for:)
and pass in your asset. It returnsnil
if your asset is not affected by the changes. Otherwise, you retrieve the updated version of the asset by callingobjectAfterChanges
. - Because this method runs in the background, dispatch the rest of the logic on the main thread because it updates the UI.
- Update the controller’s asset property with the updated asset and fetch the new image.
- Refresh the UI.
Registering the Photo View Controller
Still in PhotoViewController.swift, find viewDidLoad()
and add this as the last line:
PHPhotoLibrary.shared().register(self)
The view controller must register to receive updates. After viewDidLoad()
, add:
deinit {
PHPhotoLibrary.shared().unregisterChangeObserver(self)
}
The view controller must also unregister when done.
Build and run. Navigate to one of your favorite photos. Tap the heart button, and the heart fills. Tap again, and it reverts back.
But there is a new problem. Tap the favorite button again to fill the heart. Navigate back to the All Photos view and then select the same photo again. The heart is no longer filled, and if you try to select it nothing happens. Something is very wrong.
Photos View Controller Change Observer
PhotosCollectionViewController
also does not conform to PHPhotoLibraryChangeObserver
. Because of this, its asset is also out of date. The fix is pretty simple: You need to make it conform to PHPhotoLibraryChangeObserver
.
Open PhotosCollectionViewController.swift and scroll to the end of the file. Add the following code:
extension PhotosCollectionViewController: PHPhotoLibraryChangeObserver {
func photoLibraryDidChange(_ changeInstance: PHChange) {
// 1
guard let change = changeInstance.changeDetails(for: assets) else {
return
}
DispatchQueue.main.sync {
// 2
assets = change.fetchResultAfterChanges
collectionView.reloadData()
}
}
}
This code is similar to what you did in PhotoViewController
, with a few small differences:
- Because this view displays several assets, request change details for them all.
- Replace
assets
with the updated fetch results and reload the collection view.
Registering the Photos View Controller
Scroll to viewDidLoad()
and add this after super.viewDidLoad()
:
PHPhotoLibrary.shared().register(self)
Like last time, the view registers to receive library updates. After viewDidLoad()
add:
deinit {
PHPhotoLibrary.shared().unregisterChangeObserver(self)
}
The view also needs to unregister.
Album View Controller Change Observer
While you are at it, you should add similar code to AlbumCollectionViewController.swift. If you don’t, you end up with a similar issue when navigating all the way back. Open AlbumCollectionViewController.swift and add the following to the end of the file:
extension AlbumCollectionViewController: PHPhotoLibraryChangeObserver {
func photoLibraryDidChange(_ changeInstance: PHChange) {
DispatchQueue.main.sync {
// 1
if let changeDetails = changeInstance.changeDetails(for: allPhotos) {
allPhotos = changeDetails.fetchResultAfterChanges
}
// 2
if let changeDetails = changeInstance.changeDetails(for: smartAlbums) {
smartAlbums = changeDetails.fetchResultAfterChanges
}
if let changeDetails = changeInstance.changeDetails(for: userCollections) {
userCollections = changeDetails.fetchResultAfterChanges
}
// 4
collectionView.reloadData()
}
}
}
This code is a bit different, because you are checking if the change affects multiple fetch results.
- If there was a change to any of the assets in
allPhotos
, update the property with the new changes. - If the change affects smart albums or user collections, update those as well.
- Finally, reload the collection view.
Album View Controller Registration
Add code to register for library updates to the end of viewDidLoad()
in AlbumCollectionViewController.swift:
PHPhotoLibrary.shared().register(self)
After viewDidLoad()
add:
deinit {
PHPhotoLibrary.shared().unregisterChangeObserver(self)
}
Again, this view also needs to unregister.
Build and run. Tap All Photos and tap a photo. Mark it as a favorite, then navigate all the way back to the main view. Again, tap All Photos and tap the same photo. You can see that it’s still marked as a favorite. Navigate back to the album collection view. Notice that the Favorites album count is up to date and the cover image is set for Favorites.
Great work! You are now persisting metadata changes to assets and showing those changes in each view controller.
Editing a Photo
Open PhotoViewController.swift and add the following after declaring the asset
property:
private var editingOutput: PHContentEditingOutput?
PHContentEditingOutput
is a container that stores edits to an asset. You’ll see how this works in a moment. Find applyFilter()
and add this code to it:
// 1
asset.requestContentEditingInput(with: nil) { [weak self] input, _ in
guard let self = self else { return }
// 2
guard let bundleID = Bundle.main.bundleIdentifier else {
fatalError("Error: unable to get bundle identifier")
}
guard let input = input else {
fatalError("Error: cannot get editing input")
}
guard let filterData = Filter.noir.data else {
fatalError("Error: cannot get filter data")
}
// 3
let adjustmentData = PHAdjustmentData(
formatIdentifier: bundleID,
formatVersion: "1.0",
data: filterData)
// 4
self.editingOutput = PHContentEditingOutput(contentEditingInput: input)
guard let editingOutput = self.editingOutput else { return }
editingOutput.adjustmentData = adjustmentData
// 5
let fitleredImage = self.imageView.image?.applyFilter(.noir)
self.imageView.image = fitleredImage
// 6
let jpegData = fitleredImage?.jpegData(compressionQuality: 1.0)
do {
try jpegData?.write(to: editingOutput.renderedContentURL)
} catch {
print(error.localizedDescription)
}
// 7
DispatchQueue.main.async {
self.saveButton.isEnabled = true
}
}
- Edits are done within containers. The input container gives you access to the image. The editing logic takes place inside the completion handler.
- You need the bundle identifier, the completion handler’s input container and the filter data to continue.
- Adjustment data is a way of describing changes to the asset. To create this data, use a unique identifier to identify your change. The bundle ID is a great choice. Also supply a version number and the data used to modify the image.
- You also need an output container for the final modified image. To create this, you pass in the input container. Assign the new output container to the
editingOutput
property you created above. - Apply the filter to the image. Describing how this is done is out of scope for this article, but you’ll find the code in UIImage+Extensions.swift.
- Create JPEG data for the image and write it to the output container.
- Finally, enable the save button.
Build and run. Select a photo. Tap Apply Filter. Your photo should now have a nice noir filter added.
Tap the save button. Nothing happens. You’ll fix that next.
Saving Edits
Use the editing output container created above to save the change to the library. Again, use a PHAssetChangeRequest
like you did for changing metadata earlier.
Still in PhotoViewController.swift, find saveImage()
and add the following to it:
// 1
let changeRequest: () -> Void = { [weak self] in
guard let self = self else { return }
let changeRequest = PHAssetChangeRequest(for: self.asset)
changeRequest.contentEditingOutput = self.editingOutput
}
// 2
let completionHandler: (Bool, Error?) -> Void = { [weak self] success, error in
guard let self = self else { return }
guard success else {
print("Error: cannot edit asset: \(String(describing: error))")
return
}
// 3
self.editingOutput = nil
DispatchQueue.main.async {
self.saveButton.isEnabled = false
}
}
// 4
PHPhotoLibrary.shared().performChanges(
changeRequest,
completionHandler: completionHandler)
- Like before, you handle the change within a code block. Create a
PHAssetChangeRequest
for the asset and apply the editing output container. - Create a completion handler to run after the change completes. Check for a successful result and print out the error if the result is not successful.
- If the change is a success, assign
nil
to the container property because it is no longer needed. Disable the save button, because there is nothing else left to save. - Call the library’s
performChanges(:completionHandler:)
and pass in the change request and completion handler.
Build and run. Navigate to a photo and tap the Apply Filter button. Tap the save button. iOS displays a dialog box asking for permission to modify the photo. Tap Modify.
Navigate back to All Photos and select the photo again. You should see that the modified image saved successfully.
Undoing Edits
There is one button left in the photo view controller that does not work: Undo. An undo, or revert, is also handled with … well, you probably know by now: PHAssetChangeRequest
.
Use the existence of asset change data to determine the Undo button’s enabled state. Find updateUndoButton()
and replace its contents with:
let adjustmentResources = PHAssetResource.assetResources(for: asset)
.filter { $0.type == .adjustmentData }
undoButton.isEnabled = !adjustmentResources.isEmpty
Each edit to an asset creates a PHAssetResource
object. The assetResources(for:)
returns an array of resources for the given asset. Filter the assets by the existence of adjustment data. The button’s isEnabled
property is set to true
if there are edits, otherwise it is false
.
It’s time to add the undo logic. Find undo()
and add this code to it:
// 1
let changeRequest: () -> Void = { [weak self] in
guard let self = self else { return }
let request = PHAssetChangeRequest(for: self.asset)
request.revertAssetContentToOriginal()
}
// 2
let completionHandler: (Bool, Error?) -> Void = { [weak self] success, error in
guard let self = self else { return }
guard success else {
print("Error: can't revert the asset: \(String(describing: error))")
return
}
DispatchQueue.main.async {
self.undoButton.isEnabled = false
}
}
// 3
PHPhotoLibrary.shared().performChanges(
changeRequest,
completionHandler: completionHandler)
By now, this pattern should be pretty familiar.
- Create a change request block to contain the change logic. For this example, you create a change request for the asset and call
revertAssetContentToOriginal()
. As you might expect, this requests that the asset change back to its original state. This does not affect metadata. - The completion handler checks for a successful result and disables the undo button if the result succeeded.
- Finally, instruct the library to perform the change.
Build and run. Select the photo to which you applied the filter. Tap Undo. Just like when you saved the asset earlier, iOS asks the user for permission to undo all changes.
Tap Revert. The image changes back to the original image.
Where to Go From Here?
Congratulations! You’ve covered a lot of ground in a short time. You can download the final project by clicking the Download Materials button at the top or bottom of the tutorial. You learned about:
- PhotoKit’s permission model.
- Accessing all photos, smart albums and user collections.
- Fetching images from assets.
- Modifying asset metadata.
- Editing an asset’s image.
- Saving asset modifications.
- Reverting asset modifications.
There is much more that PhotoKit has to offer, such as LivePhoto, video and the photo editing extension. Check out the PhotoKit documentation for more information:
Please share any comments or questions about this article in the forum discussion!
All videos. All books.
One low price.
A Kodeco subscription is the best way to learn and master mobile development — plans start at just $19.99/month! Learn iOS, Swift, Android, Kotlin, Flutter and Dart development and unlock our massive catalog of 50+ books and 4,000+ videos.
Learn more