Getting Started with Cloud Firestore and SwiftUI
In this tutorial, you’ll learn how to use Firebase Cloud Firestore to add persistence to a SwiftUI iOS application with Swift. By Libranner Santos.
Adding New Cards
Start by creating the Repository to access the data.
In the Project navigator, right-click Repositories and click New file…. Create a new Swift file called CardRepository.swift and add the following code to it:
// 1
import FirebaseFirestore
import FirebaseFirestoreSwift
import Combine

// 2
class CardRepository: ObservableObject {
  // 3
  private let path: String = "cards"
  // 4
  private let store = Firestore.firestore()

  // 5
  func add(_ card: Card) {
    do {
      // 6
      _ = try store.collection(path).addDocument(from: card)
    } catch {
      fatalError("Unable to add card: \(error.localizedDescription).")
    }
  }
}
Here you:
FirebaseFirestoreSwift adds some cool functionalities to help you integrate Firestore with your models. It lets you convert Cards into documents and documents into Cards.
- Import
FirebaseFirestore,FirebaseFirestoreSwiftandCombine.FirebaseFirestoregives you access to the Firestore API andCombineprovides a set of declarative APIs for Swift. - Define
CardRepositoryand make it conform toObservableObject.ObservableObjecthelps this class emit changes, using a publisher, so other objects can listen to it and react accordingly. - Then, declare
pathand assigned the valuecards. This is the collection name in Firestore. - Declare
storeand assign a reference to theFirestoreinstance. - Next, you define
add(_:)and use a do-catch block to capture any errors thrown by the code. If something goes wrong while updating a document, you terminate the app’s execution with a fatal error. - Create a reference to the cards collection using
path, and then passcardtoaddDocument(from:encoder:completion:). This adds a new card to the collection.
With the code above, the compiler will complain that addDocument(from:encoder:completion:) requires that Card conforms to Encodable. To fix this, open Card.swift and change the class definition to this:
struct Card: Identifiable, Codable {
By adding Codable, Swift can seamlessly serialize and deserialize Cards. This includes Encodable, which caused the error, and Decodable, which you’ll use when converting documents from Firestore documents to Swift objects.
You need a view model to connect your model with your views. In the Project navigator, under the ViewModels group, create a new Swift file called CardListViewModel.swift.
Add this to the new file:
// 1
import Combine

// 2
class CardListViewModel: ObservableObject {
  // 3
  @Published var cardRepository = CardRepository()

  // 4
  func add(_ card: Card) {
    cardRepository.add(card)
  }
}
Here’s a breakdown:
-
Combinegives you the APIs to handle asynchronous code. - You declare
CardListViewModeland make it conform toObservableObject. This lets you listen to changes emitted by objects of this type. -
@Publishedcreates a publisher for this property so you can subscribe to it. - You pass
cardto the repository so you can add it to the collection.
Open NewCardForm.swift and add a property for the view model you created, right after the other properties in NewCardForm:
@ObservedObject var cardListViewModel: CardListViewModel
The previous changes will make the Xcode Preview stop working, because now NewCardForm expects a CardListViewModel. To fix this, update NewCardForm_Previews:
static var previews: some View {
  NewCardForm(cardListViewModel: CardListViewModel())
}
Add the following addCard() method at the bottom of NewCardForm:
private func addCard() {
  // 1
  let card = Card(question: question, answer: answer)
  // 2
  cardListViewModel.add(card)
  // 3
  presentationMode.wrappedValue.dismiss()
}
This code:
- Creates a
Cardusing thequestionandanswerproperties already declared at the top. - Adds the new
cardusing the view model. - Dismisses the current view.
Then, call this new method as the action for Add New Card, by replacing Button(action: {}) { with:
Button(action: addCard) {
Finally, open CardListView.swift, find the .sheet modifier and fix the compiler error by passing a new view model instance for now. You’ll use a shared instance later.
.sheet(isPresented: $showForm) {
  NewCardForm(cardListViewModel: CardListViewModel())
}
Build and run.
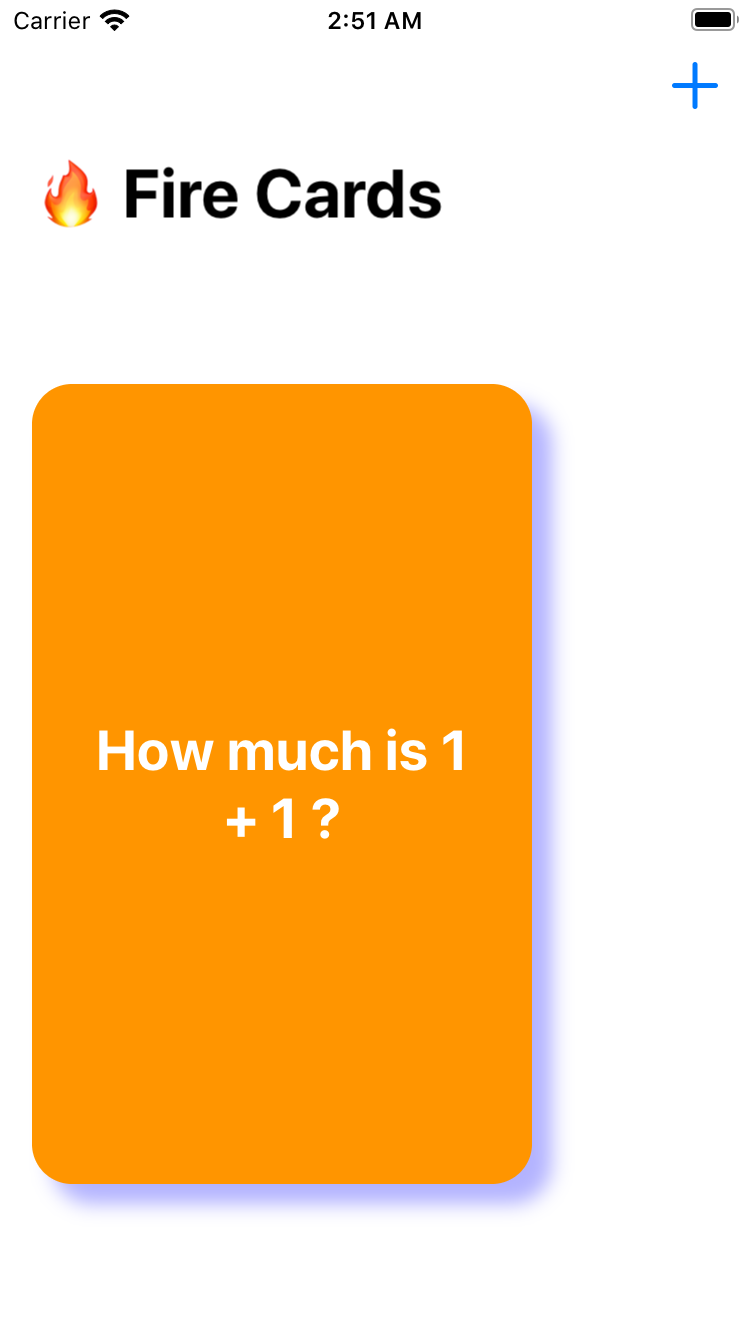
Tap + on top right corner. Fill the question and answer fields, and tap Add New Card.

Hmm, nothing happens. :( The cards don’t appear in the main screen:

Open the Firebase Console in your web browser and go to the Cloud Firestore section. Firestore created the cards collection automatically. Click the identifier to navigate into your new document:

Your data is stored in Firebase, but you still haven’t implemented the logic to retrieve and display the cards.
Retrieving and Displaying Cards
Now it’s time to show your cards! First, you’ll need to create a view model to represent a single Card.
In the Project navigator, under ViewModels, create a new Swift file called CardViewModel.swift.
Add this to the new file:
import Combine

// 1
class CardViewModel: ObservableObject, Identifiable {
  // 2
  private let cardRepository = CardRepository()
  @Published var card: Card
  // 3
  private var cancellables: Set<AnyCancellable> = []
  // 4
  var id = ""

  init(card: Card) {
    self.card = card
    // 5
    $card
      .compactMap { $0.id }
      .assign(to: \.id, on: self)
      .store(in: &cancellables)
  }
}
Here you:
- Declare
CardViewModeland make it conform toObservableObject, so it can emit changes, andIdentifiable, which guarantees you can iterate over an array ofCardViewModels. - This holds a reference to the actual
cardmodel.@Publishedcreates a publisher for this property so you can subscribe to it. -
cancellablesis used to store your subscriptions so you can cancel them later. -
idis a property required to conform toIdentifiable. It should be a unique identifier. - Set up a binding for
cardbetween the card’sidand the view model’sid. Then store the object incancellablesso it can be canceled later on.
Your repository needs to handle the logic for getting the cards. Open CardRepository.swift and add the following code at the top, below the property definitions:
// 1
@Published var cards: [Card] = []

// 2
init() {
  get()
}

func get() {
  // 3
  store.collection(path)
    .addSnapshotListener { querySnapshot, error in
      // 4
      if let error = error {
        print("Error getting cards: \(error.localizedDescription)")
        return
      }

      // 5
      self.cards = querySnapshot?.documents.compactMap { document in
        // 6
        try? document.data(as: Card.self)
      } ?? []
    }
}
In the code above, you:
- Define
cards.@Publishedcreates a publisher for this property so you can subscribe to it. Every time this array is modified, all listeners will react accordingly. - Create the initialization method and call
get(). - Get a reference to the collection’s root using
pathand add a listener to receive changes in the collection. - Checks if an error occurred, prints the error message and returns.
- Use compactMap(_:) on
querySnapshot.documentsto iterate over all the elements. IfquerySnapshotisnil, you’ll set an empty array instead. - Map every document as a
Cardusingdata(as:decoder:). You can do this thanks toFirebaseFirestoreSwift, which you imported at the top, and becauseCardconforms toCodable.
Next, open CardListViewModel.swift and add these two properties to CardListViewModel:
// 1
@Published var cardViewModels: [CardViewModel] = []
// 2
private var cancellables: Set<AnyCancellable> = []
In this code, you:
- Define
cardViewModelswith the@Publishedproperty wrapper, so you can subscribe to it. It’ll contain the array ofCardViewModels. - Create a set of
AnyCancellables. It’ll serve to store your subscriptions so you can cancel them later.
While still in the view model, add the following initializer:
init() {
  // 1
  cardRepository.$cards.map { cards in
    cards.map(CardViewModel.init)
  }
  // 2
  .assign(to: \.cardViewModels, on: self)
  // 3
  .store(in: &cancellables)
}
The code you added:
- Listens to
cardsand maps everyCardelement of the array into aCardViewModel. This will create an array ofCardViewModels. - Assigns the results of the previous map operation to
cardViewModels. - Stores the instance of this subscription in
cancellablesso it is automatically canceled whenCardListViewModelis deinitialized.
Open CardView.swift and make the following changes.
Replace var card: Card with:
var cardViewModel: CardViewModel
This lets the view use a view model instead of a Card model directly.
Then, in frontView, replace card.question with:
cardViewModel.card.question
Next, in backView, replace card.answer with:
cardViewModel.card.answer
Finally, change CardView_Previews, to this:
struct CardView_Previews: PreviewProvider {
  static var previews: some View {
    let card = testData[0]
    return CardView(cardViewModel: CardViewModel(card: card))
  }
}
With these changes, you’re now passing the expected CardViewModel instead of the Card model directly. But, you need one more update before previews work again.
You’ll also need to change the wrapping list view so it works with the card view model.
Open CardListView.swift and replace the cards array property with:
@ObservedObject var cardListViewModel = CardListViewModel()
With this change, CardListView now expects a CardListViewModel instead of an array of Cards. @ObservedObject will subscribe to the property so it can listen to changes in the view model.
Look for a ForEach statement inside body, and change it to look like this:
ForEach(cardListViewModel.cardViewModels) { cardViewModel in
  CardView(cardViewModel: cardViewModel)
    .padding([.leading, .trailing])
}
You’ll now iterate over cardListViewModel‘s individual card view models and create a CardView for each of them.
Since CardListView now expects a CardListViewModel instead of an array of Cards, change CardListView_Previews to:
CardListView(cardListViewModel: CardListViewModel())
Build and run.
Add as many cards as you want and see how they immediately appear on the main screen.