Getting Started with Cloud Firestore and SwiftUI
In this tutorial, you’ll learn how to use Firebase Cloud Firestore to add persistence to a SwiftUI iOS application with Swift. By Libranner Santos.
Firebase, Google’s mobile back end as a service, offers app developers capabilities that go from Analytics to Distribution, all the way to Databases and Authentication. In this tutorial, you’ll learn about Cloud Firestore, a part of this suite of services, and how you can use it in conjunction with SwiftUI.
Cloud Firestore is a flexible NoSQL cloud database that lets developers store and sync app data in real time. You’ll use it to power FireCards, an app that helps users memorize concepts by creating cards.
Along the way, you’ll learn how to:
- Set up Firestore.
- Use MVVM to structure an scalable code base.
- Manipulate data using Combine and Firestore.
- Use anonymous authentication.
Getting Started
Download the starter project by using the Download Materials button at the top or bottom of this tutorial.
Firecards is a simple tool that lets users create cards by providing questions and answers. Later, they can test their memory by reading the questions and tapping over the cards to see if they answered correctly.
Currently, the app doesn’t have persistence, so users can’t do much with it. But you’ll solve that by adding Firestore to this SwiftUI app.
You won’t use it for a couple of steps, but open FireCards.xcodeproj in Xcode.
Setting Up Firebase
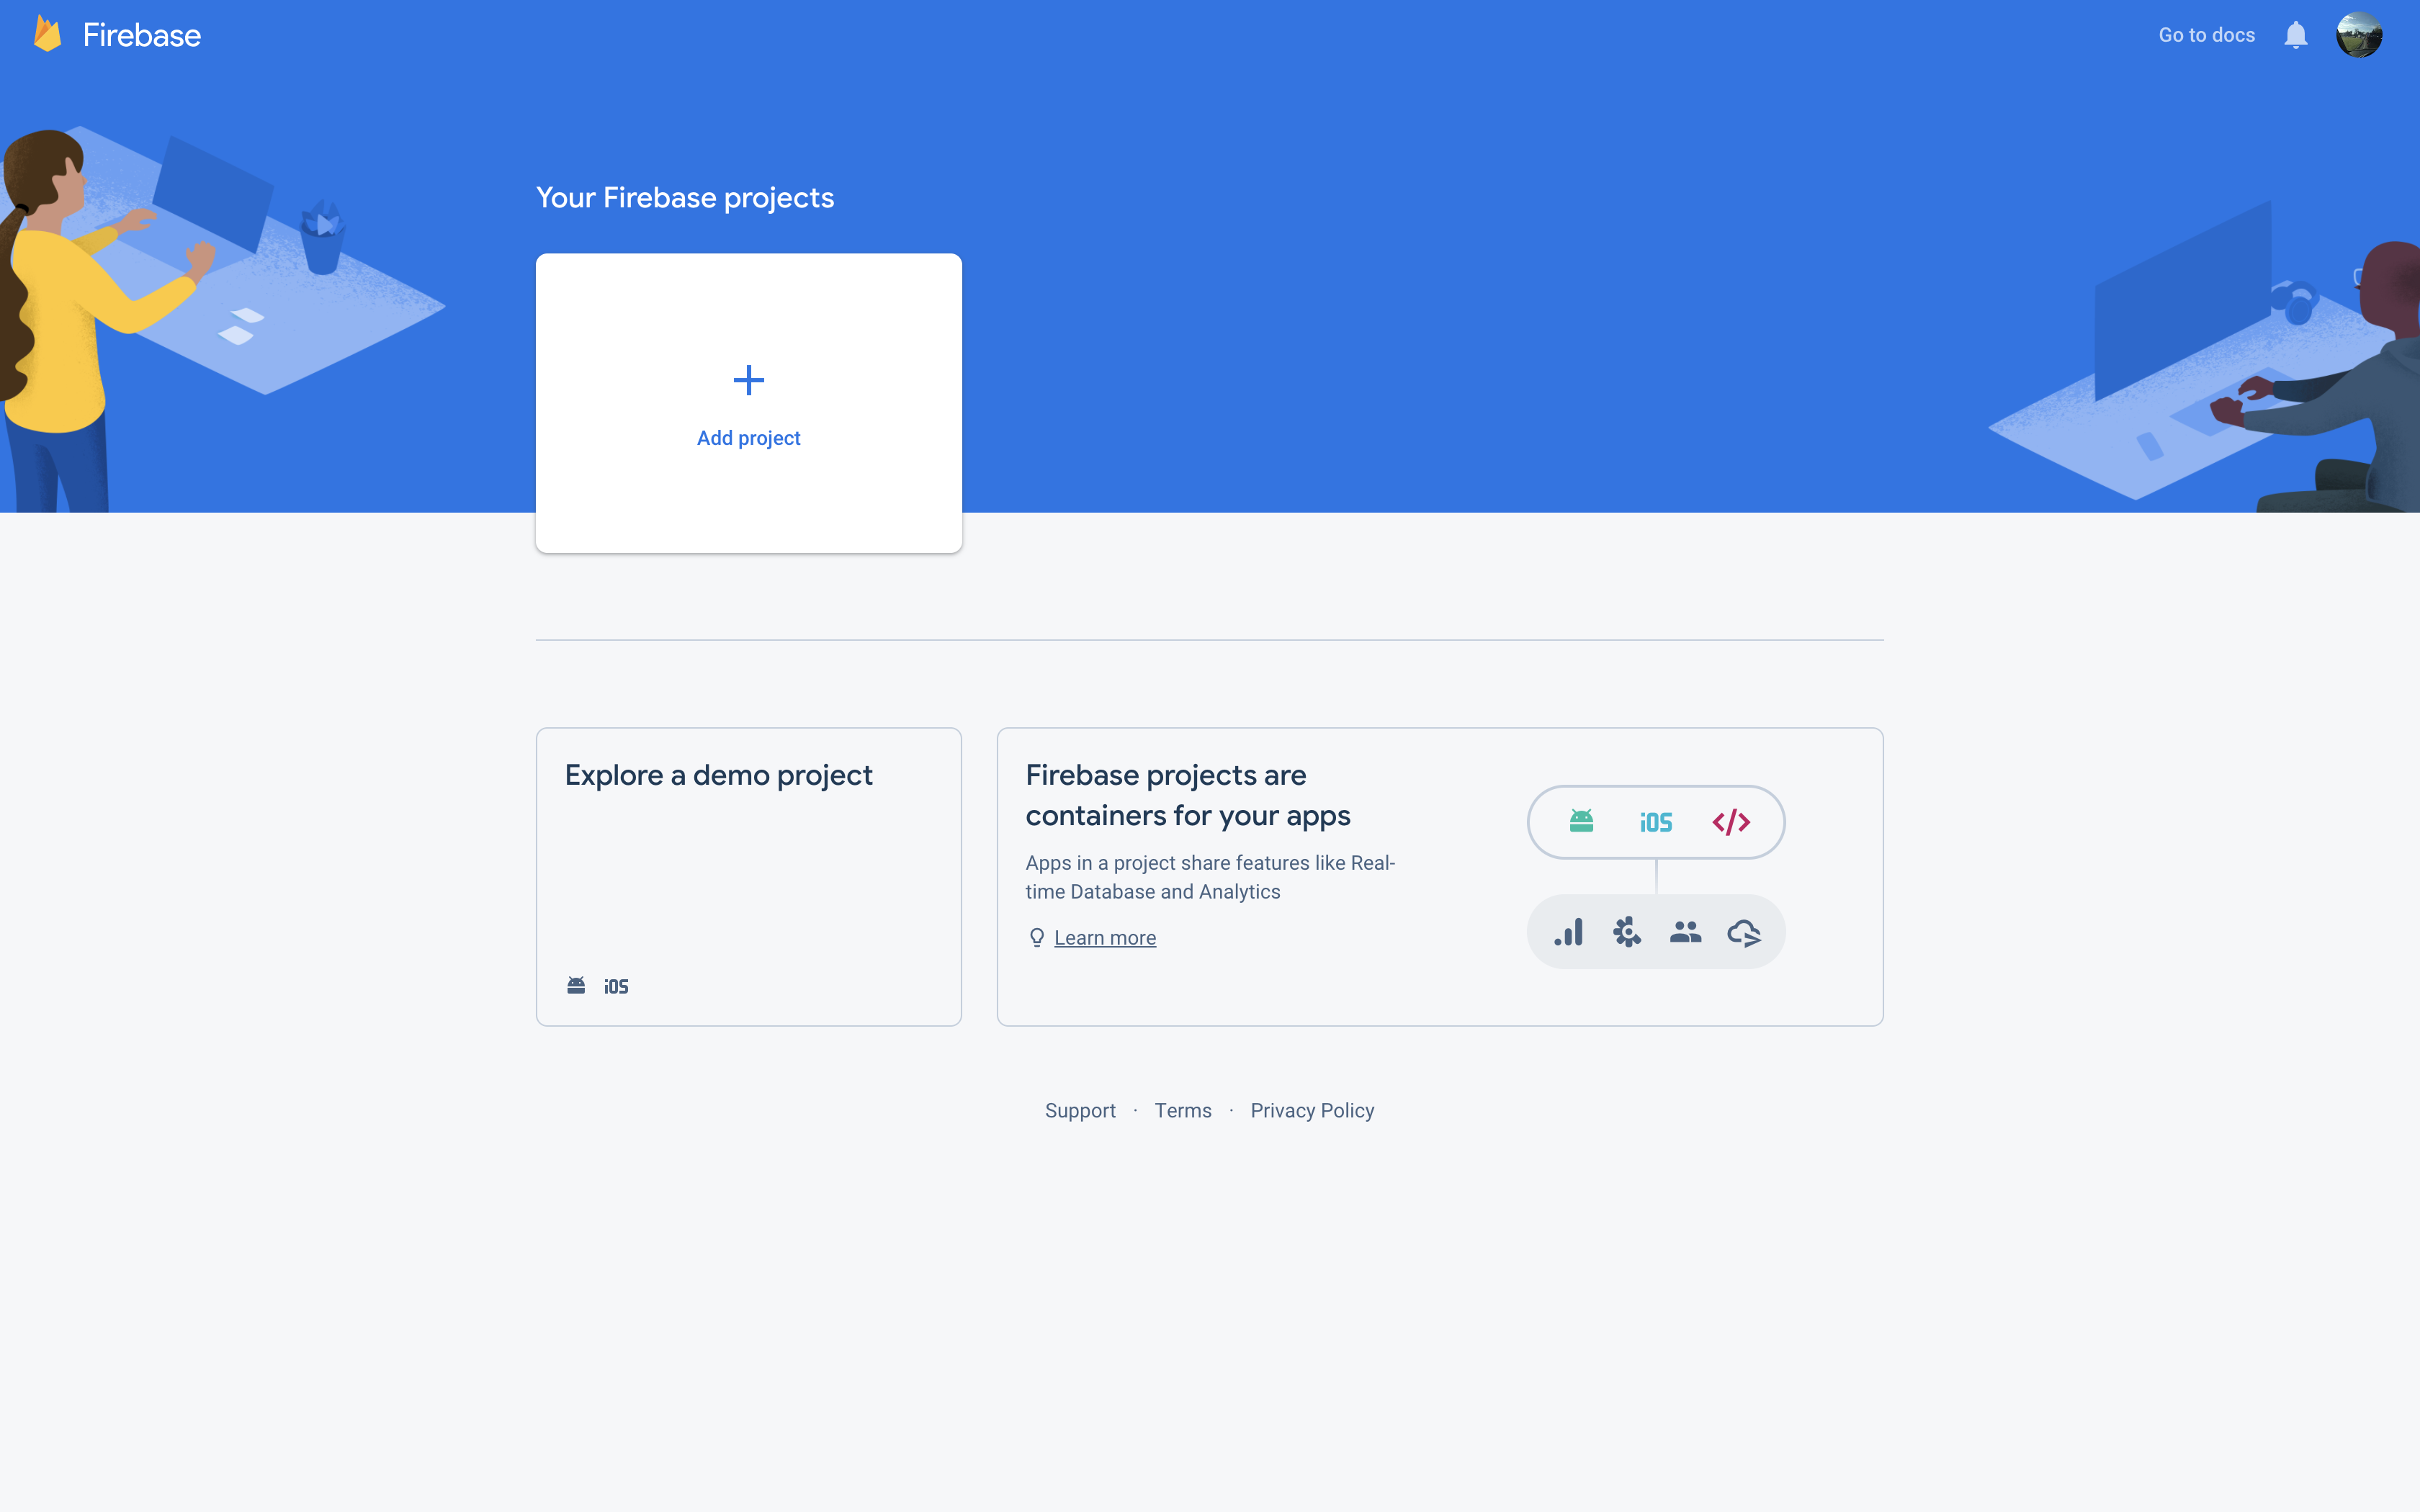
Before you can use Cloud Firestore, you need to create a Firebase account. Go to the Firebase website. On the top right corner, click Go to console. Then provide your Google account credentials or create one if you don’t have one already.
Next, click + Add project. A modal will appear asking for the name of your project. Type FireCards:
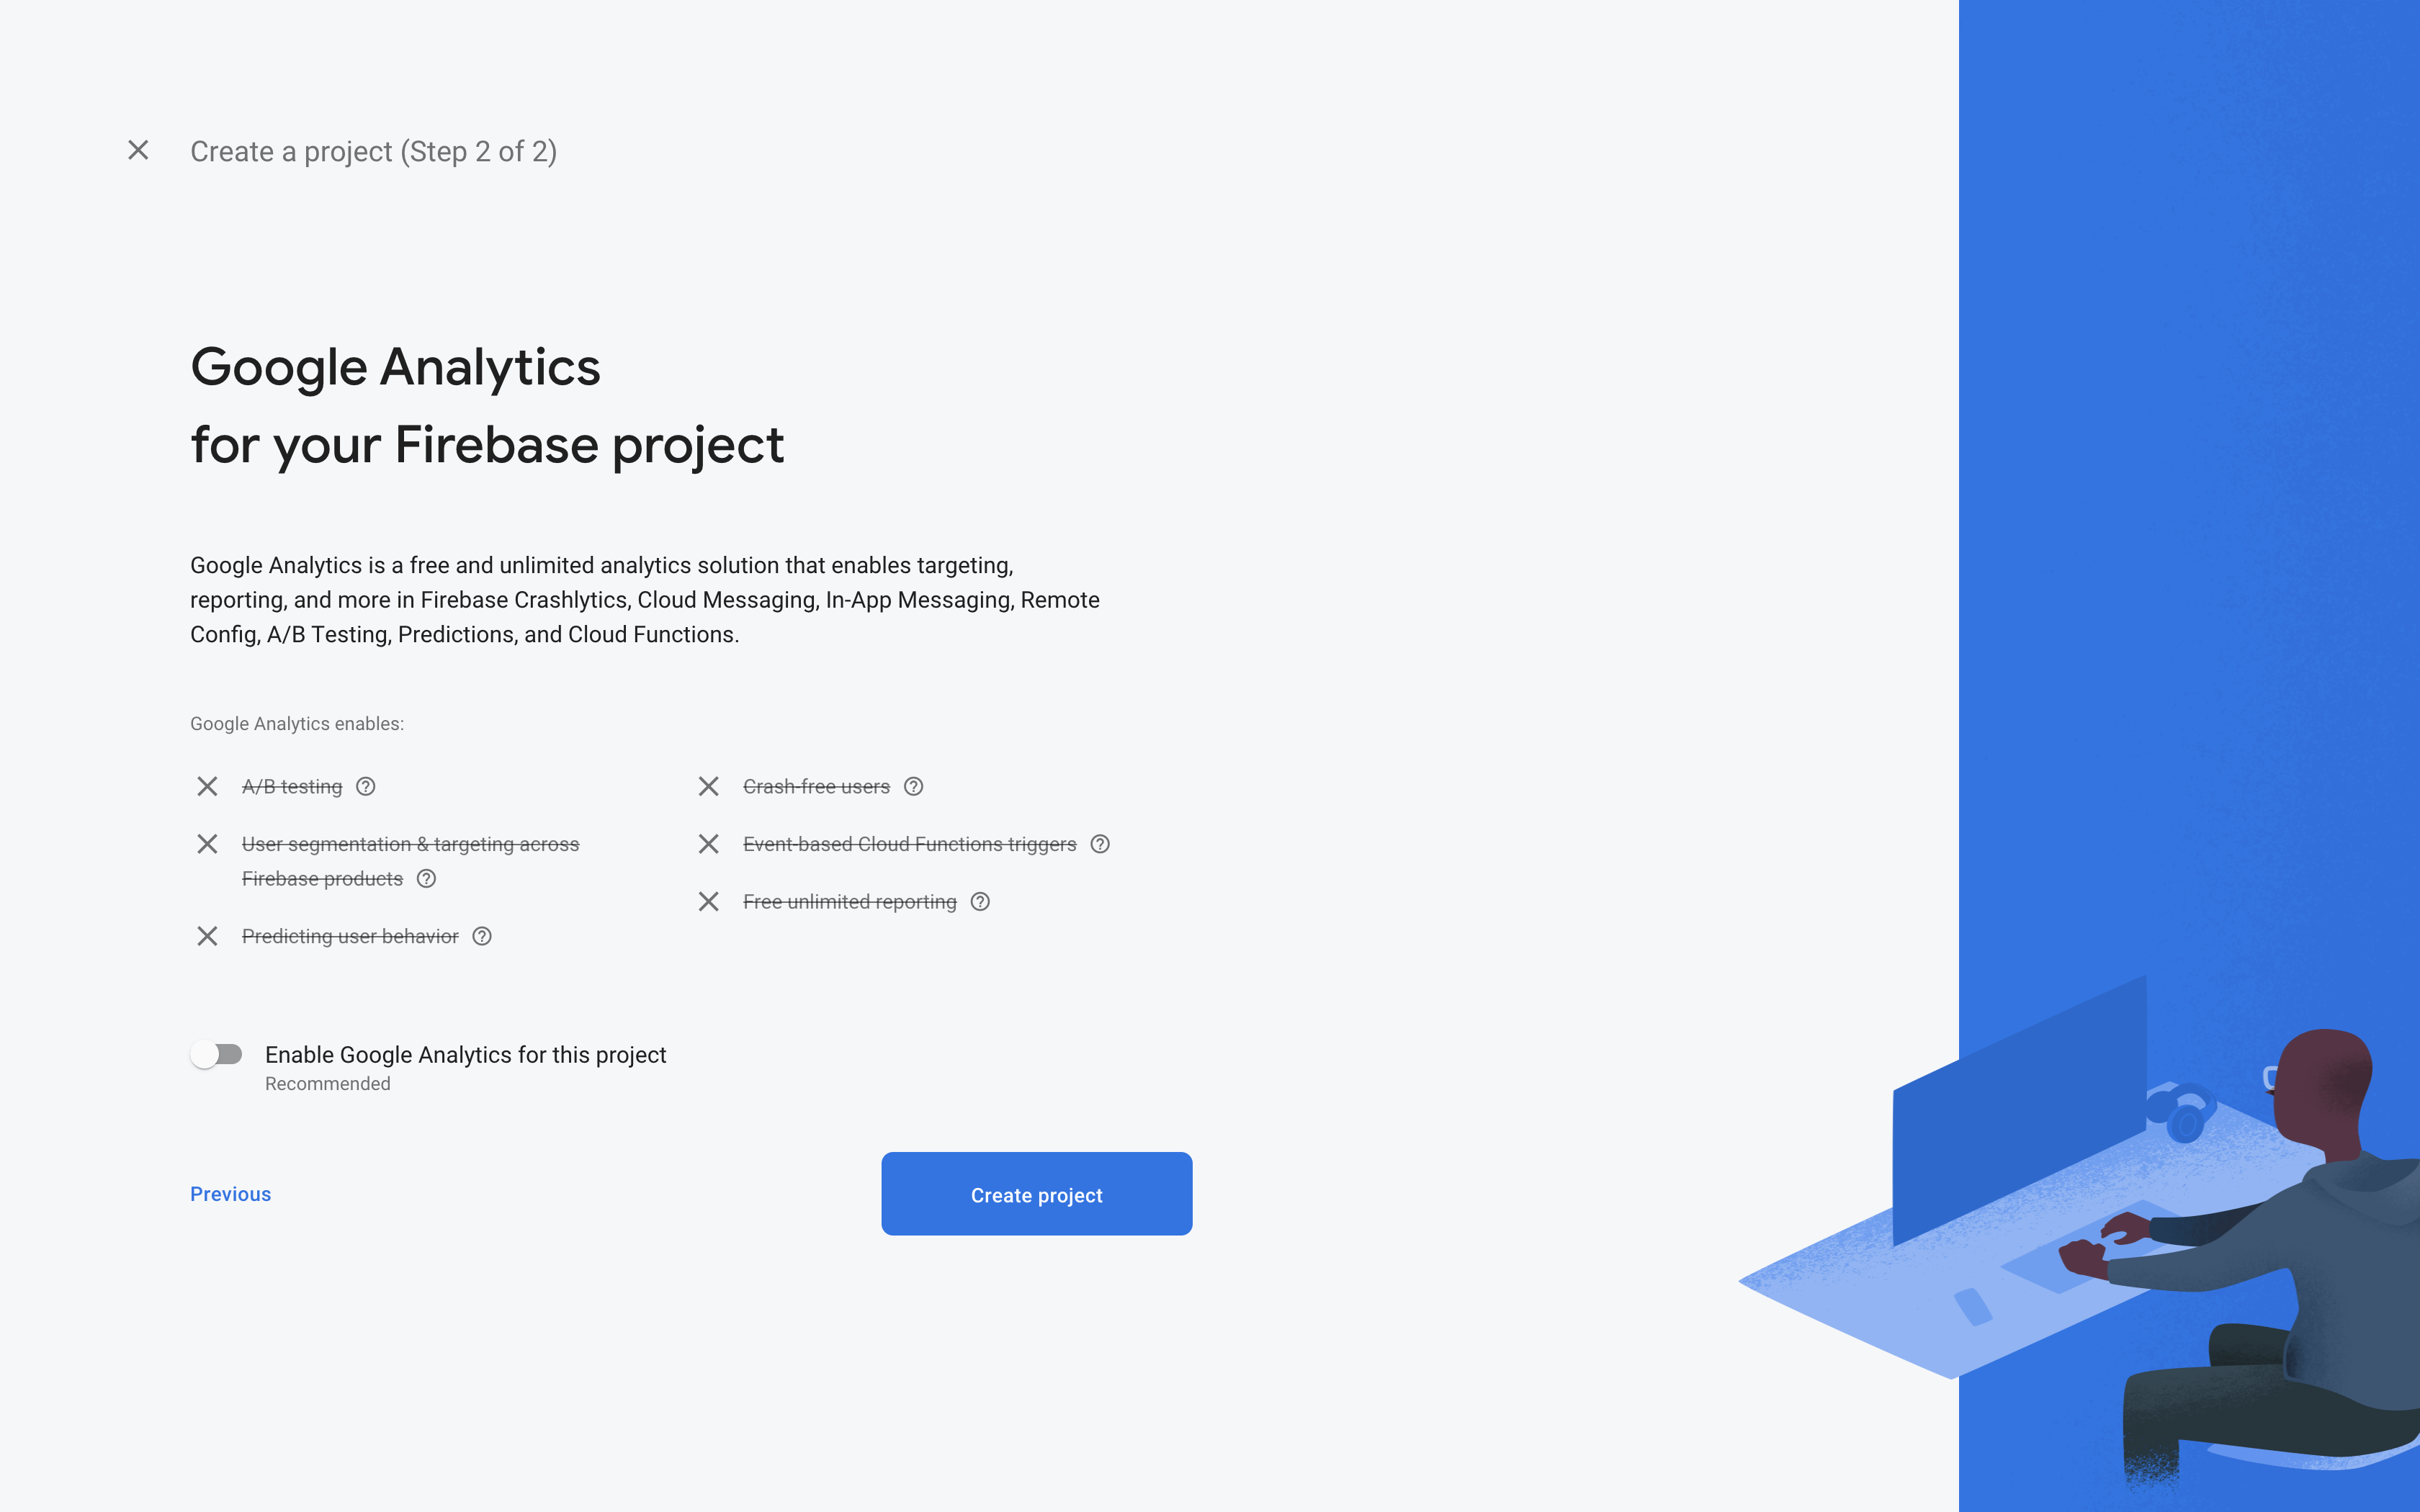
The next step asks you to enable Google Analytics for your project. Since this tutorial doesn’t cover Analytics, disable it by clicking the toggle at the bottom. Then click Create project:
After a few seconds, you’ll see a message saying Your new project is ready. Click Continue, and you’ll see the project’s dashboard:

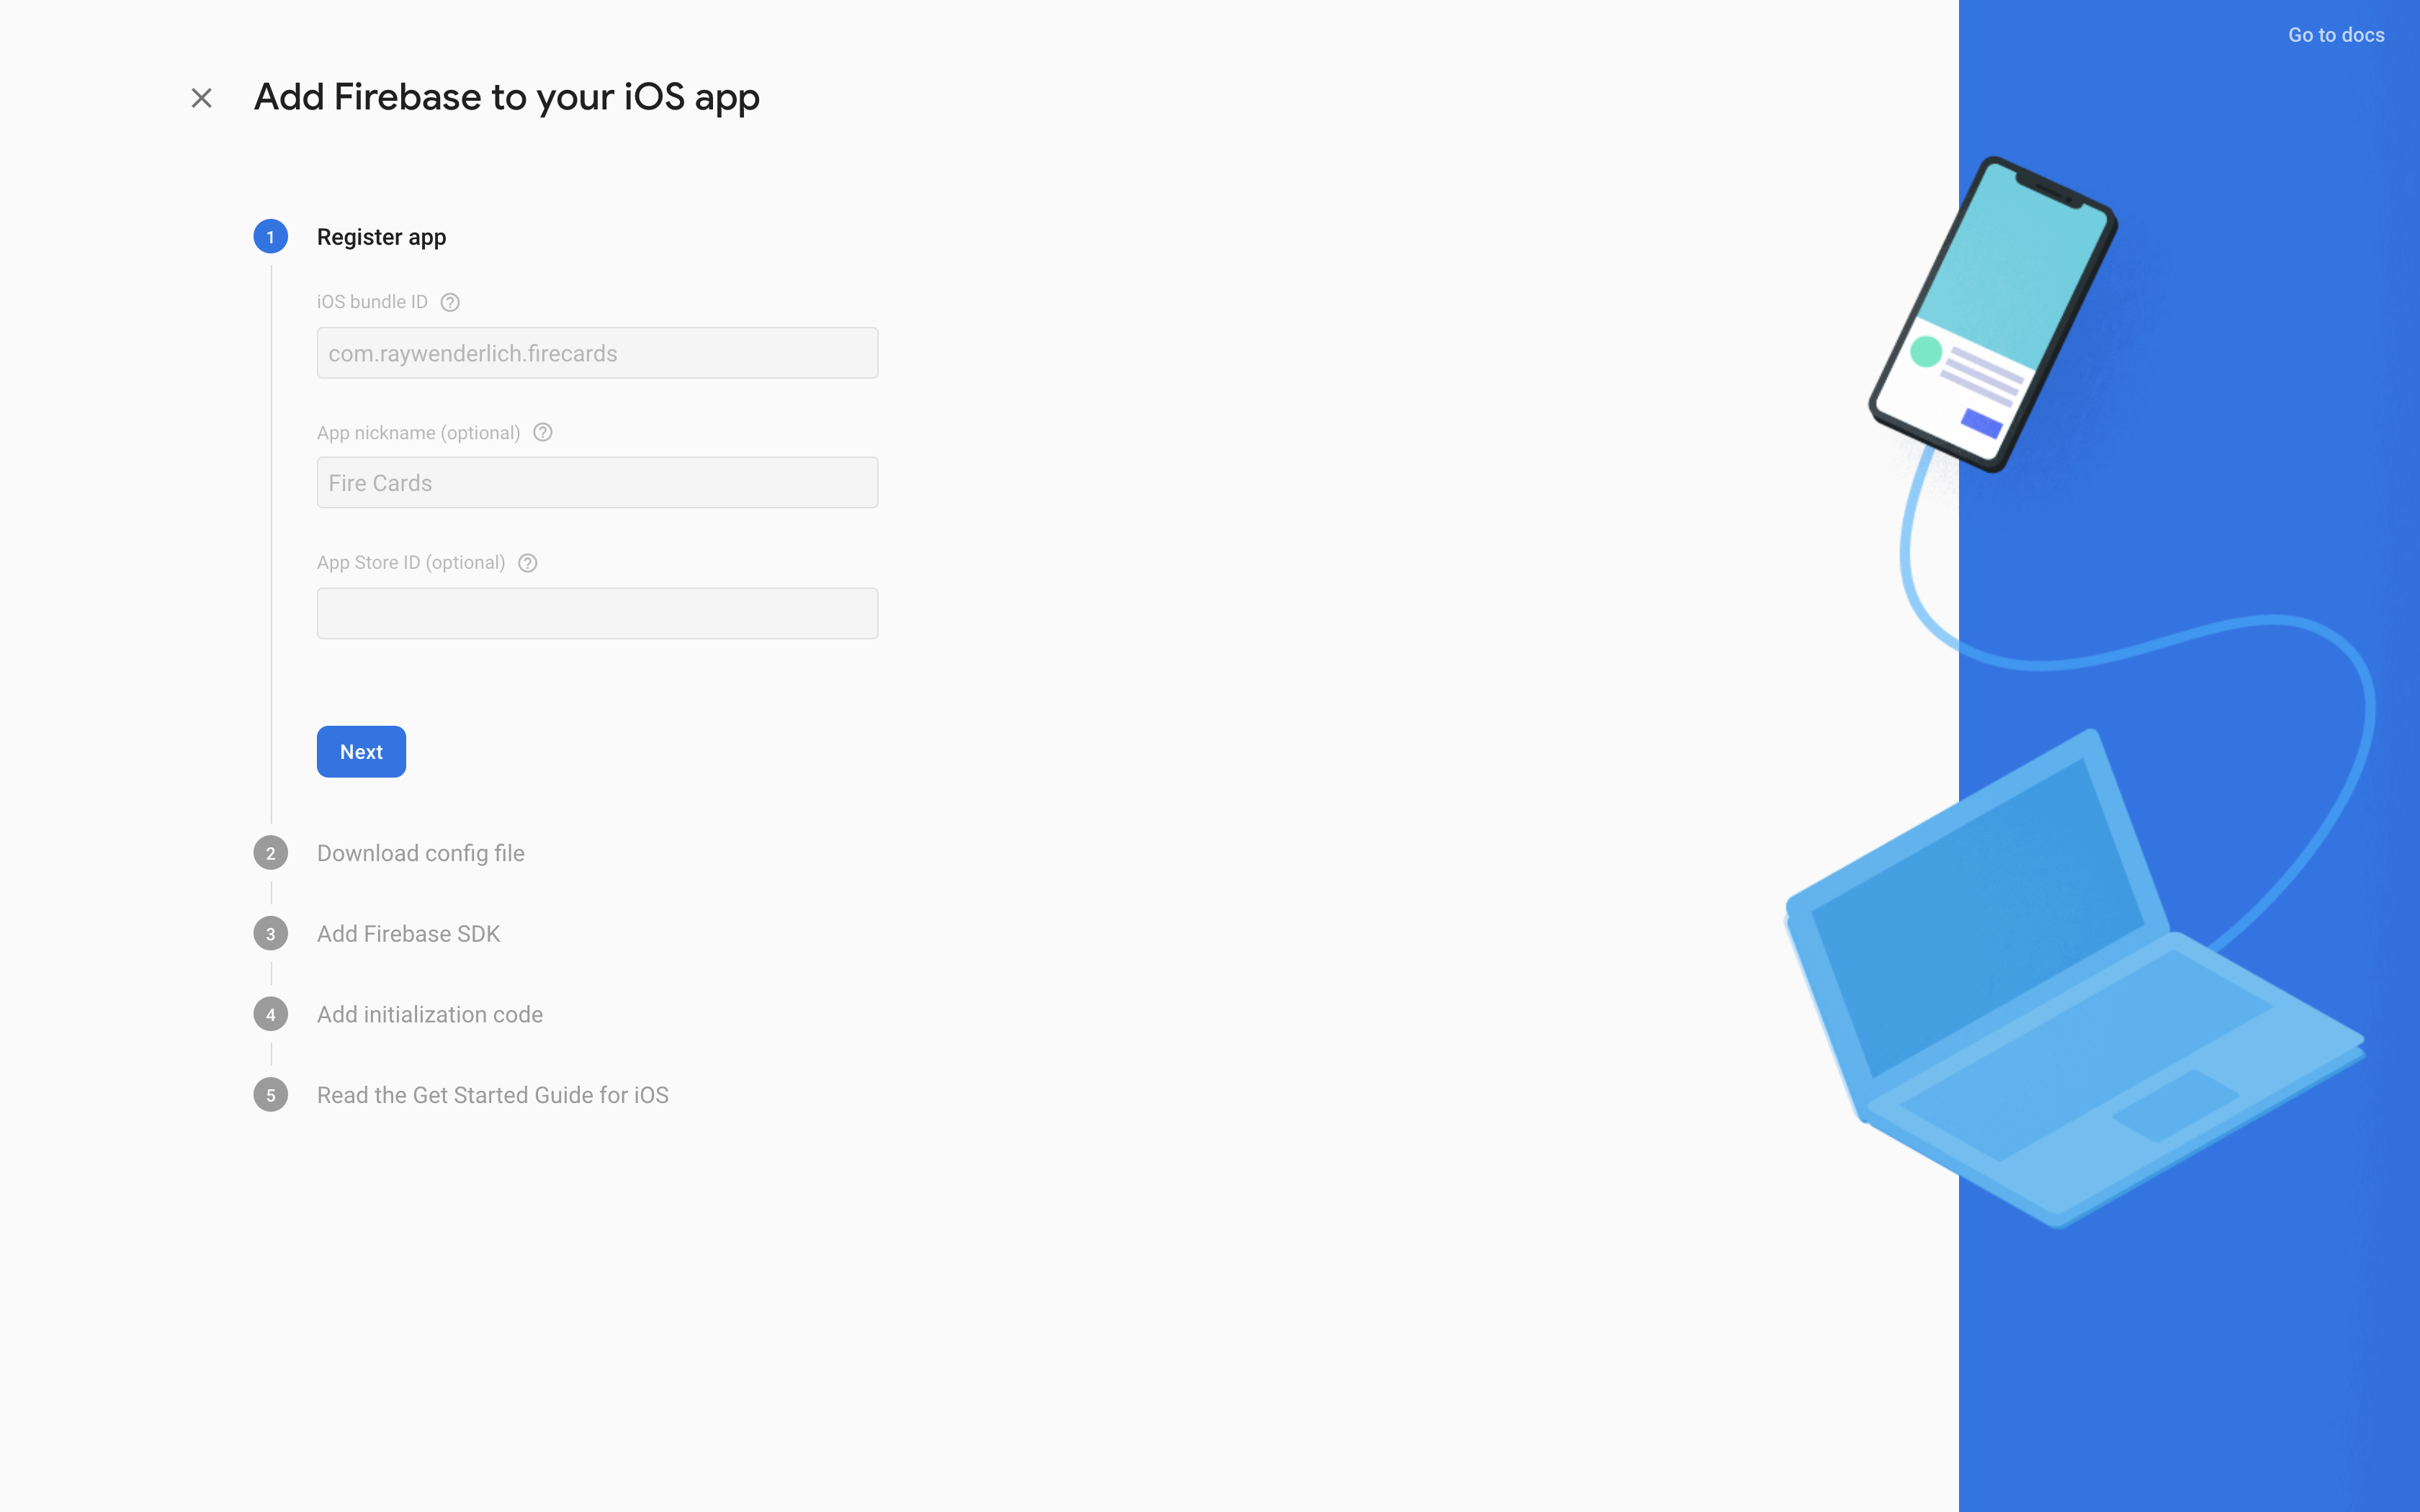
Here you can access all the Firebase services. Select the circle iOS button above Add an app to get started. Enter com.raywenderlich.firecards in the iOS Bundle ID field, and click Register app:
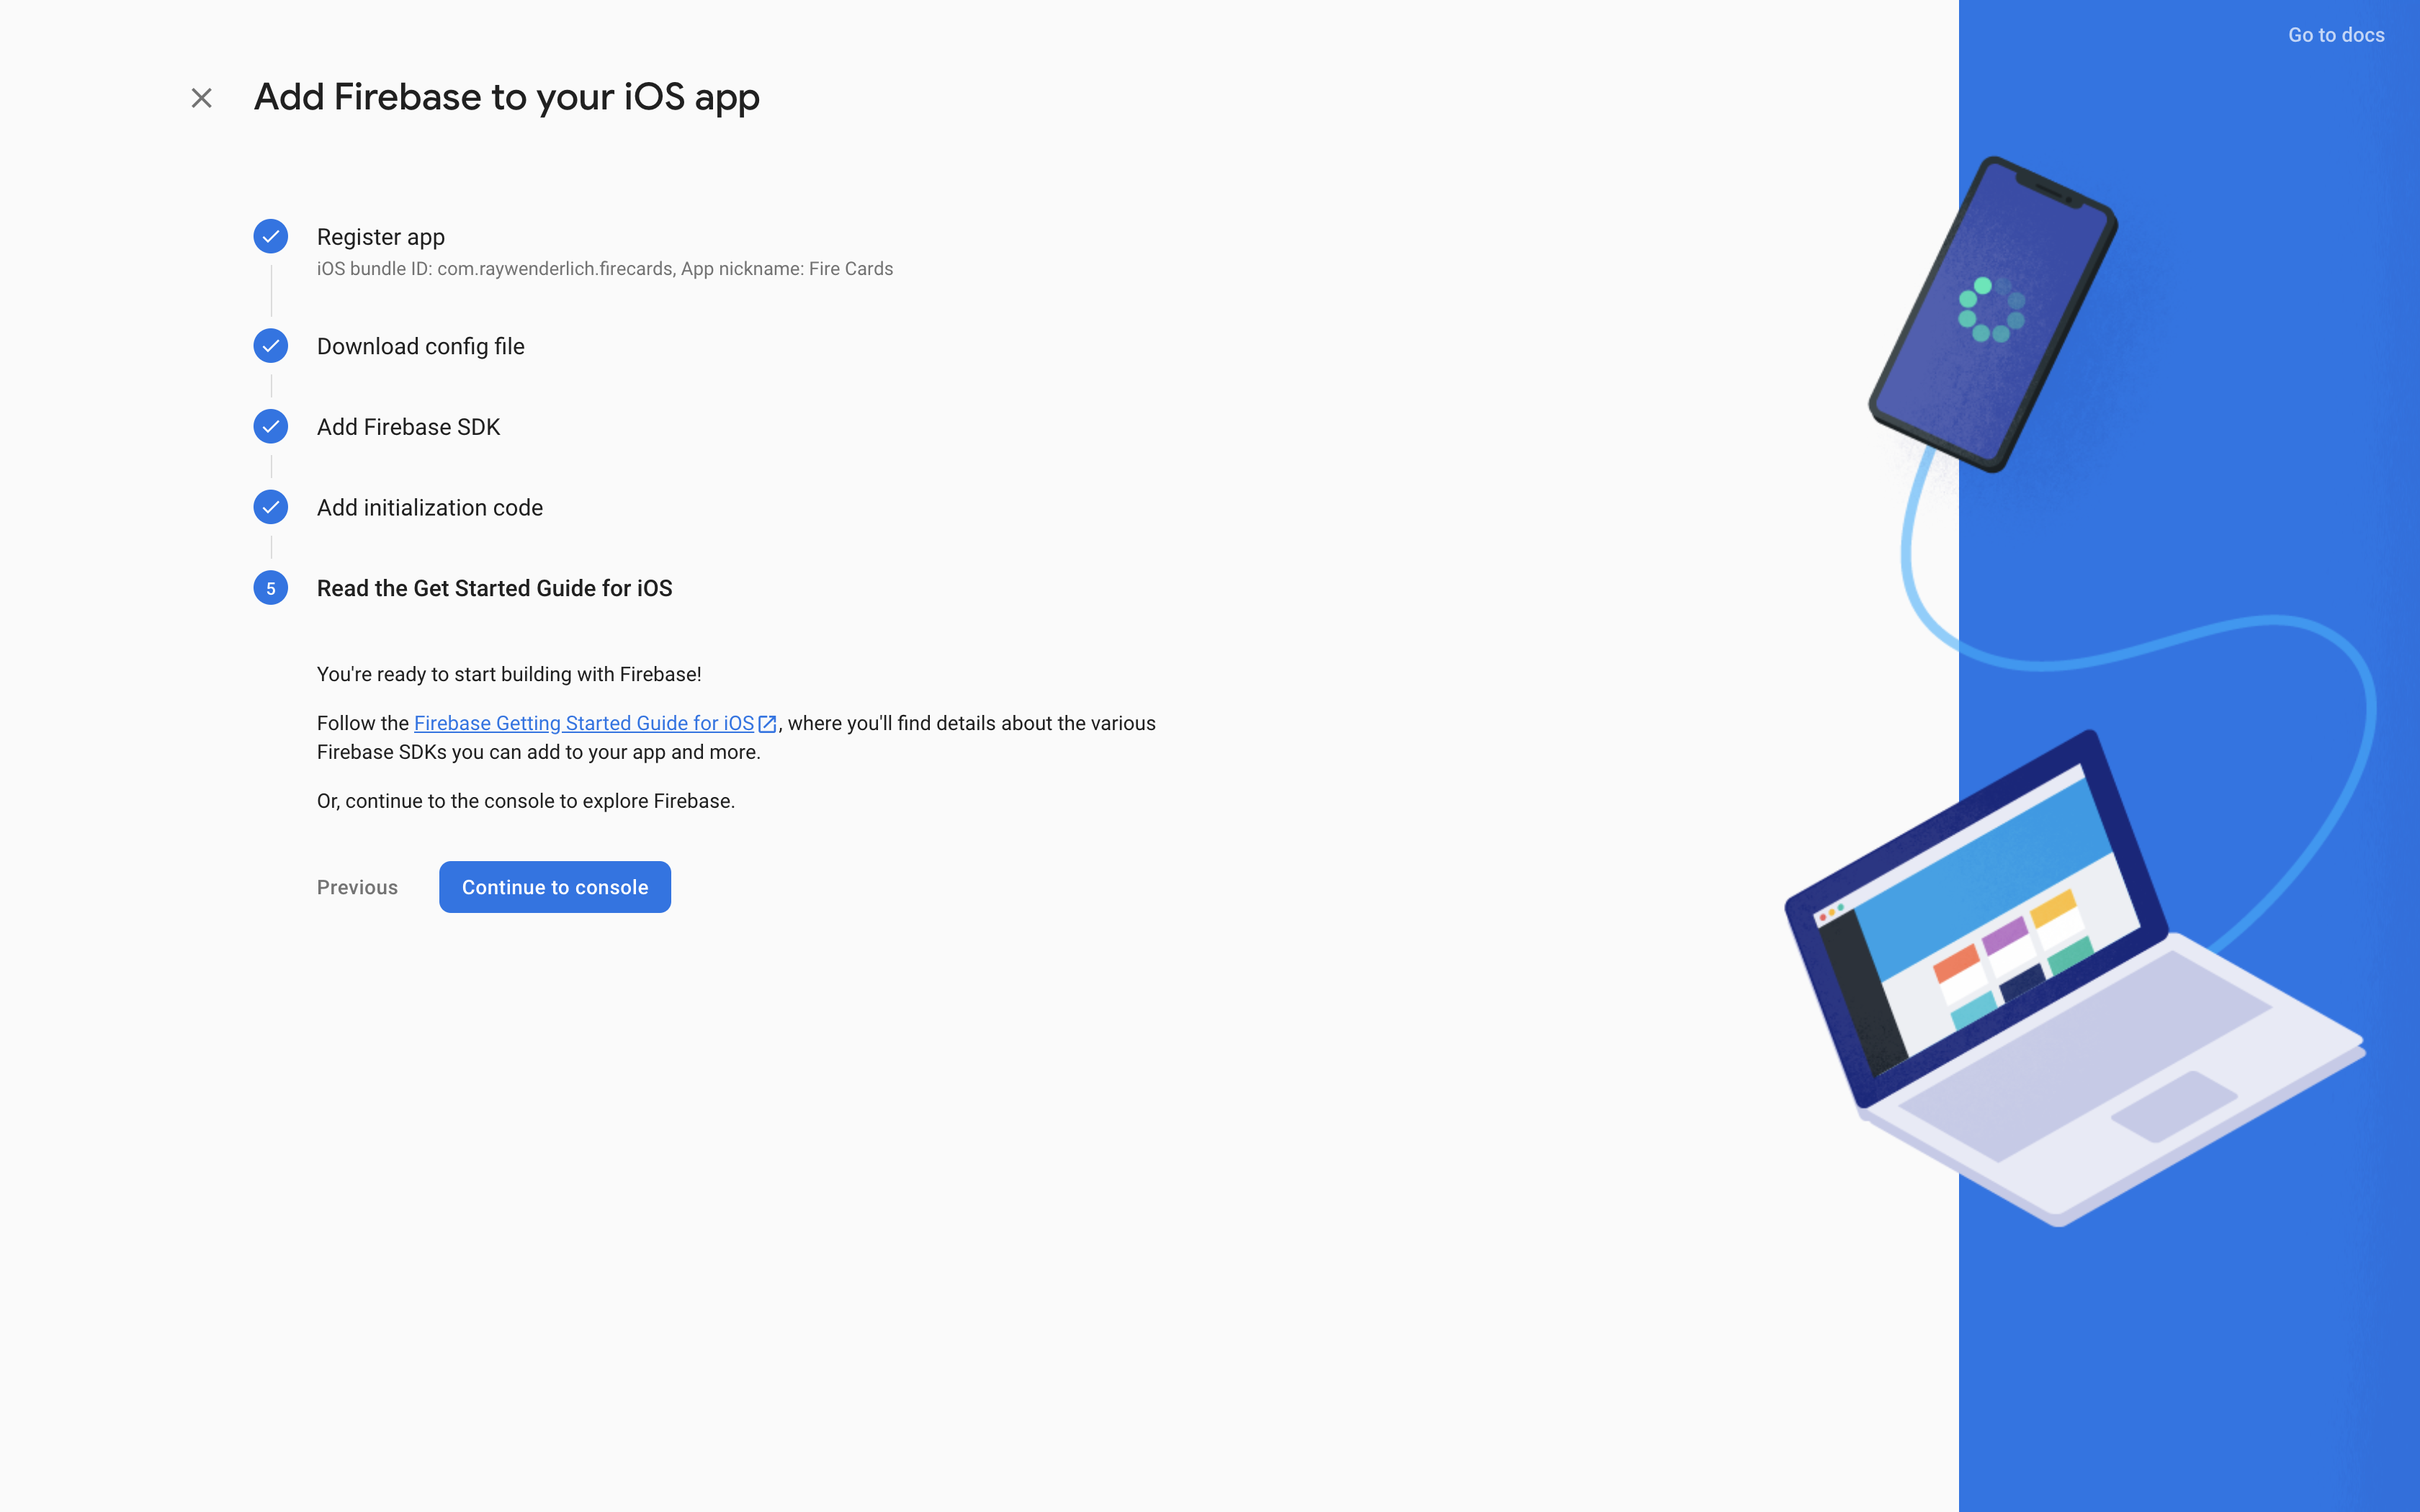
Download GoogleService-Info.plist and drag it into to the FireCards Xcode project, by following the outlined instructions:

When prompted by Xcode, make sure Copy Items if needed is checked.
The next step asks you to add the Firebase SDK to your iOS app, which was already done for you. Click Next to move to the Add initialization code step.
Open AppDelegate.swift. Make sure you include Firebase by adding this import statement:
import Firebase
Next, add this code before the return statement in application(_:didFinishLaunchingWithOptions:):
FirebaseApp.configure()
On your Firebase project’s web page, click Next and then Continue to console:
This sends you back to your project’s overview page:
You finished setting up Firebase and gave your app access to all the Firebase services. Next, you’ll configure Cloud Firestore.
On the left side menu, under Develop, click Cloud Firestore. Then, click Create database:

A modal will appear that shows you the next steps:
- Set the Secure rules for Cloud Firestore.
- Set Cloud Firestore location.
Firebase uses secure rules to handle authorization for data access. Select Start in test mode, which will make your data accessible for 30 days without authorization.
While this is OK for test projects, you should always set proper Security Rules. Fortunately, you’ll cover that later in Adding Authorization Using Security Rules.
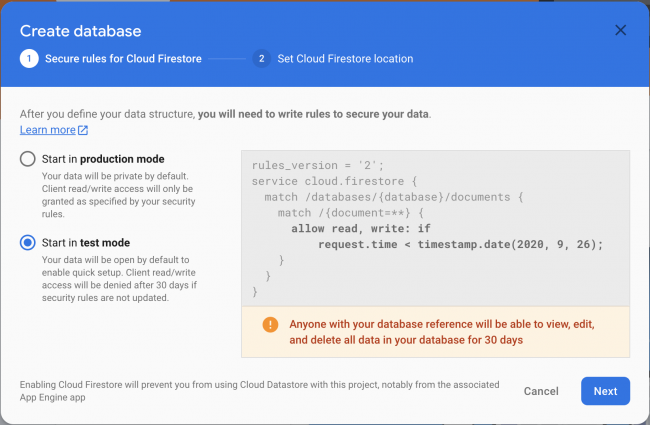
Click Next. Now the assistant will ask you where you want to store the data.
Keep in mind, the location can affect your billing and can’t be changed later. For now, select nam5(us-central), and click Enable.
Now, Firebase will configure everything for you. Then, it’ll send you to the Cloud Firestore section of the Firebase project:
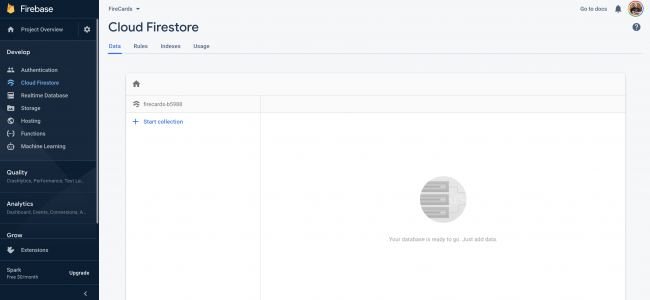
Here, you’ll see how to insert, remove or update your data in real time. You can also manipulate it manually, if necessary.
Architecting the App Using MVVM
For this project, you’ll use Model-View-View Model, or MVVM, to architect the app’s components.
MVVM is a structural design pattern that separates the elements that compose the app into Views, View Models and Models. This design pattern helps developers separate business logic from the view and maintain the necessary separation of concerns to keep views and models agnostic from data sources and business logic.
Since you’ll use Cloud Firestore for data persistence, you’ll add a layer that handles the logic required to interact with the data source. For this project, you’ll use the repository pattern. This diagram shows the final representation of the app architecture:

- Models hold app data. They’re a representation of the entities your app needs to manage.
- Views constitute the visual elements that make up your app and are responsible for displaying the data in your models.
- View Model makes the relationship between your models and your views possible by transforming the data in your models so it can be displayed in your views.
- Repository represents the abstraction that handles the data source communication. In this case, the data source is Cloud Firestore. The View Model communicates with the Repository when it needs to do any operation with the data, and also notifies views about changes in the data.
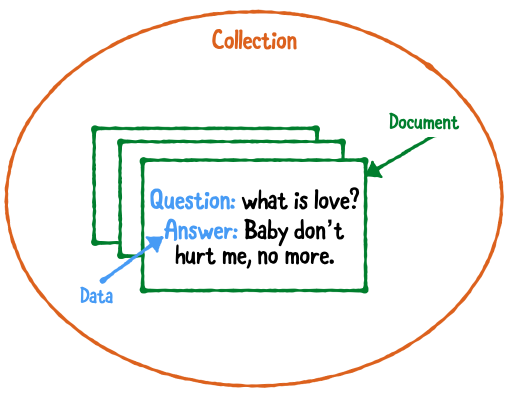
Thinking in Collections and Documents
Cloud Firestore is a NoSQL database. It uses collections and documents to structure data.
Collections hold documents. These documents have fields that constitute the entities of your app, in this case, cards. So, a card is a document, and a group of cards is a collection.
Here’s a visual representation of the app’s data structure:
You can write queries to fetch data from the collection, or insert, update or remove documents. To accomplish this, you need to create a reference to the collection or a specific document using a unique identifier. When creating a new document, you can manually pass this identifier, or Cloud Firestore will create one for you.
Enough talk, time to code!