Getting Started With Widgets
In this tutorial, you’ll add a widget to a large SwiftUI app, reusing its views to show entries from the app’s repository. By Audrey Tam.
Reading the Contents File
In EmitronWidget.swift, add the same FileManager code:
extension FileManager {
  static func sharedContainerURL() -> URL {
    return FileManager.default.containerURL(
      forSecurityApplicationGroupIdentifier: "group.your.prefix.emitron.contents"
    )!
  }
}
Be sure to update your prefix.
Add this helper method to Provider:
func readContents() -> [WidgetContent] {
  var contents: [WidgetContent] = []
  let archiveURL =
    FileManager.sharedContainerURL()
      .appendingPathComponent("contents.json")
  print(">>> \(archiveURL)")

  let decoder = JSONDecoder()
  if let codeData = try? Data(contentsOf: archiveURL) {
    do {
      contents = try decoder.decode([WidgetContent].self, from: codeData)
    } catch {
      print("Error: Can't decode contents")
    }
  }
  return contents
}
This reads the file you saved into the app group’s container.
Uncomment the code in getTimeline(in:completion:), then replace this line:
var entries: [WidgetContent] = []
With
var entries = readContents()
Next, modify the comment and for loop to add dates to your entries:
// Generate a timeline by setting entry dates interval seconds apart,
// starting from the current date.
let currentDate = Date()
let interval = 5
for index in 0 ..< entries.count {
  entries[index].date = Calendar.current.date(byAdding: .second,
    value: index * interval, to: currentDate)!
}
Delete the let entries line below the for loop.
The line after that sets the timeline running and specifies the refresh policy. In this case, the timeline will refresh after using up all the current entries.
Build and run on your device, sign in and let the list load. Then close the app, add your widget and watch it update every 5 seconds.
Widget updating entry every 5 seconds.

I could watch this all day :].
If you didn't scroll the list, the widget will run out of entries after 20 items. If you wait that long, you'll see it pause while it refreshes.
Enabling User Customization
I picked 5 seconds for the timeline interval, so I wouldn't have to wait long to see the updates. If you want a shorter or longer interval, just change the value in the code. Or ... create an intent that will let you set the interval by editing the widget, right on your home screen!
Adding an Intent
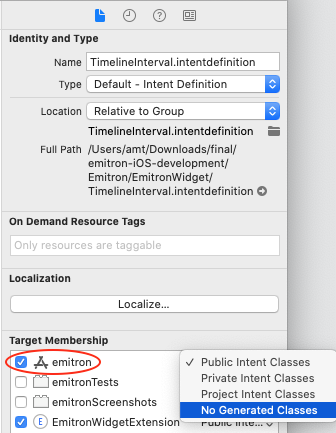
First, add your intent: Create a new file (Command-N), search for "intent", select SiriKit Intent Definition File and name it TimelineInterval. Make sure its target is both emitron and EmitronWidgetExtension.
Intent's target is both emitron and EmitronWidgetExtension
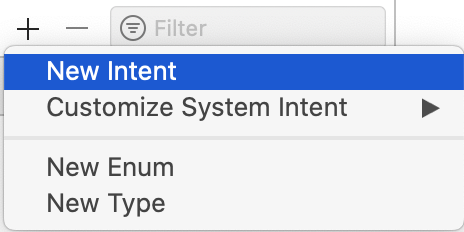
In the lower left corner of the intent's sidebar, click + and select New Intent.
Add new intent.
Name the intent TimelineInterval. Set up the Custom Intent as shown, with Category View:
Custom intent with category view.

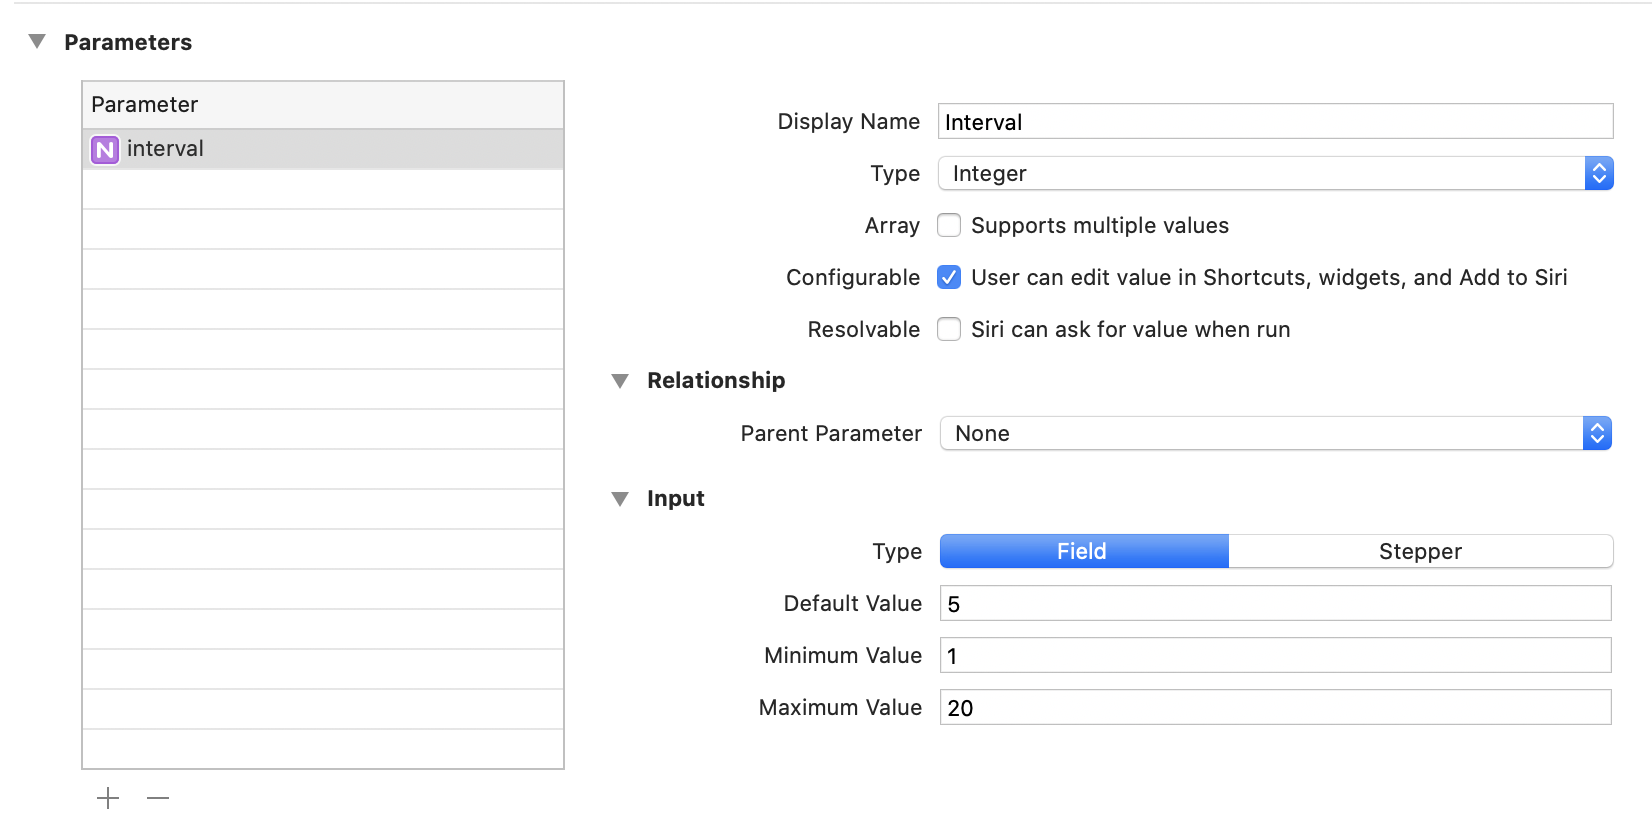
And add a Parameter named interval of type Integer with default, minimum and maximum values as shown, and Type Field. Or set your own values and/or use a stepper.
Add interval parameter.
Reconfiguring Your Widget
In EmitronWidget.swift, reconfigure your widget to IntentConfiguration.
Change the Provider protocol to IntentTimelineProvider.
struct Provider: IntentTimelineProvider {
Change the definition of getSnapshot(in:completion:) to:
public func getSnapshot(
  for configuration: TimelineIntervalIntent,
  in context: Context,
  completion: @escaping (WidgetContent) -> Void
) {
Now, change the definition of getTimeline(in:completion:) to:
public func getTimeline(
  for configuration: TimelineIntervalIntent,
  in context: Context,
  completion: @escaping (Timeline<WidgetContent>) -> Void
) {
In getTimeline(for:in:completion), change interval to use the configuration parameter:
let interval = configuration.interval as! Int
And finally, in struct EmitronWidget, change StaticConfiguration(kind:provider:) to this:
IntentConfiguration(
  kind: kind,
  intent: TimelineIntervalIntent.self,
  provider: Provider()
) { entry in
Build and run on your device, sign in and let the list load. Close the app, add your widget, then long-press the widget. It flips over to show an Edit Widget button.
Edit widget button

Tap this button to change the interval value
Change the interval value.

Setting a new interval

Where To Go From Here?
Download the final project using the Download Materials button at the top or bottom of the tutorial.
This tutorial showed you how to leverage code from a large app to create a widget that displays items from the app's own repository. Here are a few ideas for you to add to your Emitron widget:
- Design a view for the large size widget that displays two or more entries. Look at Apple's EmojiRangers sample app to see how to modify
EntryViewfor widget families. - Add a
widgetURLtoEntryViewso tapping the widget opens Emitron in that item's detail view. - Add intents to let users set the app's filters from the widget.
I hope you enjoyed this tutorial! Building widgets is fun!
If you have any comments or questions, feel free to join in the forum discussion below!