Getting Started With Widgets
In this tutorial, you’ll add a widget to a large SwiftUI app, reusing its views to show entries from the app’s repository. By Audrey Tam.
Creating a TimelineEntry
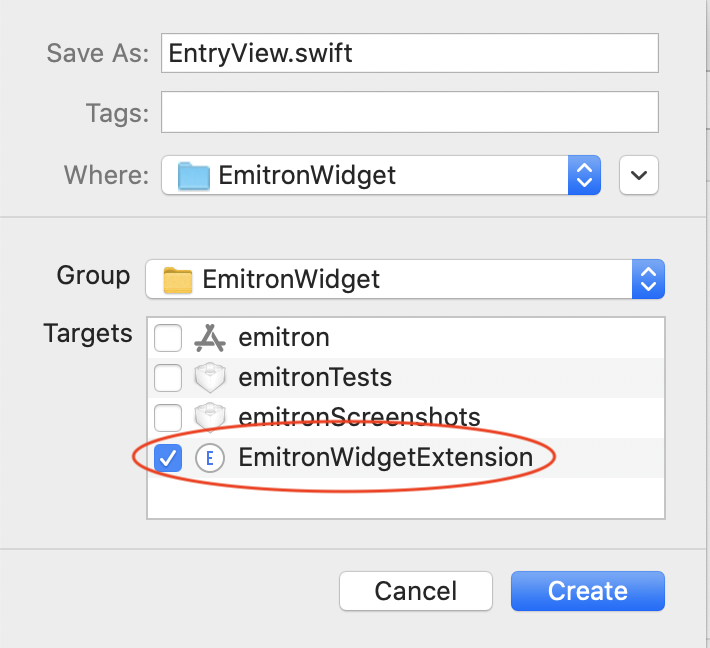
Create a new Swift file named WidgetContent.swift and make sure its targets are emitron and EmitronWidgetExtension:
Create WidgetContent with targets emitron and widget.

It should be in the EmitronWidget group.
Now add this code to your new file:
import WidgetKit

struct WidgetContent: TimelineEntry {
  var date = Date()
  let name: String
  let cardViewSubtitle: String
  let descriptionPlainText: String
  let releasedAtDateTimeString: String
}
To use WidgetContent in a widget, it must conform to TimelineEntry. The only required property is date, which you initialize to the current date.
Creating an Entry View
Next, create a view to display the four String properties. Create a new SwiftUI View file and name it EntryView.swift. Make sure its target is only EmitronWidgetExtension, and it should also be in the EmitronWidget group:
Create EntryView with only the widget as target.
Now replace the contents of struct EntryView with this code:
let model: WidgetContent

var body: some View {
  VStack(alignment: .leading) {
    Text(model.name)
      .font(.uiTitle4)
      .lineLimit(2)
      .fixedSize(horizontal: false, vertical: true)
      .padding([.trailing], 15)
      .foregroundColor(.titleText)

    Text(model.cardViewSubtitle)
      .font(.uiCaption)
      .lineLimit(nil)
      .foregroundColor(.contentText)

    Text(model.descriptionPlainText)
      .font(.uiCaption)
      .fixedSize(horizontal: false, vertical: true)
      .lineLimit(2)
      .lineSpacing(3)
      .foregroundColor(.contentText)

    Text(model.releasedAtDateTimeString)
      .font(.uiCaption)
      .lineLimit(1)
      .foregroundColor(.contentText)
  }
  .background(Color.cardBackground)
  .padding()
  .cornerRadius(6)
}
You’re essentially copying the Text views from CardView and adding padding.
Delete EntryView_Previews entirely.
Creating Your Widget
Now start defining your widget. Open EmitronWidget.swift and double-click SimpleEntry in the line:
struct SimpleEntry: TimelineEntry {
Choose Editor ▸ Edit All in Scope and change the name to WidgetContent. This will cause several errors, which you’ll fix in the next few steps. First delete the declaration:
struct WidgetContent: TimelineEntry {
  let date: Date
}
This declaration is now redundant and conflicts with the one in WidgetContent.swift.
One of the provider’s methods provides a snapshot entry to display in the widget gallery. You’ll use a specific WidgetContent object for this.
Just below the import statements, add this global object:
let snapshotEntry = WidgetContent(
  name: "iOS Concurrency with GCD and Operations",
  cardViewSubtitle: "iOS & Swift",
  descriptionPlainText: """
    Learn how to add concurrency to your apps! \
    Keep your app's UI responsive to give your \
    users a great user experience.
    """,
  releasedAtDateTimeString: "Jun 23 2020 • Video Course (3 hrs, 21 mins)")
This is the update to our concurrency video course, which was published on WWDC day 2.
Now replace the line in placeholder(in:) with this:
snapshotEntry
To display your widget for the first time, WidgetKit renders this entry in the widget’s view, using the modifier redacted(reason: .placeholder). This displays text and images in the correct layout, but masks their contents. This method is synchronous, so don’t do any network downloads or complex calculations here.
Also replace the first line of getSnapshot(in:completion:) with this:
let entry = snapshotEntry
WidgetKit displays this entry whenever the widget is in a transient state, waiting for data or appearing in the widget gallery.
A widget needs a TimelineProvider to feed it entries of type TimelineEntry. It displays each entry at the time specified by the entry’s date property.
The most important provider method is getTimeline(in:completion:). It already has some code to construct a timeline, but you don’t have enough entries yet. So comment out all but the last two lines, and add this line above those two lines:
let entries = [snapshotEntry]
You’re creating an entries array that contains just your snapshotEntry.
Finally, you can put all these parts together.
First, delete EmitronWidgetEntryView. You’ll use your EntryView instead.
Now replace the internals of struct EmitronWidget with the following:
private let kind: String = "EmitronWidget"

public var body: some WidgetConfiguration {
  StaticConfiguration(
    kind: kind,
    provider: Provider()
  ) { entry in
    EntryView(model: entry)
  }
  .configurationDisplayName("RW Tutorials")
  .description("See the latest video tutorials.")
}
The three strings are whatever you want: kind describes your widget, and the last two strings appear above each widget size in the gallery.
Build and run on your device, sign in, then close the app to see your widget.
If it’s still displaying the time, delete it and add it again.
Widget gallery with snapshot entry.
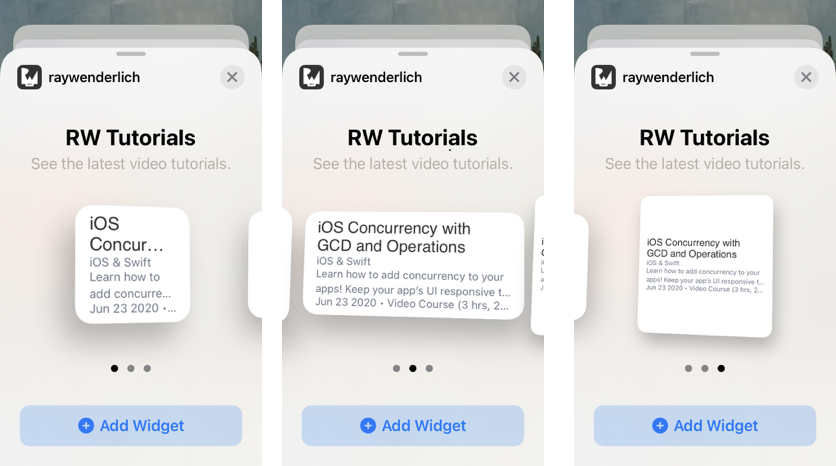
And here’s what the medium size widget looks like now:
The medium size widget on the home screen.

Only the medium size widget looks OK, so modify your widget to provide only that size. Add this modifier below .description:
.supportedFamilies([.systemMedium])
Next, you’ll provide real entries for your timeline, directly from the app’s repository!
Providing Timeline Entries
The app displays the array of ContentListDisplayable objects in contents, created in Data/ContentRepositories/ContentRepository.swift. To share this information with your widget, you’ll create an app group. Then, in ContentRepository.swift, you’ll write a file to this app group, which you’ll read from in EmitronWidget.swift.
Creating an App Group
On the project page, select the emitron target. In the Signing & Capabilities tab, click + Capability, then drag App Group into the window. Name it group.your.prefix.emitron.contents; be sure to replace your.prefix appropriately.
Now select the EmitronWidgetExtension target and add the App Group capability. Scroll through the App Groups to find and select group.your.prefix.emitron.contents.
Writing the Contents File
At the top of ContentRepository.swift, just below the import Combine statement, add this code:
import Foundation

extension FileManager {
  static func sharedContainerURL() -> URL {
    return FileManager.default.containerURL(
      forSecurityApplicationGroupIdentifier: "group.your.prefix.emitron.contents"
    )!
  }
}
This is just some standard code for getting the app group container’s URL. Be sure to substitute your app identifier prefix.
Now, just below var contents, add this helper method:
  func writeContents() {
    let widgetContents = contents.map {
      WidgetContent(name: $0.name, cardViewSubtitle: $0.cardViewSubtitle,
      descriptionPlainText: $0.descriptionPlainText,
      releasedAtDateTimeString: $0.releasedAtDateTimeString)
    }
    let archiveURL = FileManager.sharedContainerURL()
      .appendingPathComponent("contents.json")
    print(">>> \(archiveURL)")
    let encoder = JSONEncoder()
    if let dataToSave = try? encoder.encode(widgetContents) {
      do {
        try dataToSave.write(to: archiveURL)
      } catch {
        print("Error: Can't write contents")
        return
      }
    }
  }
Here, you create an array of WidgetContent objects, one for each item in the repository. You convert each to JSON and save it to the app group’s container.
Set a breakpoint at the let archiveURL line.
You’ll call this method when contents is set. Add this didSet closure to contents:
didSet {
  writeContents()
}
If Xcode is on its toes, it’s complaining about WidgetContent. Jump to the definition of WidgetContent and make it conform to Codable:
struct WidgetContent: Codable, TimelineEntry {
Now build and run the app in a simulator. At the breakpoint, widgetContents has 20 values.
Continue program execution and scroll down in the app. At the breakpoint, widgetContents now has 40 values. So you have some control over how many items you share with your widget.
Stop the app, disable the breakpoint, then copy the URL folder path from the debug console and locate in in Finder. Take a look at contents.json.
Next, go and set up the widget to read this file.