Introducing CryptoKit
Cryptography is key to protecting your users’ data. This tutorial shows you how to use Apple’s new CryptoKit API to authenticate or encrypt your app’s data. By Audrey Tam.
Digital Signatures
Digital signatures are like HMAC, but with public-key cryptography. Instead of using the same secret key to sign and to verify, the sender uses a private key to sign, and the receiver uses the sender’s public key to verify.
Public key cryptography: sign with private key, verify with public key.
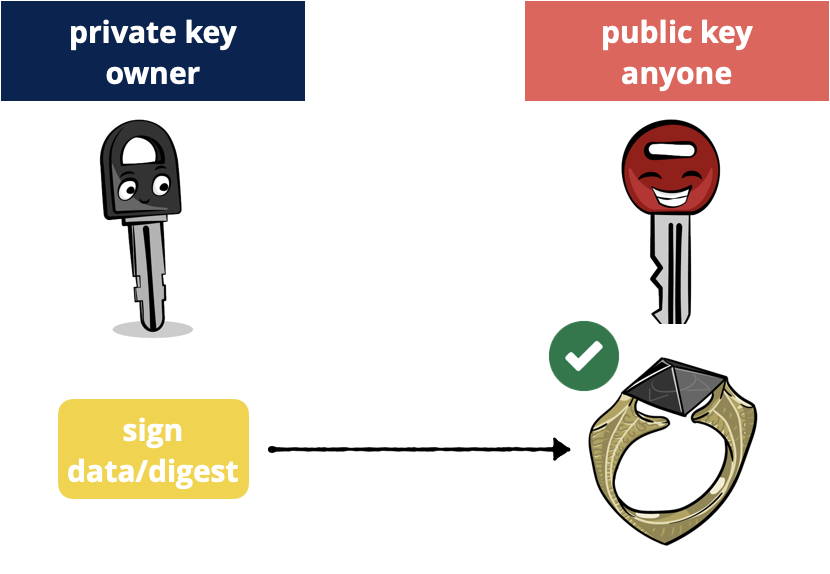
Public key cryptography: sign with private key, verify with public key.
The acronyms for digital signing are Elliptic Curve Digital Signature Algorithm (ECDSA), using NIST’s P256/P384/P512 curves, and Edwards-curve Digital Signature Algorithm (EdDSA), using Bernstein’s Ed25519 curve.
Suppose you-as-Dumbledore want to send the horcrux image to Harry. You’ll sign it so Harry can verify it’s from you-as-Dumbledore. First, you create private and public keys for digital signing:
let albusSigningPrivateKey = Curve25519.Signing.PrivateKey()
let albusSigningPublicKeyData =
  albusSigningPrivateKey.publicKey.rawRepresentation
The rawRepresentation of the public key is of type Data, so you can send it over the network.
Next, you-as-Dumbledore use your private key to sign the data:
let signatureForData = try! albusSigningPrivateKey.signature(for: data)
Or you sign the digest of the data, which is faster:
let digest512 = SHA512.hash(data: data)
let signatureForDigest = try! albusSigningPrivateKey.signature(
  for: Data(digest512))
You-as-Dumbledore use SHA-512 this time.
When using a Curve25519 private key, signature(for:) generates an elliptic curve digital signature algorithm (EdDSA) signature of the data or digest over the Ed25519 elliptic curve, using SHA-512 as the hash function. This algorithm generates a random nonce to produce a different signature on every call, even for the same data and key, to guard against timing attacks.
If you use P256 instead of Curve25519, it generates an elliptic curve digital signature algorithm (ECDSA) signature of the data over the P-256 elliptic curve, using SHA-256 as the hash function.
Now you-as-Dumbledore send data, digest512 and signatureForData or signatureForDigest to Harry.
Switching to you-as-Harry, you add this code to verify the signatures with a key created from albusSigningPublicKeyData.
let publicKey = try! Curve25519.Signing.PublicKey(
  rawRepresentation: albusSigningPublicKeyData)
if publicKey.isValidSignature(signatureForData, for: data) {
  print("Dumbledore sent this data.")
}
if publicKey.isValidSignature(signatureForDigest,
  for: Data(digest512)) {
  print("Data received == data sent.")
  UIImage(data: data)
}
Data.
Run the playground to see the authenticated data:
CryptoKit code using public key to verify private key signature

CryptoKit code using public key to verify private key signature
And that’s how easy it is to do digital signatures. But again, the data isn’t encrypted. So keep reading!
Creating a Symmetric Key for Encryption
Earlier in this tutorial, Dumbledore and Harry had a secret key they both knew, which allowed them to use an AEAD sealed box to encrypt and decrypt data. But Voldemort somehow discovered this secret key, and it’s not possible to securely set a new symmetric key — Harry’s on the run and Dumbledore’s only a spirit — so now they need to find another way.
Key agreement algorithms enable them to create a shared secret from their public and private keys, then add an agreed salt value to generate a symmetric key.
Diagram of public-private key agreement algorithm

Diagram of public-private key agreement algorithm
Computing the shared secret is amazingly simple. If G is the elliptic curve’s generator point, and a is Dumbledore’s secret key, then a * G is his public key. Similarly, Harry’s secret key is h and his public key is h * G. It turns out this is true:
(a * G) * h = (h * G) * a
That’s right, Harry multiplies Dumbledore’s public key by his private key, and this is the same point Dumbledore gets by multiplying Harry’s public key by his own private key. Magic!
Here, the acronym is Elliptic Curve Diffie Hellman (ECDH) key agreement, using either NIST’s P256/P384/P512 curves or Bernstein’s X25519 curve.
First, Dumbledore and Harry create private and public keys for key agreement, and publish their public keys as Data.
let albusPrivateKey = Curve25519.KeyAgreement.PrivateKey()
let albusPublicKeyData = albusPrivateKey.publicKey.rawRepresentation
let harryPrivateKey = Curve25519.KeyAgreement.PrivateKey()
let harryPublicKeyData = harryPrivateKey.publicKey.rawRepresentation
Dumbledore and Harry have to agree on the salt value for creating the symmetric key:
let protocolSalt = "Voldemort's Horcruxes".data(using: .utf8)!
It’s safe to send this across the network. It won’t help an attacker unless they also know one of the private keys.
Dumbledore creates Harry’s public key from its raw representation, then combines it with his private key to calculate first the sharedSecret and then the symmetricKey:
let harryPublicKey = try! Curve25519.KeyAgreement.PublicKey(
  rawRepresentation: harryPublicKeyData)
let ADsharedSecret = try! albusPrivateKey.sharedSecretFromKeyAgreement(
  with: harryPublicKey)
let ADsymmetricKey = ADsharedSecret.hkdfDerivedSymmetricKey(
  using: SHA256.self, salt: protocolSalt,
  sharedInfo: Data(), outputByteCount: 32)
Harry creates Dumbledore’s public key from its raw representation, then combines it with his private key to calculate first the sharedSecret and then the symmetricKey:
let albusPublicKey = try! Curve25519.KeyAgreement.PublicKey(
rawRepresentation: albusPublicKeyData)
let HPsharedSecret = try! harryPrivateKey.sharedSecretFromKeyAgreement(
  with: albusPublicKey)
let HPsymmetricKey = HPsharedSecret.hkdfDerivedSymmetricKey(
  using: SHA256.self, salt: protocolSalt,
  sharedInfo: Data(), outputByteCount: 32)
Now to see if they match:
if ADsymmetricKey == HPsymmetricKey {
  print("Dumbledore and Harry have the same symmetric key.")
}
Run the playground.
CryptoKit derived symmetric keys match.

CryptoKit derived symmetric keys match.
As if by magic, Dumbledore and Harry produce the same symmetric key! Now they can use this symmetric key for AEAD authenticated encryption.
P256 Key in Secure Enclave
SecureEnclave code only works on a device with a Secure Enclave chip: iPhone 5S, iPad Air and later models.
For extra protection, you can create P256 private keys directly in the device’s Secure Enclave. It’s a very small change to the code:
// Check that the device has a Secure Enclave
if SecureEnclave.isAvailable {
  // Generate private key in Secure Enclave
  let privateKey = try SecureEnclave.P256.Signing.PrivateKey()
} else {
  let privateKey = P256.Signing.PrivateKey()
}
With the private key in the Secure Enclave, creating the public key data and signing data or digest work exactly the same:
// Create public key data
let publicKeyData = privateKey.publicKey.compactRepresentation!
// Produce a signature
let dataSignature = try privateKey.signature(for: data)
let digestSignature = try privateKey.signature(for: digest)
The Secure Enclave has this cool feature: You can constrain key usage with access control. For example:
let accessControl = SecAccessControlCreateWithFlags(
  nil,
  kSecAttrAccessibleWhenUnlockedThisDeviceOnly,
  [.privateKeyUsage, .userPresence],
  nil)!
let privateKey = try SecureEnclave.P256.Signing.PrivateKey(
  accessControl: accessControl)
You’re setting access control so the key you’re creating in the Secure Enclave is only accessible when the device is unlocked and is available on this device only. Also, your app requires user presence when it’s performing an operation with the private key. Requiring user presence means the user must authenticate with TouchID or FaceID or the device passcode.