Making A Mac App Scriptable Tutorial
Allow users to write scripts to control your OS X app – giving it unprecedented usability. Discover how in this “Making a Mac App Scriptable Tutorial”. By Sarah Reichelt.
5 (1) · 1 Review
Update 9/21/16: This tutorial has been updated for Xcode 8 and Swift 3.
Update 9/21/16: This tutorial has been updated for Xcode 8 and Swift 3.
As an app developer, it’s near impossible to think of all the ways people will want to use your app. Wouldn’t it be cool to let your users create scripts to customize your app to their own personal needs?
With Applescript and Javascript for Automation (JXA), you can! In this making a Mac app scriptable tutorial you will discover how to add scripting capabilities to a sample application. You’ll start by learning how to control existing apps with scripting, and then extend a sample app to allow custom script actions.
Getting Started
Download the sample project, open it in Xcode and build and run to see how it looks:
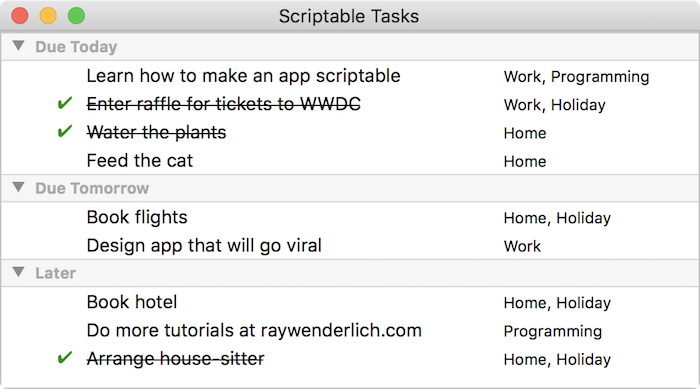
The app shows a list of tasks with due dates in the next few days and the tags associated with each task. It uses an outline view to group the tasks by due date.
You might have noticed that you can’t add, edit, or delete any tasks. That’s by design – these actions will be handled by your user automation scripts.
Take a a look at the files in the project:
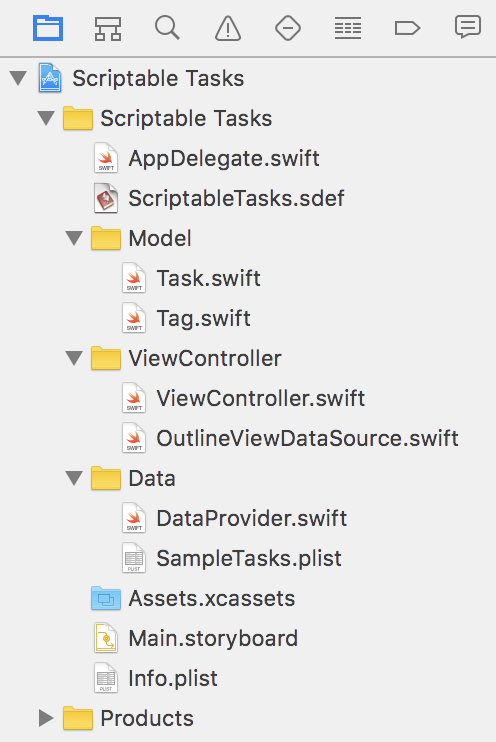
- There are 2 model class files: Task.swift and Tag.swift. These are the classes that you will be scripting.
- The ViewController group handles the display and watches for changes in the data.
- The Data group has a file with the sample tasks and a DataProvider that reads those tasks and handles any edits that arrive.
- The AppDelegate uses a
DataProviderobject to keep a record of the app’s tasks. - The ScriptableTasks.sdef file is a crucial file…which you will explore in detail later.
There are sample scripts for this tutorial as well; download them here. There are two folders in this package: one for AppleScript and one for JavaScript. Since this tutorial isn’t focused on how to write scripts, you’ll be using each of the downloaded scripts to test the functionality that you’ll add to Scriptable Tasks.
Enough with the talk – time to move on to the scripting! :]
Using the Script Editor
Open up the Script Editor app, found in Applications/Utilities, and open a new document:

You’ll see a set of four buttons in the top toolbar: Record, Stop, Run, and Compile. Compile checks that your scripting is syntactically correct, and Run does pretty much what what you’d expect.
At the bottom of the window, you’ll see three icons which switch between views. Description lets you add some information about your script, while Result shows the final result of running a script. The most useful option is the third button: Log.
The Log offers a further four options: Result, Messages, Events and Replies. Replies is the most informative, as it shows a log of every command and the return value of that command. When testing any scripts, I highly recommend the Log in Replies mode.
Note: If you ever open an AppleScript file and find it contains code like this: «class TaSk» whose «class TrFa» is false and «class CrDa», click Compile and it will be translated to readable AppleScript, provided you have the target app installed.
Note: If you ever open an AppleScript file and find it contains code like this: «class TaSk» whose «class TrFa» is false and «class CrDa», click Compile and it will be translated to readable AppleScript, provided you have the target app installed.
There are two scripting languages you’ll cover in this tutorial. The first is AppleScript, introduced with Mac System 7 in 1991, which uses an English-like syntax to make it usable by coders and non-coders alike.
The second is JavaScript for Automation (JXA), introduced by OSX Yosemite, which lets coders use the familiar JavaScript syntax to build their automation tasks.
The scripts in this tutorial will be presented in both AppleScript and JXA, so you’re free to wander down the path of whichever language you’d like to explore. :]
Note: Throughout this tutorial, the scripting code snippets are presented in AppleScript first, and immediately followed by the equivalent JavaScript version.
Note: Throughout this tutorial, the scripting code snippets are presented in AppleScript first, and immediately followed by the equivalent JavaScript version.
Exploring App Scripting With TextEdit
There’s a great little app already installed on your Mac that supports scripting: TextEdit. In the Script Editor, select Window/Library and look for the TextEdit entry. If it’s not there, click the Plus button at the top, navigate to your Applications folder and add TextEdit. Then double-click the TextEdit entry to open the TextEdit dictionary:
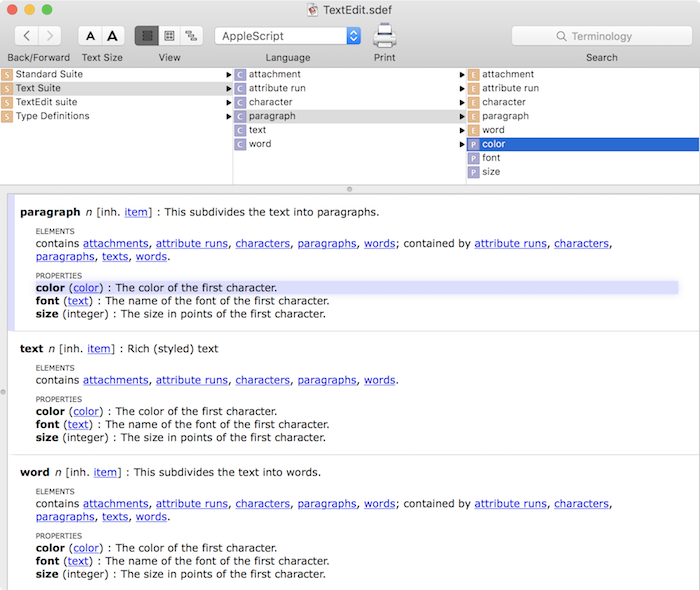
Every scriptable app has a dictionary, stored in a scripting definition (SDEF) file. The dictionary tells you what objects the app has, what properties the objects have and what commands the app responds to. In the above screen shot, you can see that TextEdit has paragraphs, and paragraphs have color and font properties. You will use this information to style some text.
Open 1. TextEdit Write.scpt from either the AppleScript or the JavaScript folder. Run the script; you’ll see TextEdit create and save a document.
You now have a new document, but it needs a bit of styling. Open 2. TextEdit Read Edit.scpt, run this script and you’ll see the document re-opened and styled as per the script.
Although delving into the actual script is beyond the scope of this tutorial, feel free to read the scripts in detail to see how they act on the TextEdit document.
As mentioned in the introduction, all apps are scriptable to some extent. To see this in action, ensure Scriptable Tasks is running. Next, open a new script window in Script Editor and enter one of the following scripts, depending on which language you’re using:
-- AppleScript
tell application "Scriptable Tasks" to quit
or
// JavaScript
Application("Scriptable Tasks"). quit();
Click Run and Scriptable Tasks should quit. Change the script to the following and click Run again:
tell application "Scriptable Tasks" to launch
or
Application("Scriptable Tasks").launch();
The app restarts, but doesn’t come to the foreground. To bring the app into focus, change launch to activate in the script above and click Run.
Now that you’ve seen that apps can respond to scripting commands, it’s time to add this ability to your app.