How to Make a Game Like Jetpack Joyride using LevelHelper and SpriteHelper [Cocos2D Edition] – Part 3
This is a post by special contributor Bogdan Vladu, an iOS application developer and aspiring game developer living in Bucharest, Romania. Update 1/9/2013: This tutorial is now deprecated. We now have a newer, updated version of this tutorial, check it out! Welcome back to our Jetpack Joyride tutorial series! In this tutorial series, we are […] By .
Sign up/Sign in
With a free Kodeco account you can download source code, track your progress, bookmark, personalise your learner profile and more!
Create accountAlready a member of Kodeco? Sign in
Sign up/Sign in
With a free Kodeco account you can download source code, track your progress, bookmark, personalise your learner profile and more!
Create accountAlready a member of Kodeco? Sign in
Contents
How to Make a Game Like Jetpack Joyride using LevelHelper and SpriteHelper [Cocos2D Edition] – Part 3
25 mins
This is a post by special contributor Bogdan Vladu, an iOS application developer and aspiring game developer living in Bucharest, Romania.
Create a game like Jetpack Joyride with LevelHelper and SpriteHelper!
Update 1/9/2013: This tutorial is now deprecated. We now have a newer, updated version of this tutorial, check it out!
Welcome back to our Jetpack Joyride tutorial series! In this tutorial series, we are making a game similar to Jetpack Joyride using Cocos2D and Box2D, and the LevelHelper and SpriteHelper tools.
So far, we’ve got a mouse that can use his jetpack to fly through a scrolling level, complete with animations and endless scrolling. Check out how we did it in Part One and Part Two.
I hope you enjoyed the first two parts, but, psst… Part Three is where we get to the really fun stuff!
In this part of the series, we’ll make our game fully capable of handling collisions.
In other words, by the end of this part we’ll be able to reward and kill the mouse! :]
We’ll also add sounds, more sophisticated animations, and we’ll iron-out some problems with game play.
So what are you waiting for – time to give our mouse the ride of his life!
Getting Started
To continue with this part of the tutorial series, first make sure that you have the complete project from Part Two, available here.
You will also need to download this sound pack, which we will be using later on.
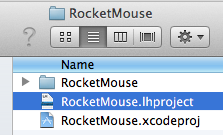
To open our project in LevelHelper, navigate to your last project folder in Finder and double click on the file RocketMouse.lhproject.
LevelHelper should open the last level we were working on. If for some reason LevelHelper opens an earlier version of the level, just go to the Levels section to find and open the latest version.
Implementing Collisions: Overview
Our game has a flying mouse and shooting lasers (with the help of animations), and it also has coins for the player to collect. However, if you run into the coins or lasers nothing happens – so it’s time to add some gameplay for that!
Before we do so, however, let’s take a look at how things are currently set up.
In LevelHelper, right click the coin in the right sidebar (first tab) and select Open SpriteHelper Scene. Select the coin in SpriteHelper, and you’ll see that in the physics section, we have the “Is Sensor” option checked:
We have this checked because we want the player to trigger a collision response when it touches a coin, so that we know to give points to the user, but we don’t want the mouse to behave like it’s colliding with the coin.
What about the laser? If we look at the laser property, this sprite does not have the “Is Sensor” option selected:
Why? Don’t we want the same behavior? We do, but our need to keep track of our lasers’ animation requires us to to handle them differently.
If a sprite has Is Sensor selected, the collision will be triggered only when the mouse first touches the sprite. But for our lasers, we need the possibility of continuous collisions (every frame), because from one frame to another the animation of the laser might change (from off to on, for example) while the player is still in contact with the laser.
If we have Is Sensor enabled for the lasers, and the player makes contact with a laser when the laser is off, we have a collision response – but we wouldn’t fry the mouse, because after all, the laser is off.
But then the laser turns on. But because the collision already has been performed, we have no way of knowing if the player is still touching the laser.
How can we solve this? Well, it’s easy. Using LevelHelper’s collisions behavior together with Box2d, we can disable the collision response so that the mouse will move over the laser without behaving like it’s colliding with it. This way we will have collision trigger on every frame, and we’ll know if we need to kill the player.
Implementing Collisions: Coins
OK, finally time to code! Open up your Xcode project, navigate to HelloWorldScene.mm and declare this new method before init:
-(void) setupCollisionHandling
{
    [lh useLevelHelperCollisionHandling];
    [lh registerBeginOrEndCollisionCallbackBetweenTagA:PLAYER andTagB:COIN idListener:self selListener:@selector(mouseCoinCollision:)];
}
Next, call this new method at the end of init (right after the call to retrieveRequiredObjects):
[self setupCollisionHandling];
So what have we done here?
In the setupCollisionHandling method, we first tell to the LevelHelperLoader instance that we want to use its collision handling and not create our own collision handling. My advice is: always use this, because its fast, easy and painless.
On the second call, we register a method that we want LevelHelper to call whenever a collision between a sprite with the tag PLAYER (in our case the mouse sprite) and a sprite with the tag COIN (in our case any coin sprite) happens.
Remember how we set up collision tags for these in part two? Well LevelHelper automatically generates constants for these so we can use them in code! You can control-click on one of them and choose “Go to definition” if you’re curious where they are defined.
LevelHelper collision handling has multiple types of collision but here we use beginOrEnd because our coin sprites are defined as sensors and Box2d handles collision for sensor objects only on “begin” collision types.
Now let’s define the methods that will be used for collision responses between the mouse and coin. Add this new method right before setupCollisionHandling:
-(void)mouseCoinCollision:(LHContactInfo*)contact
{
    LHSprite* coin = [contact spriteB];

    if(nil != coin)
    {
        if([coin visible])
        {
            [self scoreHitAtPosition:[coin position] withPoints:100];
        }

        [coin setVisible:NO];
    }
}
As you can see, this method gets a LHContactInfo* object as an argument. This is a special class that will give us info about the collision.
So how do we get the coin sprite from this collision? Well, we register the coin sprite as being tagB in a call to registerBeginOrEndCollisionCallbackBetweenTagA andTagB. So if tag B is the coin, then we take the sprite using [contact spriteB].
If you want to learn more about the LHContactInfo class, check out the official LevelHelper documentation.
Next, we make sure the coin is not nil. This is not strictly necessary, but it’s a good way to avoid errors. As a general note, it’s always good to check against nil.
If the coin is visible, we call a method that we’ll write in a minute to give points to the user for taking the coin. We then make the coin invisible in order to hide it from the screen and give visual feedback to the user that he now has the coin in his virtual wallet.
Compiling now will give an error, because we did not define the scoreHitAtPosition method. Let’s define it now. Put the following before the mouseCoinCollision method:
-(void)scoreHitAtPosition:(CGPoint)position withPoints:(int)points
{
    score += points;
}
Declare the variable score inside the HelloWorldScene.h:
int score;
Compile and run the game, and you’ll see that when the mouse collides with the coins, the coins disappear!


