Airplay Tutorial: An Apple TV Multiplayer Quiz Game
Learn how to make a multiplayer iOS quiz game that displays one thing to an Apple TV, and uses your device as a controller! By Gustavo Ambrozio.
Apple introduced AirPlay in iOS 5, allowing your iOS devices to stream content to an Apple TV. This opened up a lot of gaming possibilities, such as using an Apple TV as one display and your iOS device as another.
GameKit was introduced back in iOS 3 (or was it still “iPhoneOS” back then?) and even though it has evolved a lot over the years, it had one interesting capability from the start called peer-to-peer connectivity. This can be used as a communication channel for multiplayer gaming.
In this tutorial you’ll see how to use AirPlay and the peer-to-peer connectivity feature of GameKit to create a trivia game that displays the question and answers through an Apple TV. Each player will use their own iOS device to answer the questions, and the first player to answer correctly wins the point!
The trivia game uses the Sprite Kit framework to handle the drawing and the UI. As covering Sprite Kit in depth is not the goal of this tutorial, it’s okay if you’re not familiar with it. If you’re curious, you can check out a few Sprite Kit tutorials from our site.
You won’t need an Apple TV either – you can use the simulator to mimic the external display if need be.
Getting Started
To get started, download the starter project and unzip the file.
Build and run your project; you should see the following screen:

Feel free to take a peek through the starter project. You’ll see that it includes the code necessary for the main game logic of the quiz game and its user interface, but no code related to Airplay or multiplayer logic yet.
Once you’re ready taking a look through, it’s time to start learning about AirPlay and GameKit!
Setting Up a Secondary Screen
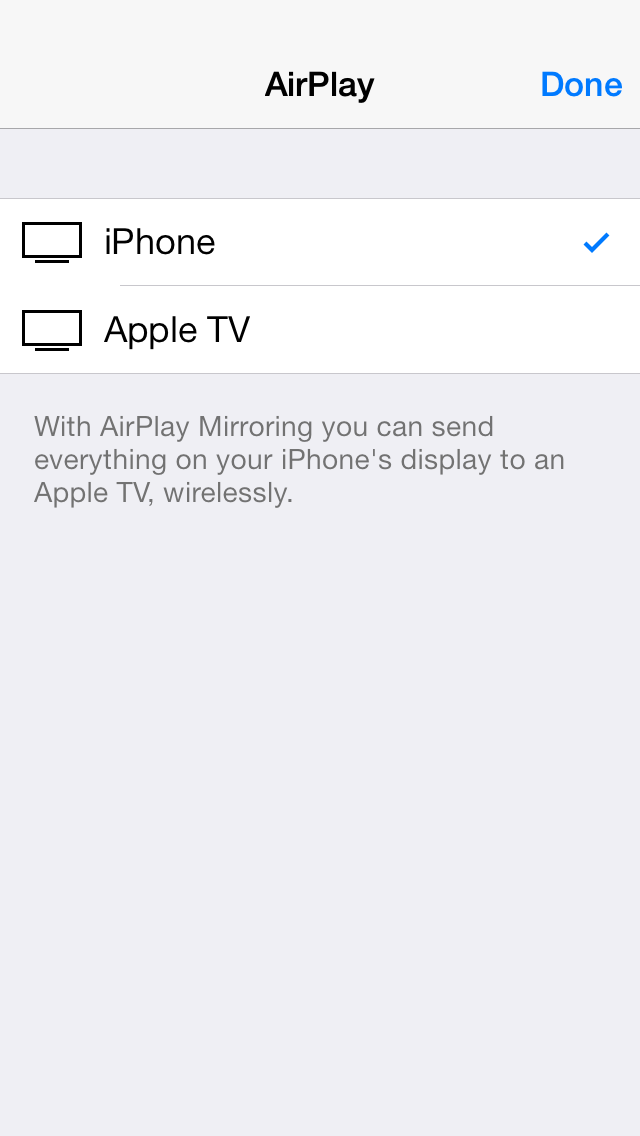
First of all, note that by default your iOS device supports screen mirroring to an external display (like an Apple TV) without you having to write one line of code. You simply swipe up from the bottom of the screen, tap the AirPlay button, and then select your external device and it just works:
However, often in games you want to have your iOS device show one thing, and your external display show something else. For example, in this quiz game we want the Apple TV to show one screen (the question) and the iOS devices to show a different screen (buttons to select the answers). Doing this requires some code, so that is the focus of this tutorial.
Also note that AirPlay doesn’t have a specific API to output to an Apple TV; instead, it uses the generic external display API. This means using the same API you can either connect wirelessly to an AppleTV over AirPlay, or manually connect to an external TV or monitor using one of the cables that Apple sells for this purpose.
So, if you want to display different things to different screens (i.e. not mirroring), and regardless of what type of external display you’re connecting to (Apple TV or something else), the first thing you’ll need to do is to detect whether a new external display is available.
Open ATViewController.m and add the following methods to the end of the class implementation:
#pragma mark - AirPlay and extended display

- (void)setupOutputScreen
{
  // Register for screen notifications
  NSNotificationCenter *center = [NSNotificationCenter defaultCenter];
  [center addObserver:self selector:@selector(screenDidConnect:) name:UIScreenDidConnectNotification object:nil];
  [center addObserver:self selector:@selector(screenDidDisconnect:) name:UIScreenDidDisconnectNotification object:nil];
  [center addObserver:self selector:@selector(screenModeDidChange:) name:UIScreenModeDidChangeNotification object:nil];

  // Setup screen mirroring for an existing screen
  NSArray *connectedScreens = [UIScreen screens];
  if ([connectedScreens count] > 1) {
    UIScreen *mainScreen = [UIScreen mainScreen];
    for (UIScreen *aScreen in connectedScreens) {
      if (aScreen != mainScreen) {
        // We've found an external screen !
        [self setupMirroringForScreen:aScreen];
        break;
      }
    }
  }
}

- (void)screenDidConnect:(NSNotification *)aNotification
{
}

- (void)screenDidDisconnect:(NSNotification *)aNotification
{
}

- (void)screenModeDidChange:(NSNotification *)aNotification
{
}

- (void)setupMirroringForScreen:(UIScreen *)anExternalScreen
{
}

- (void)disableMirroringOnCurrentScreen
{
}
setupOutputScreen observes three notifications to tell you when an external display is connected, disconnected or changed. However, the notifications only cover changes to the display state — they won’t tell you if you already have a display plugged in.
To cover the case of displays that are already connected, you need to loop through [UIScreen screens] which returns an array of all screens connected to the device. If you find a screen that is NOT the main screen, then you can assume this is the external display. Once you populate the empty setupMirroringForScreen: method, it will send a different scene to that screen.
Your next task is to populate all the empty methods you added above starting with screenDidConnect:.
Add the following code to screenDidConnect::
  NSLog(@"A new screen got connected: %@", [aNotification object]);
  [self setupMirroringForScreen:[aNotification object]];
The object property of the notification contains the UIScreen object of the new connected display. When you receive the notification, simply log the change and call the same setupMirroringForScreen: to set up the mirroring.
Add the following code to screenDidDisconnect:
  NSLog(@"A screen got disconnected: %@", [aNotification object]);
  [self disableMirroringOnCurrentScreen];
Here you’re simply performing the reverse of screenDidConnect:: log the notification and disable mirroring of the display. disableMirroringOnCurrentScreen is still just a shell — you’ll flesh it out later.
Next, add the following code to screenModeDidChange::
  NSLog(@"A screen mode changed: %@", [aNotification object]);
  [self disableMirroringOnCurrentScreen];
  [self setupMirroringForScreen:[aNotification object]];
This method performs a reset by disabling the screen and setting it up again. This ensures the new screen mode and settings are the ones used in the scene.
Before you fill in the logic behind setupMirroringForScreen: you’ll need some properties to store the states of your various objects.
Add the following code to the top of ATViewController.m:
#import "ATAirPlayScene.h"
Next, find the following line, located just below the includes:
@property (nonatomic, strong) ATMyScene *scene;
…and add the following properties directly below that line:
@property (nonatomic, strong) UIWindow *mirroredWindow;
@property (nonatomic, strong) UIScreen *mirroredScreen;
@property (nonatomic, strong) SKView *mirroredScreenView;
@property (nonatomic, strong) ATAirPlayScene *mirroredScene;
These three properties store your secondary UIWindow and UIScreen objects, the corresponding SKView for that screen, and the Sprite Kit scene with the interface that displays the question and answers to the external display.
Add the following code to setupMirroringForScreen:
  self.mirroredScreen = anExternalScreen;

  // Find max resolution
  CGSize max = {0, 0};
  UIScreenMode *maxScreenMode = nil;

  for (UIScreenMode *current in self.mirroredScreen.availableModes) {
    if (maxScreenMode == nil || current.size.height > max.height || current.size.width > max.width) {
      max = current.size;
      maxScreenMode = current;
    }
  }

  self.mirroredScreen.currentMode = maxScreenMode;
In the code above, you first store the screen sent to the method in mirroredScreen for later use. Next, you loop through the screen’s availableModes to find the maximum supported screen mode and then set that as the screen’s currentMode.
This method is not quite complete; there’s still a little to add.
Add the following code directly after the code you added above:
  // Setup window in external screen
  self.mirroredWindow = [[UIWindow alloc] initWithFrame:self.mirroredScreen.bounds];
  self.mirroredWindow.hidden = NO;
  self.mirroredWindow.layer.contentsGravity = kCAGravityResizeAspect;
  self.mirroredWindow.screen = self.mirroredScreen;

  self.mirroredScreenView = [[SKView alloc] initWithFrame:self.mirroredScreen.bounds];

  // Create and configure the scene.
  self.mirroredScene = [ATAirPlayScene sceneWithSize:self.mirroredScreenView.bounds.size];
  self.mirroredScene.scaleMode = SKSceneScaleModeAspectFill;

  // Present the scene.
  [self.mirroredScreenView presentScene:self.mirroredScene];

  [self.mirroredWindow addSubview:self.mirroredScreenView];
The above code illustrates how easy it is to present something to the new screen. First, you create a new UIWindow with the size of the secondary screen. Since windows are set to hidden by default, you need to un-hide them by setting the property to NO.
According to CALayer class reference, contentsGravity “specifies how the layer’s contents are positioned or scaled within its bounds”. In your implementation of screenModeDidChange: you disable and set up the window again when the screen changes, so you only have to set the contentsGravity to aspect fill. Finally, you set the screen of this new window to the passed-in screen.
Next you create a SKView with the same size as the window. SKView is Sprite Kit’s UIView subclass; if you were creating a project without Sprite Kit, you’d create a new UIView instance here instead of SKView.
Finally, you create a new ATAirPlayScene instance, instruct Sprite Kit to present this scene in the newly created view, and add the view to the new window.
There’s only one empty method remaining: disableMirroringOnCurrentScreen.
Add the following code to disableMirroringOnCurrentScreen:
[self.mirroredScreenView removeFromSuperview];
self.mirroredScreenView = nil;
self.mirroredScreen = nil;
self.mirroredScene = nil;
self.mirroredWindow = nil;
[self.scene enableStartGameButton:NO];
This method cleans up all the properties you created in the previous method. You also call enableStartGameButton: to disable the start button; you haven’t yet seen this but you’ll come across it later as part of the game logic.
This button is only enabled on the device with the secondary display and only when there’s more than one player connected. If you lose a display, then you need to disable this button.
The final piece is to get the ball rolling and call the setupOutputScreen you just wrote. To do this, add the following line to the end of viewDidLoad:
[self setupOutputScreen];
Build and run your project; you should see the same screen as before:
In the simulator menu, choose Hardware\TV Out\640×480, and a new window opens with the simulated TV output.
At this point, a bug in the simulator may cause the app to crash. This is only an issue in the simulator and won’t happen when you use a real Apple TV or a cable, so don’t worry too much about it. Run the project again without quitting the simulator and you should now see the following on both displays:

If you want to see this on your Apple TV, run the project on a physical device, open Control Center and choose your Apple TV in the AirPlay menu.