How To Create a HUD Layer with Cocos2D
A common question for beginners to Cocos2D is how to add a second layer to your scene to use as a Heads-Up Display, or HUD. You might want to use the HUD to contain extra controls (like a joystick or buttons) or you might want to use it to display status information (like lives or […] By .
Sign up/Sign in
With a free Kodeco account you can download source code, track your progress, bookmark, personalise your learner profile and more!
Create accountAlready a member of Kodeco? Sign in
Sign up/Sign in
With a free Kodeco account you can download source code, track your progress, bookmark, personalise your learner profile and more!
Create accountAlready a member of Kodeco? Sign in
Contents
How To Create a HUD Layer with Cocos2D
10 mins
Learn How to Create a HUD with Cocos2D!
A common question for beginners to Cocos2D is how to add a second layer to your scene to use as a Heads-Up Display, or HUD.
You might want to use the HUD to contain extra controls (like a joystick or buttons) or you might want to use it to display status information (like lives or score).
In this tutorial, we’re going to take a Cocos2D game that has been made with a single scene and single layer, and add a second layer to use as a HUD.
This tutorial is for beginners to Cocos2D who have gone through the How To Make a Simple Game with Cocos2D tutorial, or have equivalent knowledge.
Heads up – tutorial incoming!
Getting Started
Start by downloading the sample game that we will be using for this tutorial.
If you’re curious, this game was made in this and that tutorial, but I don’t recommend those tutorials for beginners.
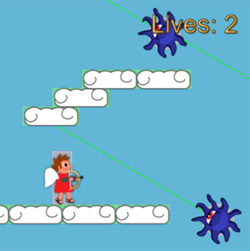
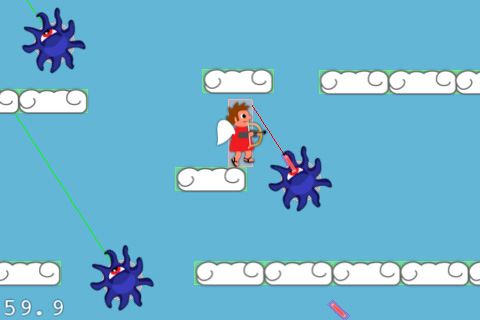
Open the project in Xcode and run it. You’ll see this is a simple game where you tap to move, or double tap to jump. Your goal is to avoid the lasers, and make it to the end!
If you get hit by a laser as you play the game, you’ll notice that you take a hit – however there is nothing on the screen to show you your lives.
What’s worse – when you win or lose nothing happens except for a sound effect – there’s no way to retry!
Never fear – HUD to the rescue!
Why You Need a HUD
There may be some of you out there that are thinking, “HUD?! I don’t need no stinking HUD! I’ll just add the labels directly to the layer!”
So before we go any further, let’s give that a try and see what happens.
Open up ActionLayer.mm and add the following code right after the +(id)scene method:
- (void)restartTapped:(id)sender {

    // Reload the current scene
    CCScene *scene = [ActionLayer scene];
    [[CCDirector sharedDirector] replaceScene:[CCTransitionZoomFlipX transitionWithDuration:0.5 scene:scene]];

}

- (void)showRestartMenu:(BOOL)won {

    CGSize winSize = [CCDirector sharedDirector].winSize;

    NSString *message;
    if (won) {
        message = @"You win!";
    } else {
        message = @"You lose!";
    }

    CCLabelBMFont *label;
    if (UI_USER_INTERFACE_IDIOM() == UIUserInterfaceIdiomPad) {
        label = [CCLabelBMFont labelWithString:message fntFile:@"Arial-hd.fnt"];
    } else {
        label = [CCLabelBMFont labelWithString:message fntFile:@"Arial.fnt"];
    }
    label.scale = 0.1;
    label.position = ccp(winSize.width/2, winSize.height * 0.6);
    [self addChild:label];

    CCLabelBMFont *restartLabel;
    if (UI_USER_INTERFACE_IDIOM() == UIUserInterfaceIdiomPad) {
        restartLabel = [CCLabelBMFont labelWithString:@"Restart" fntFile:@"Arial-hd.fnt"];
    } else {
        restartLabel = [CCLabelBMFont labelWithString:@"Restart" fntFile:@"Arial.fnt"];
    }

    CCMenuItemLabel *restartItem = [CCMenuItemLabel itemWithLabel:restartLabel target:self selector:@selector(restartTapped:)];
    restartItem.scale = 0.1;
    restartItem.position = ccp(winSize.width/2, winSize.height * 0.4);

    CCMenu *menu = [CCMenu menuWithItems:restartItem, nil];
    menu.position = CGPointZero;
    [self addChild:menu z:10];

    [restartItem runAction:[CCScaleTo actionWithDuration:0.5 scale:1.0]];
    [label runAction:[CCScaleTo actionWithDuration:0.5 scale:1.0]];

}
This is some basic code to display a label to the screen that says “You Win” or “You Lose”, and a button underneath that says “Restart”. When the restart button is tapped, it creates a new instance of the ActionLayer switches to it.
This code is not relevant to this tutorial so I’m not going to go over it in more detail here. If you’re unsure how this works, check out our Learning Cocos2D Book or some of the other tutorials on this site.
Next, make the following modifications to call this new method:
// At bottom of loseGame
[self showRestartMenu:NO];

// At bottom of winGame
[self showRestartMenu:YES];
Compile and run, and see if it works. Move over so the level scrolls a bit, and let yourself die by getting shot. You should see something like the following (or maybe no menu at all!)
See how the menu is offscreen?
This is happening because this game follows the player by moving the layer to keep the player centered – however the label and menu gets scrolled along with it because it’s a child of the layer!
What we really want is to have a separate layer so that we can freely move this layer around without having to worry about elements that should always stay visible on the screen, like this menu.
Creating the HUD
Let’s create a new CCLayer for this HUD and hook things up so that the ActionLayer can communicate with the HUD layer.
Go to File\New\New File, choose iOS\Cocoa Touch\Objective-C class, and click Next. Enter NSObject for Subclass of, click Next, name the new class HUDLayer.mm (note the .mm extension, that is intentional), and click Save.
Open HUDLayer.h and replace it with the following:
#import "cocos2d.h"

@interface HUDLayer : CCLayer {
}

- (void)showRestartMenu:(BOOL)won;

@end
This is just a basic subclass of CCLayer, and we predeclare the showRestartMenu.
Next, switch to HUDLayer.mm, and move the restartTapped and showRestartMenu methods you added to ActionLayer.mm earlier into this file. Also add an #import to the top of the file:
#import "ActionLayer.h"
Now let’s hook this up to the ActionLayer. Open up ActionLayer.h and make the following changes:
// Add to top of file
#import "HUDLayer.h"

// Add inside @interface
HUDLayer * _hud;

// Add after @interface
- (id)initWithHUD:(HUDLayer *)hud;
We’re importing the new layer here, and creating an instance variable so we can keep a reference to it. We’re also modifying our initializer to take the HUDLayer as a parameter.
Next switch to ActionLayer.mm and make the folllowing changes:
// Replace scene method with the following
+ (id)scene {
    CCScene *scene = [CCScene node];

    HUDLayer *hud = [HUDLayer node];
    [scene addChild:hud z:1];

    ActionLayer *layer = [[[ActionLayer alloc] initWithHUD:hud] autorelease];
    [scene addChild:layer];

    return scene;
}

// Replace beginning of init with the following
- (id)initWithHUD:(HUDLayer *)hud
{
    if ((self = [super init])) {
        _hud = hud;
        // Rest of method...

// In loseGame, replace call to showRestartMenu with the following
[_hud showRestartMenu:NO];

// In winGame, replace call to showRestartMenu with the following
[_hud showRestartMenu:YES];
Here we modify the static method that creates the scene to create two layers – the HUDLayer and the ActionLayer – and add them as children. It passes the HUDLayer as a parameter to the ActionLayer so the ActionLayer can easily access it and call methods on it.
Note that it adds the HUDLayer with a z-order of 1, so it appears on top of the ActoinLAyer.
The init method now takes the HUDLayer as a parameter, and stores a reference in an instance variable so it can be accessed later on. And now we can call the showRestartMenu on the HUDLayer!
Compile and run, and try it out… now the menu should be properly centered, even if you scroll!


