Kotlin Android Extensions
Learn about the Kotlin Android Extensions plugin from JetBrains that can help you eliminate much of the boilerplate code in your Android app. By Fernando Sproviero.
View binding under the hood
I bet you’re curious about how this “magic” works.

Fortunately, there is a tool to decompile the code!
Open NoteListActivity and go to Tools > Kotlin > Show Kotlin Bytecode and then press the Decompile button.
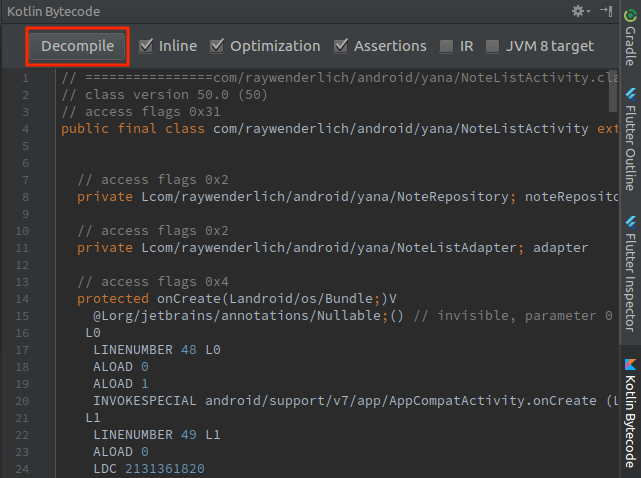
You’ll find the following method, generated by the plugin:
public View _$_findCachedViewById(int var1) {
  if(this._$_findViewCache == null) {

    this._$_findViewCache = new HashMap();
  }

  View var2 = (View)this._$_findViewCache.get(Integer.valueOf(var1));
  if(var2 == null) {
    var2 = this.findViewById(var1);
    this._$_findViewCache.put(Integer.valueOf(var1), var2);
  }

  return var2;
}
Now check that this method is called whenever you reference a view by right-clicking on it and selecting Find Usages. One example usage is:
RecyclerView var10000 = (RecyclerView)this._$_findCachedViewById(id.noteListView);
_$_findCachedViewById() creates a view cache HashMap, tries to find the cached view, and, if it doesn’t find it, then calls good old findViewById() and saves it to the cache map.
Pretty cool right? :]
Note: You’ll see that a _$_clearFindViewByIdCache was also generated, but the Activity doesn’t call it. This method is only needed when using Fragments, as the Fragment’s onDestroyView() calls it.
Note: You’ll see that a _$_clearFindViewByIdCache was also generated, but the Activity doesn’t call it. This method is only needed when using Fragments, as the Fragment’s onDestroyView() calls it.
Check what the plugin does with the adapter. Open NoteListAdapter and decompile it.
To your surprise, you won’t find the _$_findCachedViewById method. Instead, you’ll find that each time that the bind() method is called, findViewById() is called. This leads to a performance problem (because it will always have to find the views through the hierarchy), the exact problem that a ViewHolder should solve. So, this is not following the ViewHolder pattern!
To avoid this, you could workaround with the following approach:
class NoteViewHolder(itemView: View)
  : RecyclerView.ViewHolder(itemView) {

  private val noteTextView = itemView.noteTextView
  private val noteCardView = itemView.noteCardView
  private val noteDateView = itemView.noteDateView

  private val sdf = SimpleDateFormat("yyyy-MM-dd HH:mm", Locale.getDefault())

  fun bind(note: Note, listener: Listener) {
    noteTextView.text = note.text
    noteCardView.setCardBackgroundColor(
        ContextCompat.getColor(noteCardView.context, note.getPriorityColor()))
    noteCardView.setOnClickListener {
      listener.onNoteClick(noteCardView, note)
    }

    noteDateView.text = sdf.format(Date(note.lastModifed))
  }
}
Now, if you decompile, you’ll see that findViewById() is only called when the NoteViewHolder is created, so you’re safe again!
However, there is another approach. You can use the LayoutContainer interface, which will be covered in the following section.
Experimental features
Certain features of the Kotlin Android Extensions have not yet been deemed production ready, and are considered experimental features. These include the LayoutContainer interface and the @Parcelize annotation.
To enable the experimental features, open the app module build.gradle file again and add the following, just below the ‘kotlin-android-extensions’ plugin:
androidExtensions {
  experimental = true
}
LayoutContainer
As you’ve seen, it’s easy to access views with synthethic properties by using the corresponding kotlinx imports. This applies to both activities and fragments.
But, in the case of a ViewHolder (or any class that has a container view), you can implement the LayoutContainer interface to avoid workarounds like the one you used before.
Open again NoteListAdapter and implement the LayoutContainer interface.
// 1
import kotlinx.android.extensions.LayoutContainer
// 2
import kotlinx.android.synthetic.main.note_item.*

...

// 3
class NoteViewHolder(override val containerView: View)
  : RecyclerView.ViewHolder(containerView), LayoutContainer {

  private val sdf = SimpleDateFormat("yyyy-MM-dd HH:mm", Locale.getDefault())

  fun bind(note: Note, listener: Listener) {
    // 4
    noteTextView.text = note.text
    noteCardView.setCardBackgroundColor(
        ContextCompat.getColor(noteCardView.context, note.getPriorityColor()))
    noteCardView.setOnClickListener {
      listener.onNoteClick(noteCardView, note)
    }

    noteDateView.text = sdf.format(Date(note.lastModifed))
  }
}
- Import the LayoutContainer interface.
- To reference the views of the note_item.xml layout using LayoutContainer you need to import
kotlinx.android.synthetic.main.note_item.* - Add the interface to NoteViewHolder. To comply with it, you provide a containerView property override in the primary constructor, which then gets passed along to the superclass.
- Finally, use the properties that reference the views of the layout.
If you decompile this code, you’ll see that it uses _$_findCachedViewById() to access the views.
Build and run the app to see the app working just like before, this time with LayoutContainer.
View caching strategy
You’ve seen that _$_findCachedViewById uses a HashMap by default. The map uses an integer for the key and a view object for the value. You could use a SparseArray for the storage instead.
If you prefer using a SparseArray, you can annotate the Activity/Fragment/ViewHolder with:
@ContainerOptions(cache = CacheImplementation.SPARSE_ARRAY)
If you want to disable the cache, the annotation is:
@ContainerOptions(cache = CacheImplementation.NO_CACHE)
It’s also possible to set a module-level caching strategy by setting the defaultCacheImplementation value in the androidExtensions in the build.gradle file.
@Parcelize
Implementing the Parcelable interface on a custom class allows you to add instances of the class to a parcel, for example, adding them into a Bundle to pass between Android components. There is a fair amount of boilerplate needed to implement Parcelable. Libraries like AutoValue have been created to help with that boilerplate.
The Kotlin Android Extensions have their own way to help you implement Parcelable, using the @Parcelize annotation.
Open the Note class and modify it to the following:
@Parcelize
data class Note(var text: String,

                var priority: Int = 0,
                var lastModifed: Long = Date().time,
                val id: String = UUID.randomUUID().toString()) :
    Parcelable
You’ve removed literally all the code in the body of the class, and replaced it with the single annotation.
Note: Android Studio may highlight the class thinking there’s a compile error. But this is a known bug, and here is the issue. Fear not, you can build and run the project without any problems.
Note: Android Studio may highlight the class thinking there’s a compile error. But this is a known bug, and here is the issue. Fear not, you can build and run the project without any problems.
Build and run the app, and all is working as before. Implementing Parcelable is just that simple! Imagine how much time this will save you. :]

Where To Go From Here?
Congratulations! You’ve just learned the Kotlin Android Extensions, and seen how they let you remove a ton of boilerplate code from your project.
You can download the final version of the project using the Download Materials button at the top or bottom of this tutorial.
Here are some great references to learn more about the development of Kotlin Android Extensions:
- Official docs: you can have a look at them here.
- Kotlin Evolution and Enhancement Process: these are ideas and proposals that may go into future Kotlin releases, also called KEEPs. For example, the @Parcelize annotation, the view caching strategy and the LayoutContainer interface have their own KEEPs.
- If you liked decompiling the code and checking what’s under the hood, then I recommend you watch Exploring Java hidden costs by Jake Wharton.
Finally, as a separate project from Kotlin Android Extensions, Google has released Android KTX. KTX is not a plugin, but instead another set of extensions to ease Android development. KTX simplifies working with strings, SharedPreferences, and other parts of Android.
Feel free to share your feedback, findings or ask any questions in the comments below or in the forums. I hope you enjoyed this tutorial on the Kotlin Android Extenstions!