UIElements Tutorial for Unity: Getting Started
In this Unity tutorial, you’ll learn how to use Unity’s UIElements to create complex, flexible editor windows and tools to add to your development pipeline. By Ajay Venkat.
Unity’s editor provides tools that make game development enjoyable, efficient and productive. Sometimes, however, you may need a tool that the editor doesn’t include by default. Luckily, Unity’s UIElements framework lets you create custom editor windows to add missing tools.
In this tutorial, you’ll learn to make a Preset Manager from scratch that modifies and stores different properties of a GameObject using UIElements.
Throughout this process, you’ll get hands-on experience with the following topics:
- Writing Unity XML to create layouts.
- Styling editor windows using Unity Style Sheets.
- Manipulating and interacting with UIElements.
- Registering events and callbacks.
- Binding object values to UIElements.
- Debugging editor windows.
You’ll need a copy of Unity 2019.3 (or newer) installed on your machine to follow along with this tutorial.
Getting Started
Now that you have Unity, you need to download the sample project by clicking on the Download Materials button at the top or bottom of this tutorial.
Once downloaded, extract the files and open the Introduction to UI Elements Begin project in Unity. With the project loaded, open the RW folder using the Project window and take a look at the folder structure:
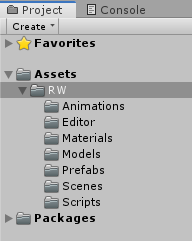
Here’s a quick breakdown of what each folder contains:
- Animations: All the animations and animation controllers for the Preset GameObject.
- Editor: At the moment, just a USS document with some pre-made styles. By the end of the tutorial, it will contain all the editor styles.
- Materials: The default material for the Preset GameObject.
- Scenes: The main game scene.
- Scripts: All the scripts required for the animations and data handling.
- Prefabs: The Preset prefab.
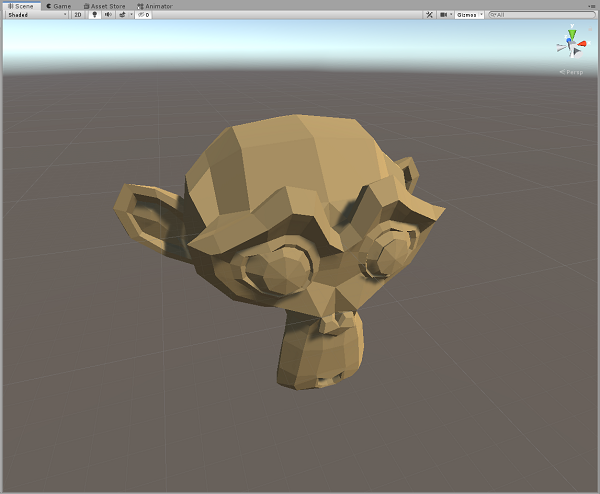
Open the Main Scene in the Scenes folder and look at the Game view. You’ll see a monkey head, which you’ll modify using UI Elements.
Creating an Empty Editor Window
An empty editor window is the blank canvas you’ll start with. You’ll then add UIElements to create layouts and build your custom tools.
In Unity, you need to store all editor-related scripts in a folder named Editor.
Navigate to RW/Editor and select Assets ► Create ► UIElements Editor Window. This will open the UIElements Editor Window Creator. Name the editor window PresetWindow and Confirm.

Within RW/Editor project folder, there will now be four files.
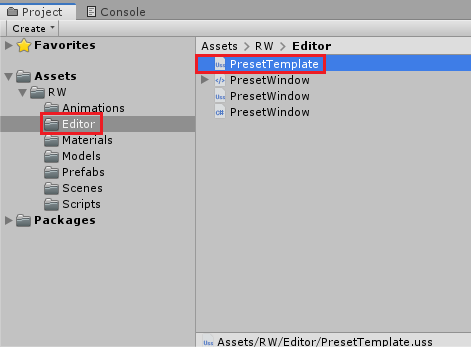
The PresetTemplate.uss file is a pre-made style sheet to simplify the process of styling the editor window.
You may not realize it, but you just created your first editor window! So where is it? Right in front of you! The new editor window should have popped up in the Unity editor. If it didn’t, you can bring it up from Window ► UIElements ► PresetWindow.

Now that you’ve built your first editor window, it’s time to get into some theory.
Understanding Visual Elements
The basic building block of all UIElements is the VisualElement. All elements are either a VisualElement or a sub-class of the VisualElement, making the UI hierarchy a collection of VisualElements parented to each other.
Each editor window has a rootVisualElement property, which represents the top element of the hierarchy. The root has to add a VisualElement as a child for Unity to know about and draw it.
Exploring UXML Documents
The UXML format is unique to Unity, but it takes its cues from other markup languages like HTML, XAML and XML. If you’re familiar with any of those, you’ll probably notice a lot of similarities while working with UXML. If these are foreign to you, take a moment to familiarize yourself with the starter UXML documentation.
Open the PresetWindow.uxml file in the RW/Editor project folder and take a look at the contents. This is the default UXML document attached to the editor window’s rootVisualElement.

The only section of this file you will be modifying is the green highlighted section. Everything else is code that won’t directly affect the layout of the editor window.
Now, take a look at the following line:
<engine:Label text="Hello World! From UXML" />
A simple label VisualElement with some text created that line. The line iteslf consists of two main parts: the type of VisualElement and its attributes.
Analyzing a VisualElement

The type of VisualElement here is a Label, which derives from engine, making it a built in control. This means it has a pre-defined look and functionality with its own custom attributes.
All VisualElements come with a common set of attributes such as the name and class.
The text attribute is unique to labels, but all VisualElements share the following attributes:
- Name: An identifier for the element, which should be unique. The name helps you find the element in USS and C#.
- Class: A space-separated list of identifiers that characterize the element. The class is primarily for assigning styles.
You can create your own VisualElements, but that’s beyond the scope of this tutorial.
Change the text attribute of the label to: I changed the text!. The line should now look like this:
<engine:Label text="I changed the text!" />
Save the UXML file and go to Unity… where you’ll see that nothing’s changed.
To reload UXML changes, you need to close the editor window and reopen it by selecting Window ► UIElements ► PresetWindow.

So far, you’ve only changed one of the text strings, but it’s only going to get more interesting from here!
Exploring the USS Document
CSS is the inspiration behind USS, and many of the selectors and properties are similar. The layout system uses the Yoga Layout Engine.
Open PresetWindow.uss within RW/Editor and look at the contents:
Label {
    font-size: 20px;
    -unity-font-style: bold;
    color: rgb(68, 138, 255);
}
At the moment, this style sheet only affects one label within the editor window, but you’ll change this later in PresetWindow.cs.
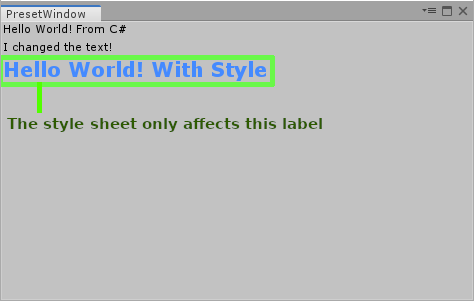
Style sheets can be set to any VisualElement, and they’ll also affect all the children of that VisualElement. If you want to create a universal style sheet, you must assign the style sheet to the rootVisualElement.
Next, you’ll look at a break down of the current contents of the PresetWindow.uss file:
- Label: In this case, this is a type selector. It will apply the style to all VisualElements of type label that are children of the VisualElement the style sheet is on.
- font-size: Affects the label‘s font size.
- -unity-font-style: A custom Unity property that sets the font style of the text. Options include bold, italic and so on.
- color: A text property that modifies the color of the text.