The Navigation Architecture Component Tutorial: Getting Started
In this tutorial, you’ll learn how to use the Navigation Architecture Component, which simplifies the implementation of navigation in Android apps. By Ivan Kušt.
Actions
Open nav_graph.xml and add a new destination for WorkDetailsFragment:
<fragment
  android:id="@+id/workDetailsFragment"
  android:name="com.raywenderlich.android.bookmanstreasure.ui.workdetails.WorkDetailsFragment"
  android:label="work_details_fragment"
  tools:layout="@layout/fragment_work_details">
</fragment>
This will be used to show book details, such as the author name, title, list of editions, etc.
To navigate between destinations, you use actions. Find the fragment with the bookSearchFragment ID, and paste this inside its the fragment tags:
<action
 android:id="@+id/actionBookDetails"
 app:destination="@id/workDetailsFragment" />
You can now navigate to WorkDetailsFragment. The two attributes:
-
android:id: The ID uniquely identifying this action. -
app:destination: The ID of the desired destination.
To ensure the action is triggered, open BookSearchFragment.kt in the ui.booksearch package. Look for the comment:
//TODO implement navigation to Book details
Replace the TODO with:
findNavController().navigate(R.id.actionBookDetails)
At the end of the import section, add the following:
import androidx.navigation.fragment.findNavController
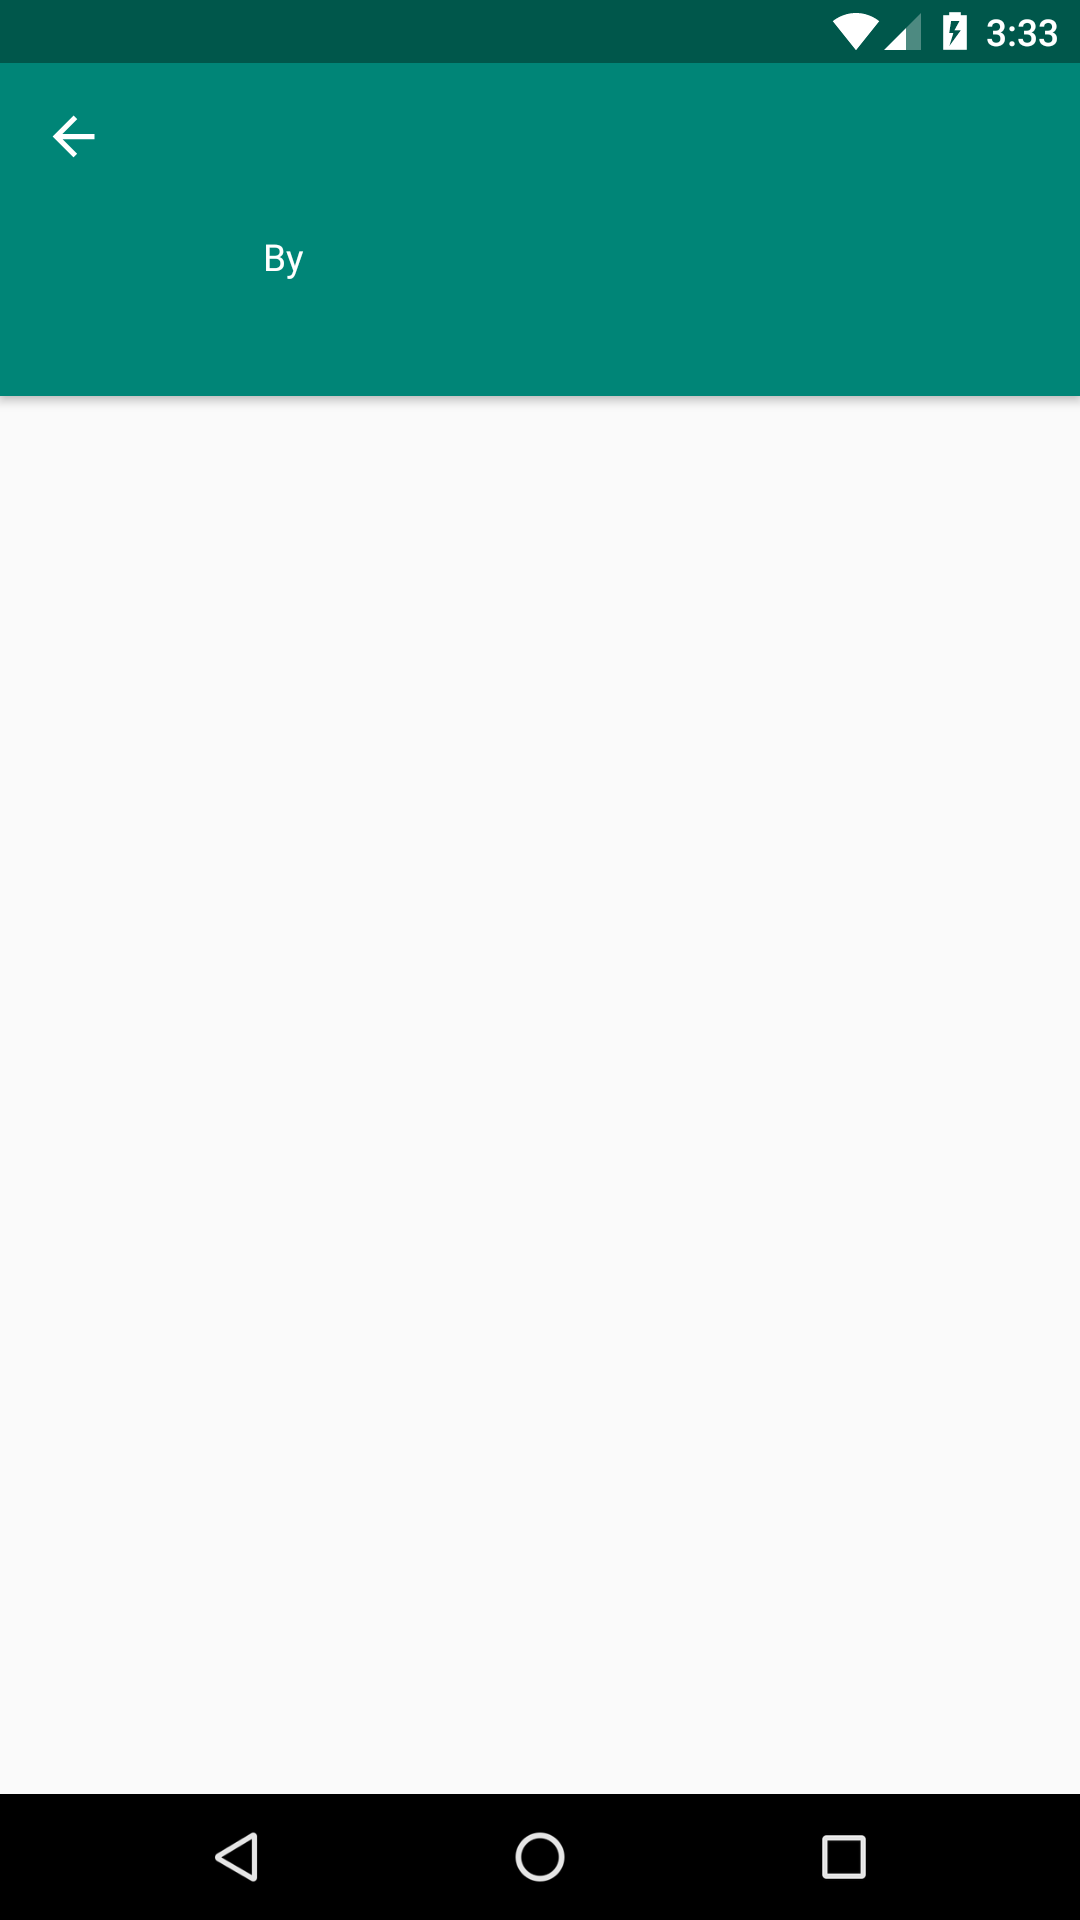
Build and run. Search for a book using a generic word like “after” and tap on one of the results. You’ll get a detail page that is currently blank:
You’ll learn how to pass arguments between destinations shortly. First, add more destinations using the Navigation editor.
Navigation Editor
So far, you’ve added destinations and actions using XML. Now, you’ll get familiar with the Navigation editor. Open the nav_graph.xml file and click on the Design tab at the bottom of the editor.

There are three sections in the editor:
- Destinations list
- Graph Editor that shows your navigation graph
- Attributes Editor for selected destination or action
Add another destination to the graph. Click on the icon with the green + sign at the top of the graph editor.
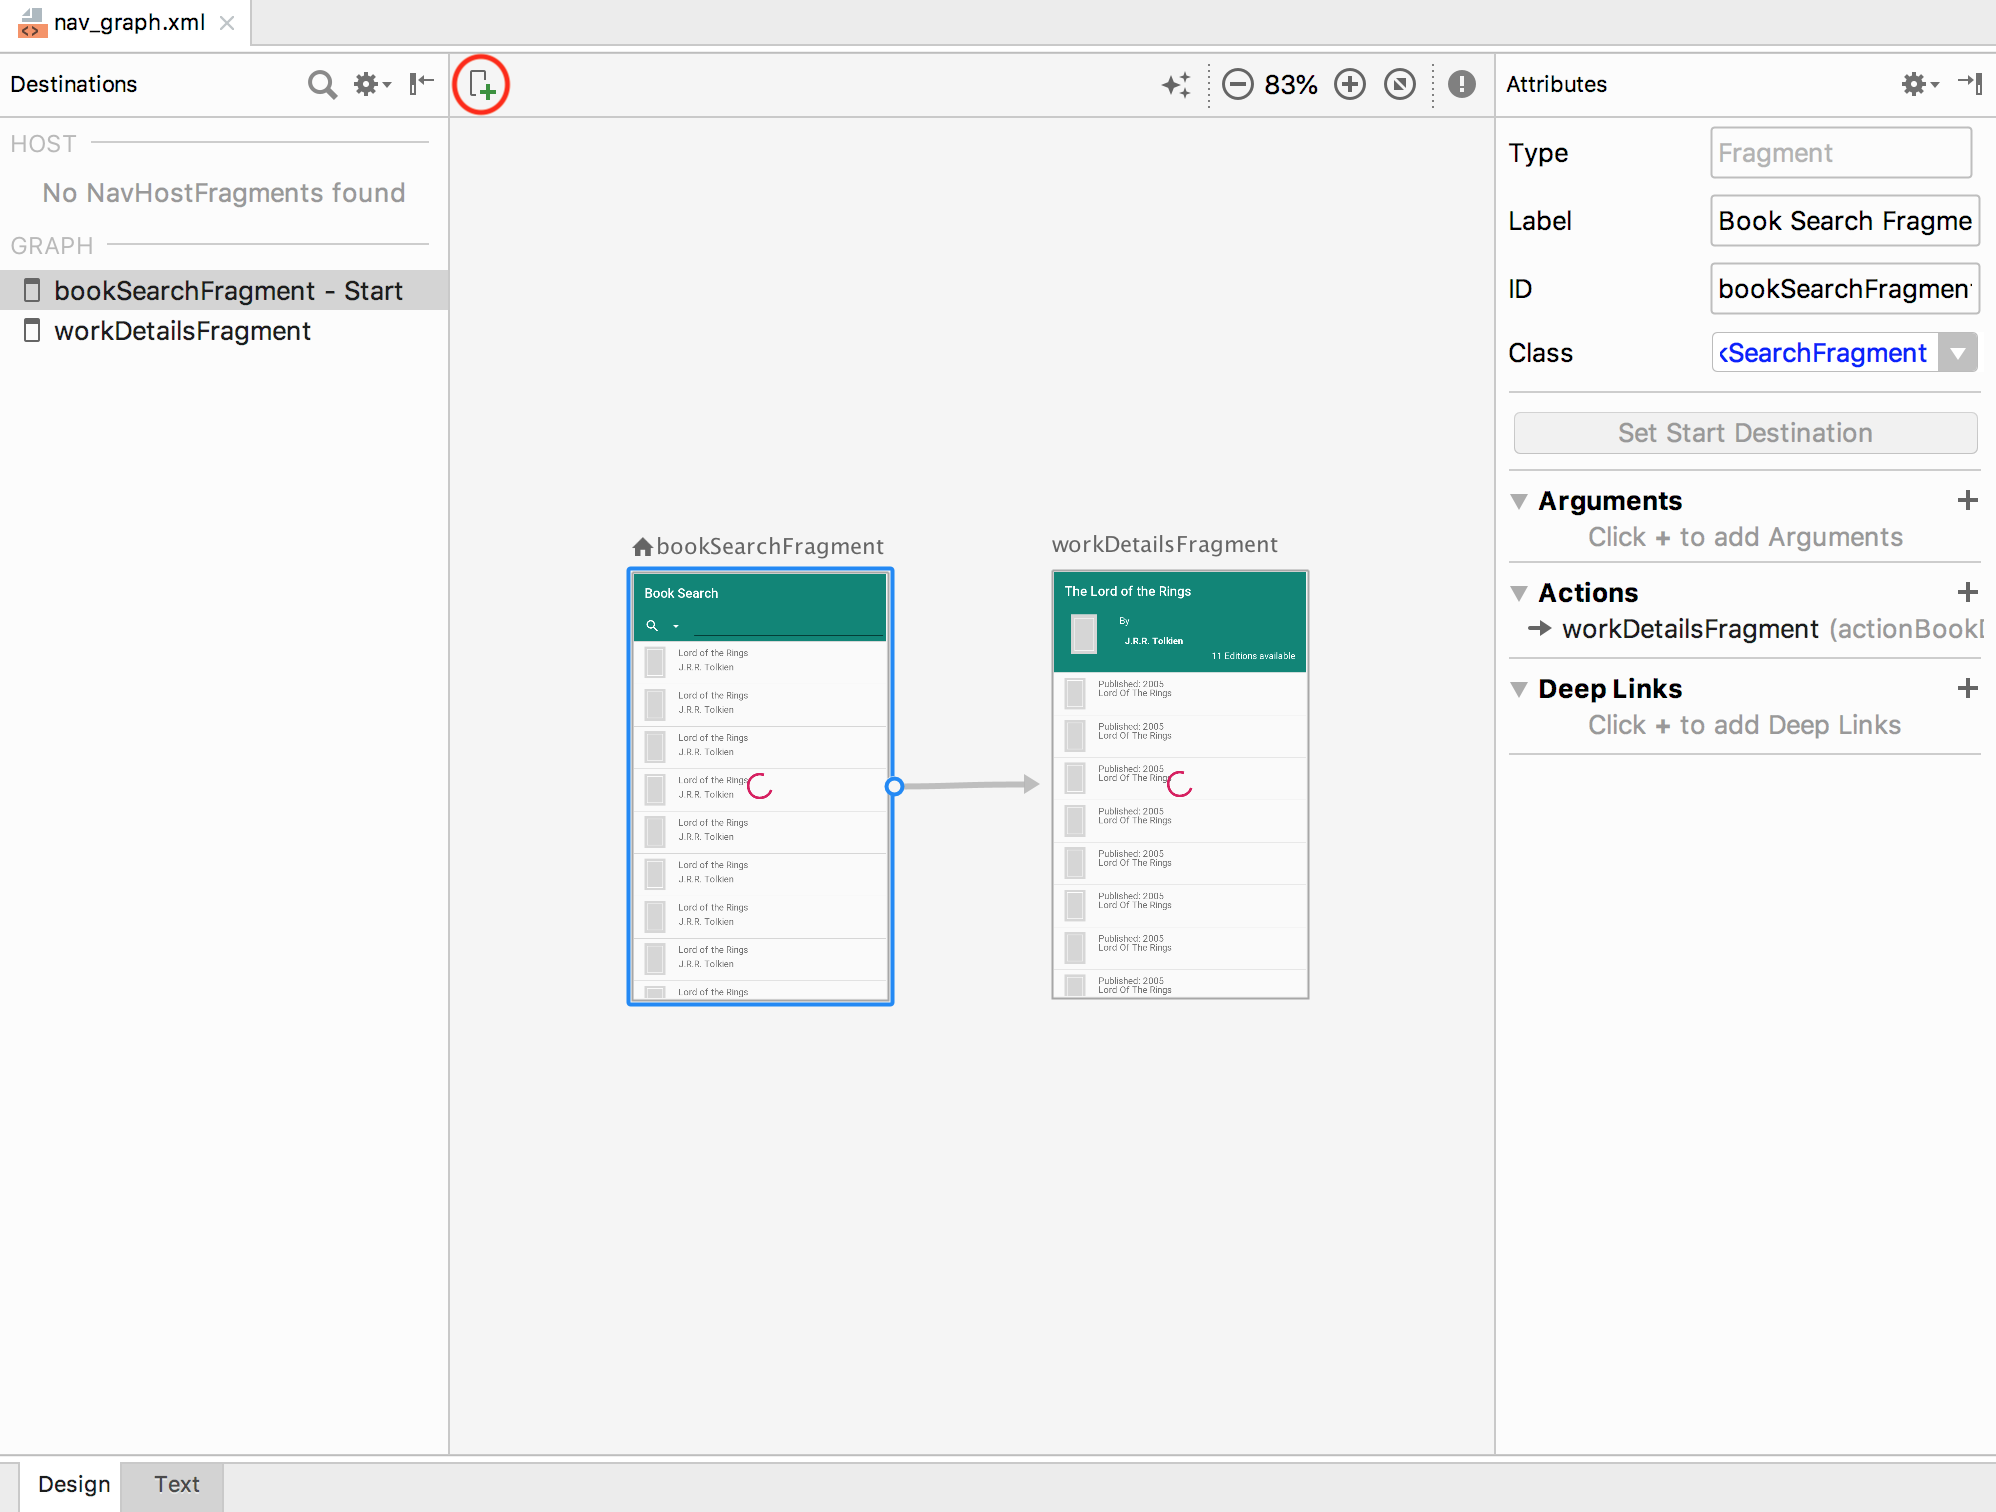
Start typing favorites and select FavoritesFragment from the list.
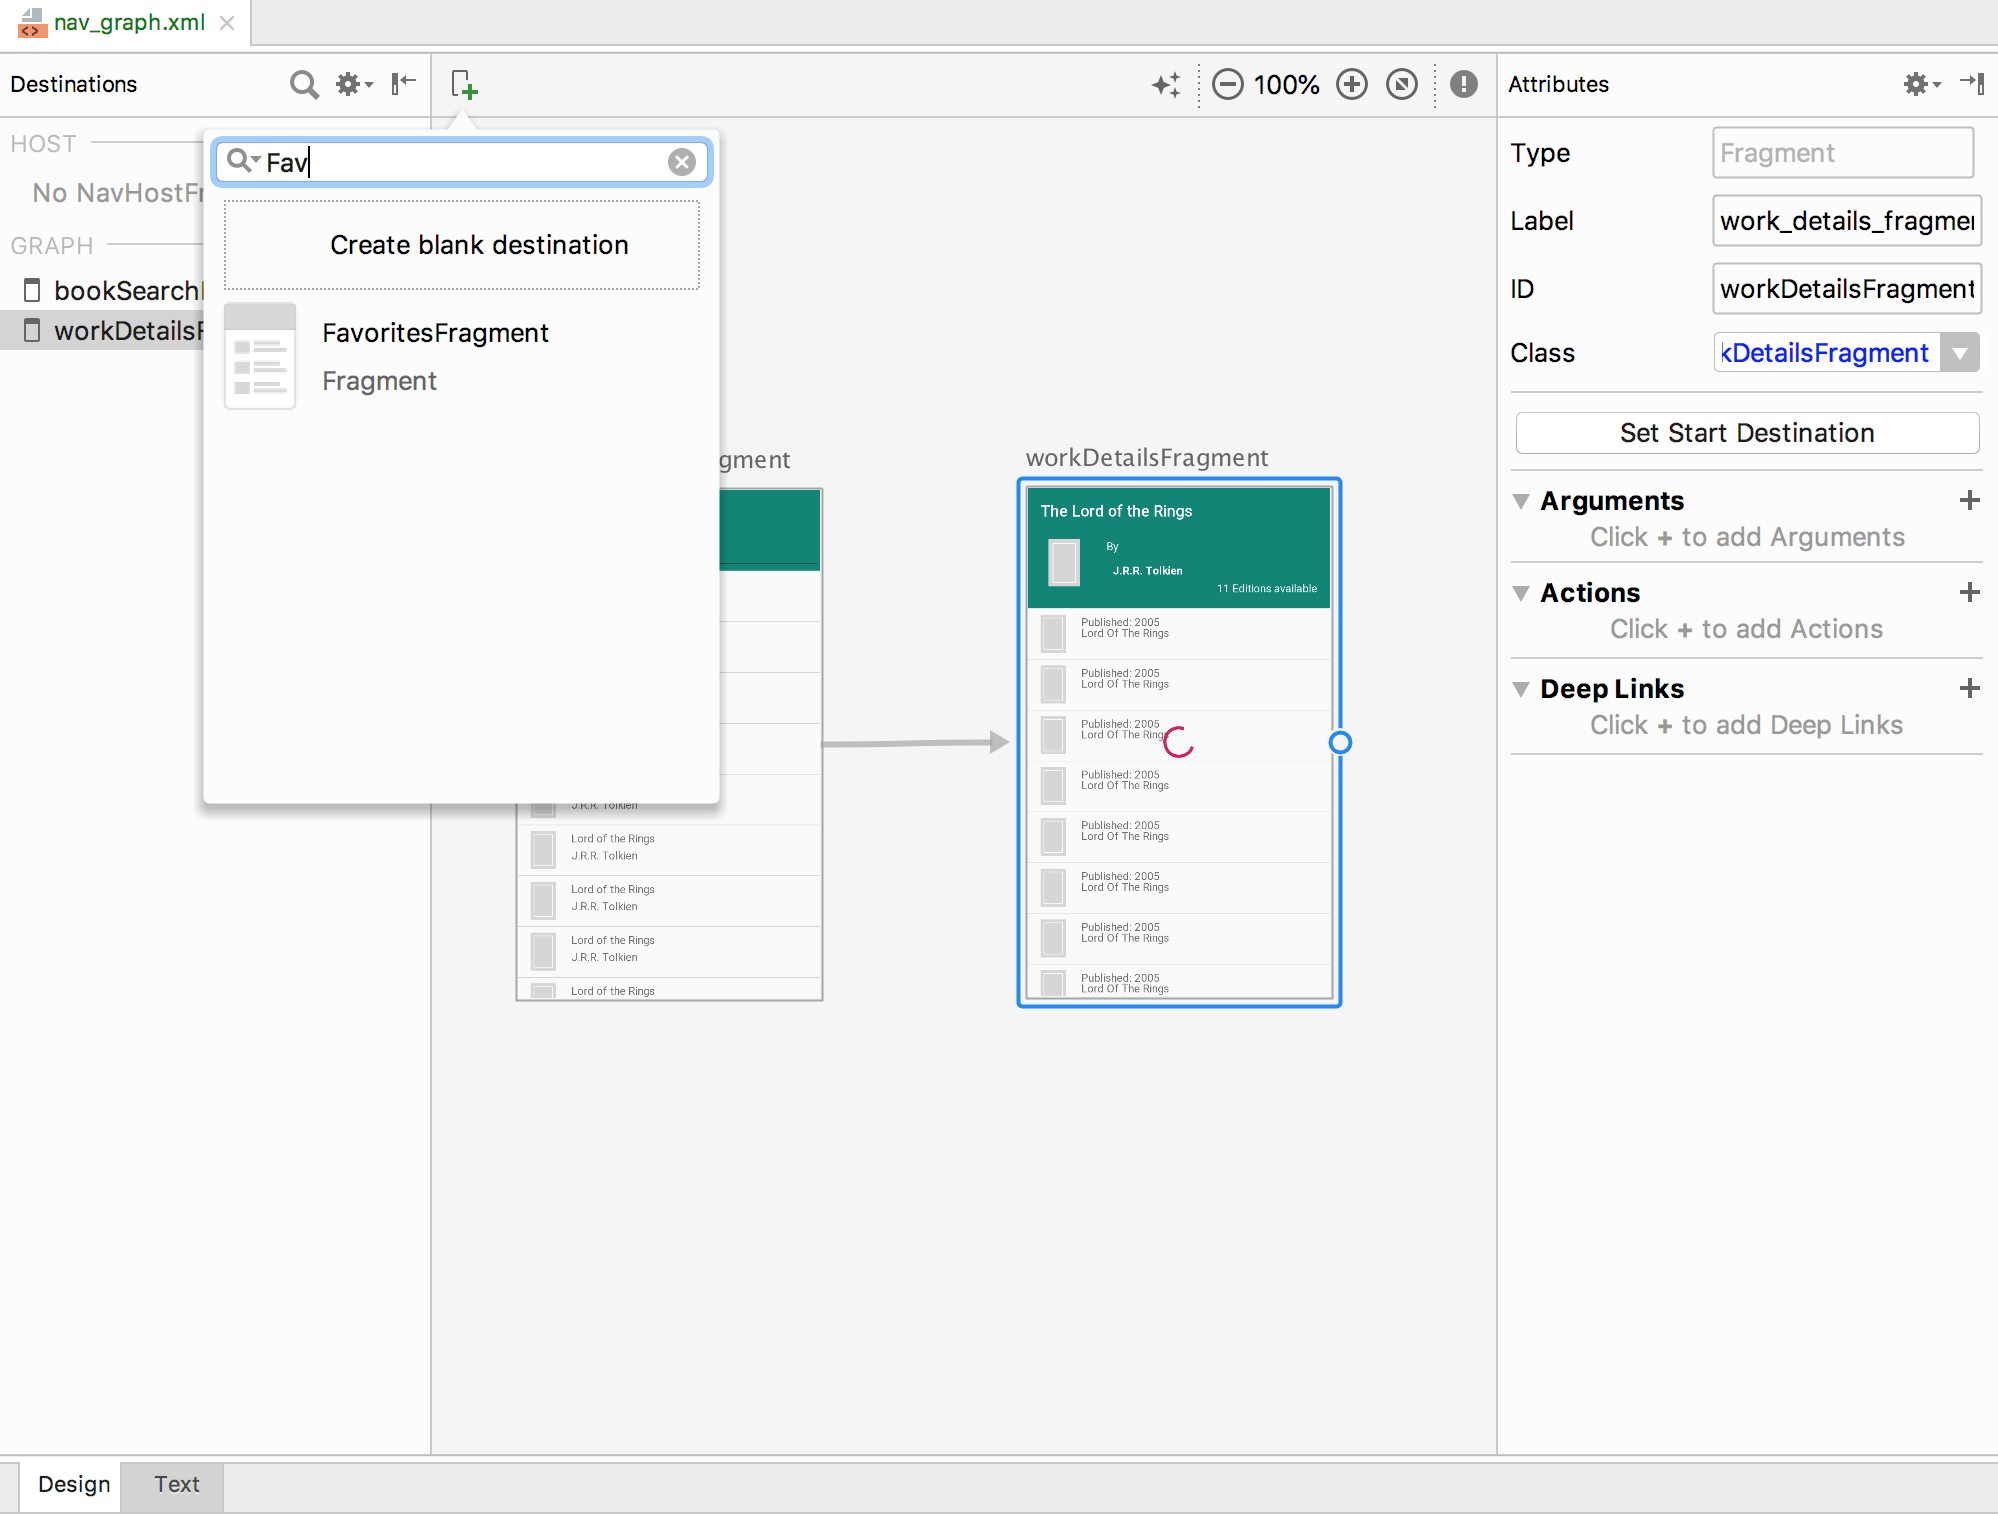
You can edit the properties of the new destination using the Attributes editor. Set the ID to favoritesFragment.

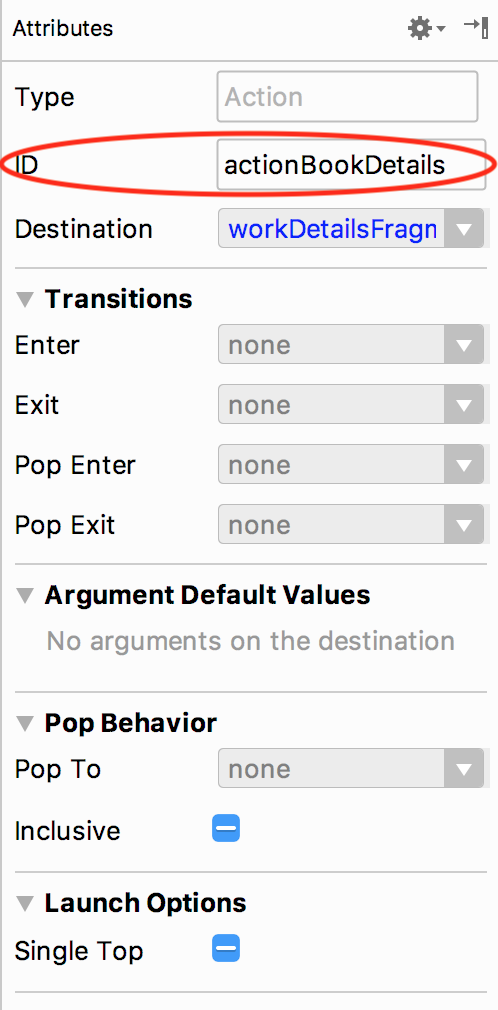
In the editor, hover your mouse over the dot on the middle of the right side of favoritesFragment. Then, press and hold, and drag the line to the workDetailsFragment.

This creates a new action, navigating from FavoritesFragment to WorkDetailsFragment. Make sure the action (the line with the arrow) is selected in the editor and set the action ID to actionBookDetails.
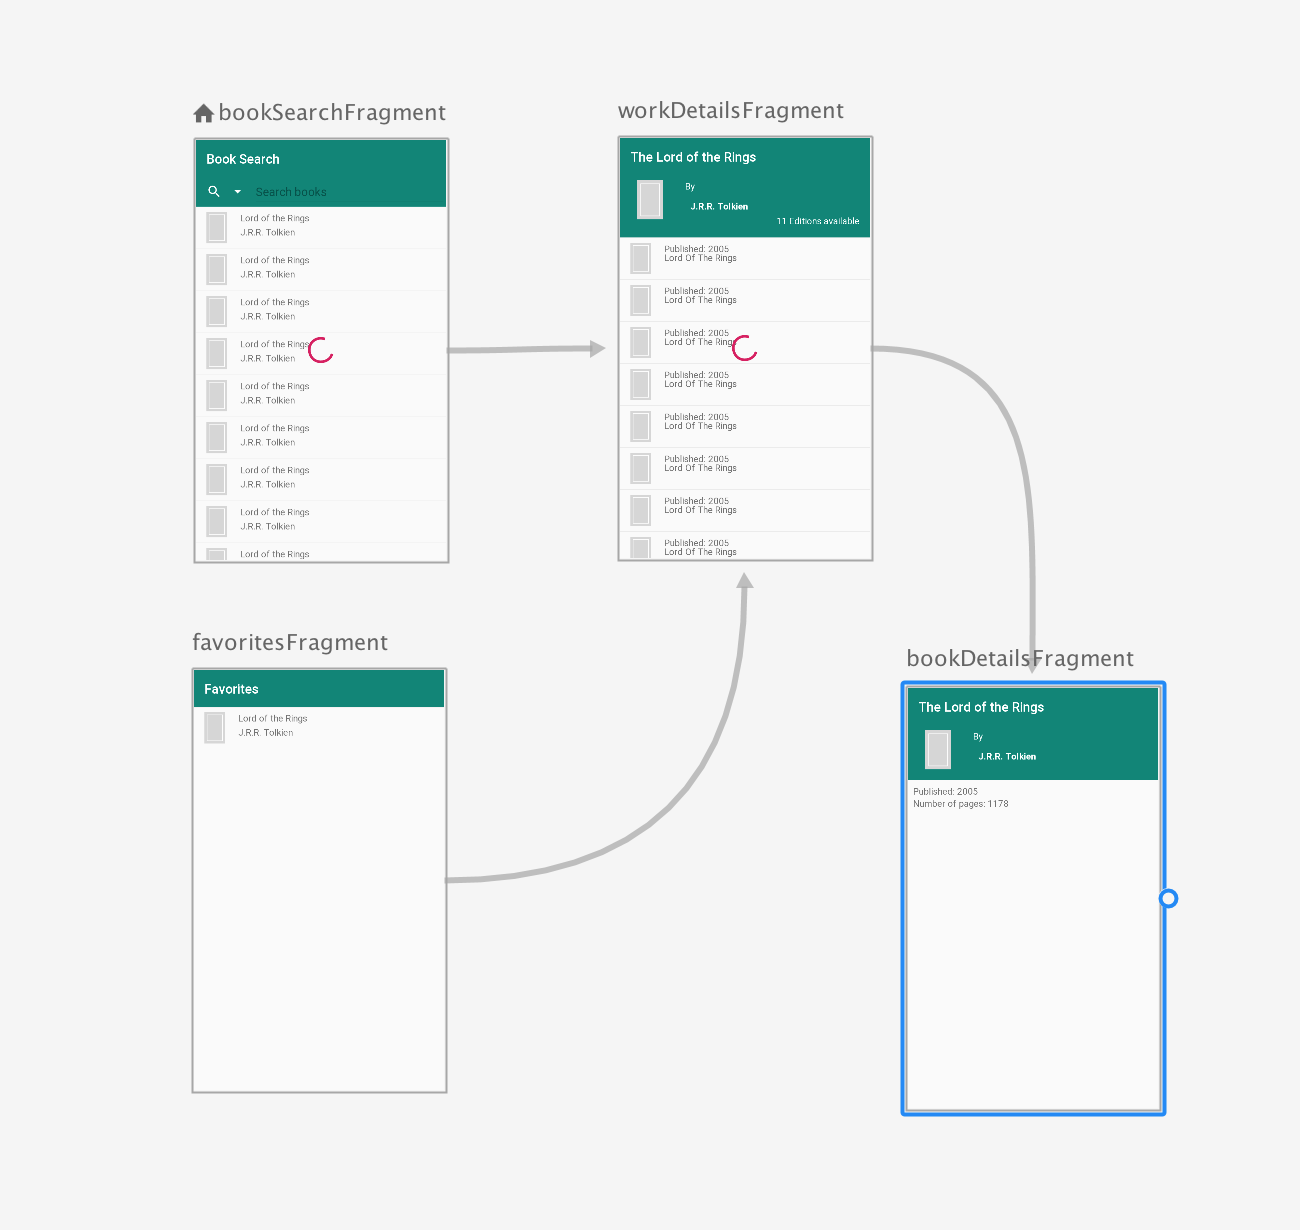
Now, add another destination, BookDetailsFragment, following the same steps as above. Then, create an action that navigates from workDetailFragment to bookDetailsFragment. Set its ID to actionShowEdition. Your nav_graph.xml should look like this:
Open WorkDetailsFragment.kt in the ui.and replace:
//TODO Implement navigation to edition details
With:
findNavController().navigate(R.id.actionShowEdition)
And add the import statement, if necessary:
import androidx.navigation.fragment.findNavController
Build and run the app to make sure there are no errors.
Navigating From a Menu
If you’ve toggled the navigation drawer, you might have noticed the Favorites menu item.

You can use the Navigation architecture component to handle menu actions as well. Open MainActivity.kt and replace:
//TODO setup Navigation Drawer menu item actions
With:
drawerLayout.navView.setupWithNavController(
  navHostFragment.findNavController())
Add the following at the end of the import list:
import androidx.navigation.fragment.findNavController
import androidx.navigation.ui.setupWithNavController
import kotlinx.android.synthetic.main.activity_main.view.*
The Navigation controller assumes the menu IDs are the same as your destination IDs and therefore knows what to do when an item is selected.
Build and run the app. Open the navigation drawer and tap on Favorites:

How easy was that? You can return back to the Book Search using either the back button or the navigation drawer.
Passing Data and Animating Actions
Passing Data Between Destinations
You often need to pass data between your destinations. Remember @+id/actionBookDetails you added earlier?
Currently, it opens the correct screen but shows no details for a selected book. You'll fix this, now.
Go back to the BookSearchFragment and find the call to findNavController().navigate(R.id.actionBookDetails). Replace it with:
findNavController().navigate(
  R.id.actionBookDetails,
  WorkDetailsViewModel.createArguments(it)
)
Using a helper method, you passed a Bundle instance as a second argument. Its content will be used to construct the destination — the WorkDetailsFragment. You might need to add the following import:
import com.raywenderlich.android.bookmanstreasure.ui.workdetails.WorkDetailsViewModel
it argument is the data class Book, containing general book information. it is the implicit name within a lambda expression with only one parameter. Check the documentation to learn more.Build and run the app. Search for your favorite book and tap on a search result:

Now, follow the same set of steps in WorkDetailsFragment. Find:
findNavController().navigate(R.id.actionShowEdition)
Replace it with:
findNavController().navigate(
  R.id.actionShowEdition,
  BookDetailsViewModel.createArguments(it)
)
Add the import if you need to:
import com.raywenderlich.android.bookmanstreasure.ui.bookdetails.BookDetailsViewModel
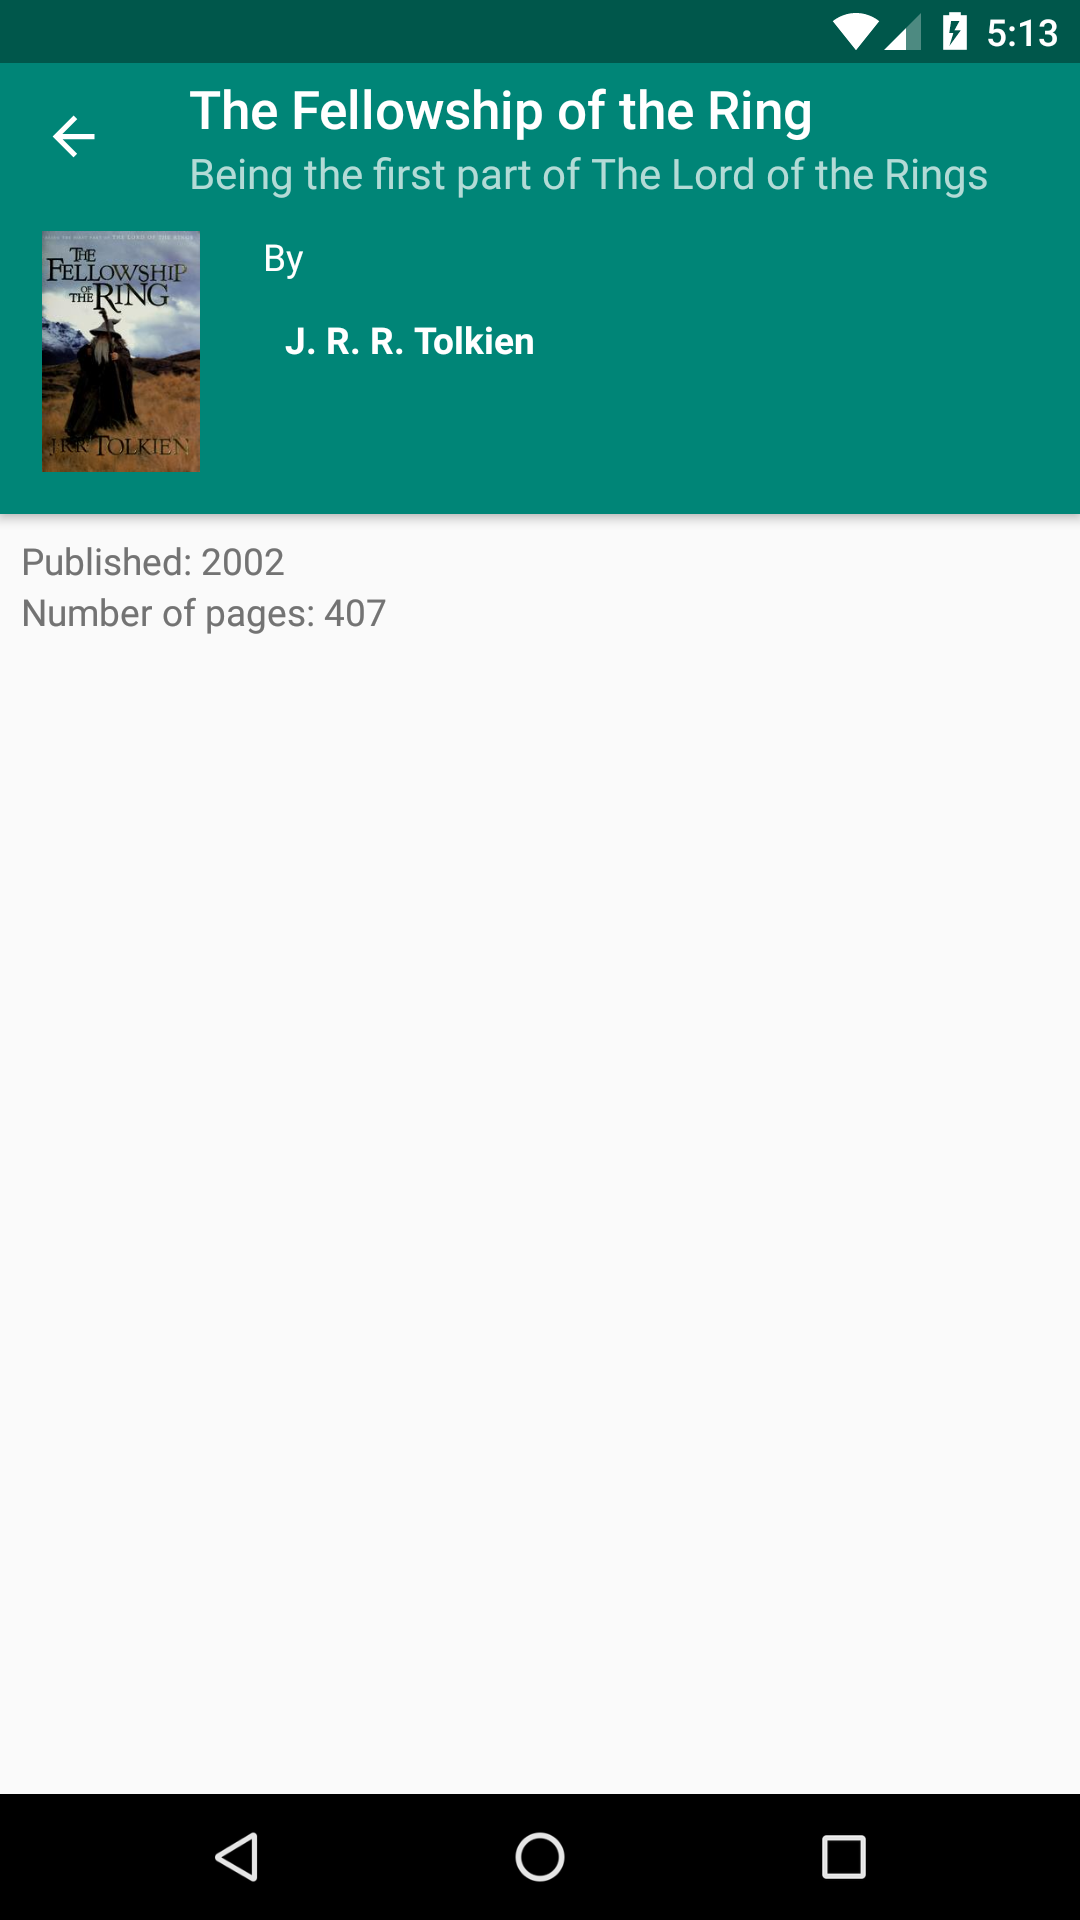
Build and run the app. Search for a book, check its details and select an edition. You should see the edition details.
Finally, take care of the FavoritesFragment. Look for:
//TODO implement navigation to Work details
Replace it with:
findNavController().navigate(
  R.id.actionBookDetails,
  WorkDetailsViewModel.createArguments(it)
)
As before, you might need to add the import statements:
import androidx.navigation.fragment.findNavController
import com.raywenderlich.android.bookmanstreasure.ui.workdetails.WorkDetailsViewModel
Adding Transitions
You can add custom animations to actions using attributes in the action tag. Open up nav_graph.xml. Select the Text tab at the bottom, and add the following attributes to the actions with ID @+id/actionBookDetails (there are two such actions):
app:enterAnim="@anim/slide_in_right"
app:exitAnim="@anim/slide_out_left"
app:popEnterAnim="@anim/slide_in_left"
app:popExitAnim="@anim/slide_out_right"
Each of the new tags defines a custom transition for one of the cases:
-
enterAnim: Resource ID of the animation to use for the incoming destination. -
exitAnim: Resource ID of the animation to use for the outgoing destination. -
popEnterAnim: Resource ID of the animation to use for the incoming destination when popping the backstack. -
popExitAnim: Resource ID of the animation to use for the outgoing destination when popping the backstack.
Build and run the app. Search for a book, click on one of the results and see the animation in action.
Types of Destinations
The Navigation architecture component supports Activities and Fragments out-of-the-box, but you can also add custom types.
Adding New Destination Types
Check the com.raywenderlich.android.bookmanstreasure.ui.authordetails package. The AuthorDetailsDialog class can show the author details. You'll put it to use and add support for DialogFragment destinations.
To add a custom destination, you have to implement the Navigator interface. You pass it to the NavigationController when initializing the navigation graph.
First, create a new package at the root level called destinations, by clicking on the com.raywenderlich.android.bookmanstreasure package in your project explorer, then press command+N (or File ▸ New) and select Package.

Type "destinations" in the dialog and click OK.

Click on the new package then press command+N (or File ▸ New) and select Kotlin File/Class.

Under name, enter AuthorDetailsNavigator and click OK.

Add the following code in the new file:
import android.os.Bundle
import androidx.navigation.NavDestination
import androidx.navigation.NavOptions
import androidx.navigation.Navigator

// 1
@Navigator.Name("author")
class AuthorDetailsNavigator : Navigator<AuthorDetailsNavigator.Destination>() {

  // 2
  override fun navigate(destination: Destination, args: Bundle?, navOptions: NavOptions?) {}

  // 3
  override fun createDestination(): Destination {
    return Destination(this)
  }

  // 4
  override fun popBackStack(): Boolean {
    return false
  }

  // 5
  class Destination(authorDetailsNavigator: AuthorDetailsNavigator) :
      NavDestination(authorDetailsNavigator)
}
Going over this step by step:
- Here, you declare the name of the tags that you will use for your custom destinations using the
@Navigatorannotation. The name is what you will add to the nav_graph.xml file the same way as you did for fragment destinations. You also extend theNavigatorabstract class. -
navigate()is theNavigatorfunction that performs the navigation to your destination. - This is the function that instantiates your type of destination.
- This function navigates back through the back stack. You can ignore it in this case and return
false. - This nested class holds the data for your custom destination. Its task is to parse all attributes in your destination tag and store them.
Adjust the AuthorDetailsNavigator constructor to take a FragmentManager parameter:
class AuthorDetailsNavigator(
    private val manager: FragmentManager
) : Navigator<AuthorDetailsNavigator.Destination>() {
Add the import statement for the FragmentManager:
import android.support.v4.app.FragmentManager
Next, replace the empty navigate() function with:
override fun navigate(destination: Destination, args: Bundle?, navOptions: NavOptions?) {
  val dialog = AuthorDetailsDialog()
  dialog.arguments = args
  dialog.show(manager, AuthorDetailsDialog.TAG)
}
Import the AuthorDetailsDialog, if required:
import com.raywenderlich.android.bookmanstreasure.ui.authordetails.AuthorDetailsDialog
The function creates a new instance of the AuthorDetailsDialog, sets the Bundle as the dialog arguments and shows it using the FragmentManager.
You now need to tell the Navigation architecture component about your custom destination. Open the MainActivity class and replace
//TODO initialize navigation graph
with the following:
val destination = AuthorDetailsNavigator(navHostFragment.childFragmentManager)
navHostFragment.findNavController().navigatorProvider.addNavigator(destination)

val inflater = navHostFragment.findNavController().navInflater
val graph = inflater.inflate(R.navigation.nav_graph)
navHostFragment.findNavController().graph = graph
You might also need an import statement:
import com.raywenderlich.android.bookmanstreasure.destinations.AuthorDetailsNavigator
In these additions to MainActivity, aside from adding your custom destination, you also inflate the nav_graph.xml file yourself. This ensures the custom author attribute name is recognized.
Define an author details destination in nav_graph.xml:
<author
  android:id="@+id/authorDetails" />
Next, add the following action for the @+id/workDetailsFragment destination:
<action
    android:id="@+id/actionShowAuthor"
    app:destination="@id/authorDetails" />
Open WorkDetailsFragment and replace:
//TODO implement navigation to Author details
With:
findNavController().navigate(
  R.id.actionShowAuthor,
  AuthorDetailsViewModel.createArguments(it)
)
Add the import statement, too:
import com.raywenderlich.android.bookmanstreasure.ui.authordetails.AuthorDetailsViewModel
Finally, open activity_main.xml and remove the app:navGraph="@navigation/nav_graph" attribute on the NavHostFragment fragment tag. If you don't, the app will crash.
Build and run the app. Search for a book, open its details and tap on the author name. If a dialog opens, you're winning!
