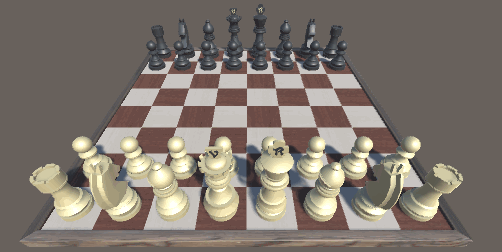
How to Make a Chess Game with Unity
Not every successful game involves shooting aliens or saving the world. Board games, and chess, in particular, have a history that spans thousands of years. In this tutorial, you’ll build a 3D chess game in Unity. By Brian Broom.
Execute the Move
Add this section below Reference Point 2, inside the if statement checking the mouse button:
if (!moveLocations.Contains(gridPoint))
{
    return;
}
If the player clicks on a tile that isn’t a valid move, exit from this function.
Finally, in MoveSelector.cs, add this code to the end of ExitState:
foreach (GameObject highlight in locationHighlights)
{
    Destroy(highlight);
}
At this point, the player has selected a move so you can remove the overlay objects.

Whew! Those were a lot of code changes just to get the pawns to move. Now that you’ve done all the hard work, it’ll be easy to move the other pieces.
Next Player
It’s not much of a game if only one side gets to move. It’s time to fix that!
To let both players play, you’ll have to figure out how to switch between players and where to add the code.
Since GameManager is responsible for all of the game rules, it makes the most sense to put the switching code there.
The actual switch is straightforward. There are variables for the current and other player in GameManager, so you just need to swap those values.
The trickier question is: where do you call the swap?
A player’s turn is over once they have moved a piece. ExitState in MoveSelector is called after the selected piece is moved, so that seems like the right place to do the switch.
In GameManager.cs, add the following method to the end of the class:
public void NextPlayer()
{
    Player tempPlayer = currentPlayer;
    currentPlayer = otherPlayer;
    otherPlayer = tempPlayer;
}
Swapping two values requires a third variable to act as a placeholder; otherwise, you’d overwrite one of the values before it can be copied.
Switch over to MoveSelector.cs and add the following line to ExitState, right before the call to EnterState:
GameManager.instance.NextPlayer();
That’s it! ExitState and EnterState already take care of their own cleanup.
Enter play mode, and you can now move pieces for both sides. You’re getting close to a real game at this point

Capturing Pieces
Capturing pieces is an important part of chess. As the saying goes, “It’s all fun and games until someone loses a Knight”.
Since the game rules go in GameManager, open that and add the following method:
public void CapturePieceAt(Vector2Int gridPoint)
{
    GameObject pieceToCapture = PieceAtGrid(gridPoint);
    currentPlayer.capturedPieces.Add(pieceToCapture);
    pieces[gridPoint.x, gridPoint.y] = null;
    Destroy(pieceToCapture);
}
Here, GameManager looks up which piece is at the target location. This piece is added to the list of captured pieces for the current player. Next, it’s cleared from GameManager‘s record of the board tiles and GameObject is destroyed, which removes it from the scene.
To capture a piece, you move on top of it. So the code to call this step should go in MoveSelector.cs.
In Update, find the Reference Point 3 comment and replace it with the following statement:
else
{
    GameManager.instance.CapturePieceAt(gridPoint);
    GameManager.instance.Move(movingPiece, gridPoint);
}
The previous if statement checked to see if there was a piece at the target location. Since the earlier move generation filtered out tiles with friendly pieces, a tile that contains a piece must be an enemy piece.
After the enemy piece is gone, the selected piece can move in.
Click on play and move the pawns around until you can capture one.
I am the Queen, you captured my pawn, prepare to die.
I am the Queen, you captured my pawn, prepare to die.
Ending the Game
A chess game ends when a player captures the opposing King. When you capture a piece, check to see if it’s a King. If so, the game is over.
But how do you stop the game? One way is to remove both the TileSelector and MoveSelector scripts on the board.
In GameManager.cs, in CapturePieceAt, add the following lines before you destroy the captured piece:
if (pieceToCapture.GetComponent<Piece>().type == PieceType.King)
{
    Debug.Log(currentPlayer.name + " wins!");
    Destroy(board.GetComponent<TileSelector>());
    Destroy(board.GetComponent<MoveSelector>());
}
It’s not enough to disable these components. The next ExitState and EnterState calls will only re-enable one of them, which will keep the game going.
Destroy is not just for GameObject classes; it can be used to remove a component attached to an object as well.
Hit play. Manouever a pawn and take the enemy king. You’ll see a win message printed to the Unity console.
As a personal challenge, you can add UI elements to display a “Game Over” message or transition back to a menu screen.

Now it’s time to bring out the big guns and move the more powerful pieces!
Special Movement
Piece and its specific subclasses are an excellent way to encapsulate the special movement rules.
You can use techniques from Pawn to add movement to some of the other pieces. Pieces that move a single space in different directions, such as the King and Knight, are set up in the same way. See if you can implement those movement rules.
Have a look at the finished project code if you need a hint.
Moving Multiple Spaces
Pieces that can move multiple spaces in one direction are more challenging. These are the Bishop, Rook and Queen pieces. The Bishop is easier to demonstrate, so let’s start with that one.
Piece has premade lists of the directions the Bishop and Rook can move as a starting point. These are all directions from the current tile location of the piece.
Open Bishop.cs, and replace MoveLocations with this:
public override List<Vector2Int> MoveLocations(Vector2Int gridPoint)
{
    List<Vector2Int> locations = new List<Vector2Int>();

    foreach (Vector2Int dir in BishopDirections)
    {
        for (int i = 1; i < 8; i++)
        {
            Vector2Int nextGridPoint = new Vector2Int(gridPoint.x + i * dir.x, gridPoint.y + i * dir.y);
            locations.Add(nextGridPoint);
            if (GameManager.instance.PieceAtGrid(nextGridPoint))
            {
                break;
            }
        }
    }

    return locations;
}
The foreach loops over each direction. For each direction, there is a second loop that generates enough new locations to move the piece off the board. Since the list of locations will be filtered for off-board locations, you just need enough to make sure you don't miss any tiles.
In each step, generate a GridPoint for the location and add it to the list. Then check to see if that location currently has a piece. If it does, break out of the inner loop to go to the next direction.
The break is included because an existing piece will block further movement. Again, later in the chain, you filter out locations with friendly pieces, so you don't have to worry about that here.
For chess, this only matters for pawns, but other games might require that distinction.
For chess, this only matters for pawns, but other games might require that distinction.
That's it! Hit play mode and try it out.
