Testing REST APIs Using MockWebServer
Learn how to mock a REST API with MockWebServer and easily test your business logic using Espresso to check how your UI handle success or error responses. By Subhrajyoti Sen.
Testing a Successful Case
For your first test case, you’ll make MockWebServer return the response from the JSON file. You can tell MockWebServer what to send as a response by creating a dispatcher.
Add the following method to the MainActivityTest.kt class and import dependencies:
@Test
fun testSuccessfulResponse() {
  mockWebServer.dispatcher = object : Dispatcher() {
    override fun dispatch(request: RecordedRequest): MockResponse {
      return MockResponse()
          .setResponseCode(200)
      .setBody(FileReader.readStringFromFile("success_response.json"))
    }
  }
}
Here’s what’s happening with this code:
@Test tells Espresso the method contains a test. MockResponse() creates a mock response the mock server will return. setResponseCode() specifies the response code.
Because you’re mocking a successful response, the code is 200. setBody() contains the body of the response. In this case, you use FileReader to convert the JSON response into a String instance.
With the mock server set up, you need to write the UI test to run to verify the successful response.
In this case, the MockWebServer returns the response almost immediately, and you might not need an idling resource for the test to work. But it’s recommended to use an idling resource when a test depends on an asynchronous operation. Ensuring the test conditions are checked only after the asynchronous operation is completed reduces test flakiness.
Add the following at the end of testSuccessfulResponse() and import dependencies:
val scenario = launchActivity<MainActivity>()

onView(withId(R.id.progress_bar))
 .check(matches(withEffectiveVisibility(ViewMatchers.Visibility.GONE)))
onView(withId(R.id.meme_recyclerview))
 .check(matches(withEffectiveVisibility(ViewMatchers.Visibility.VISIBLE)))
onView(withId(R.id.textview))
  .check(matches(withEffectiveVisibility(ViewMatchers.Visibility.GONE)))

scenario.close()
The code above launches the Activity and verifies the that following conditions are met after a successful response:
- The view with
R.id.progress_barhas a visibility ofView.GONE. - The one with
R.id.meme_recyclerviewhas a visibility ofView.VISIBLE. - The view with
R.id.textviewhas a visibility ofView.GONE.
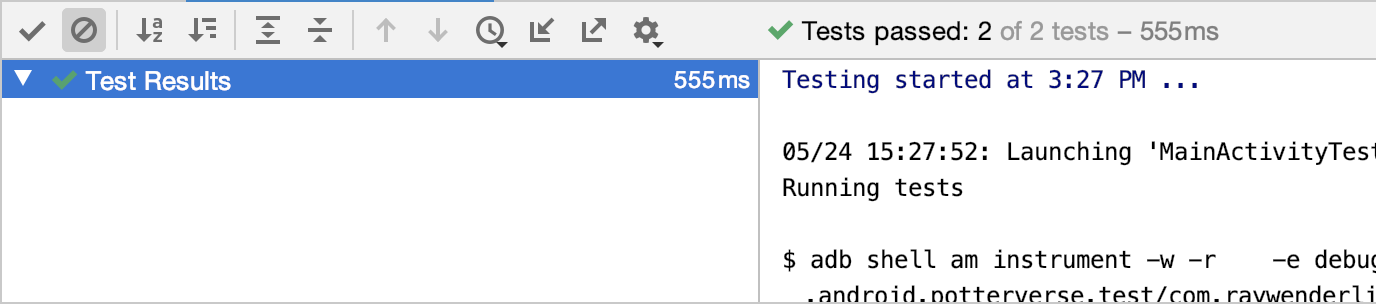
Run the test by clicking the Play icon next to the class definition and then selecting Run MainActivityTest.
Once the app launches on your device, Android Studio shows you a green check mark indicating the successful test.

Now, it’s time to see what happens when you get a failed response.
Testing a Failed Response
For this test, you’ll create a response that returns after five seconds. You’ve configured the app to request timeout after three seconds so it will treat a five-second response as a failure.
Add the following method to MainActivityTest.kt and import dependencies:
@Test
fun testFailedResponse() {
  mockWebServer.dispatcher = object : Dispatcher() {
    override fun dispatch(request: RecordedRequest): MockResponse {
      return MockResponse()
        .setResponseCode(200)
        .setBody(FileReader.readStringFromFile("success_response.json"))
        .throttleBody(1024, 5, TimeUnit.SECONDS)
    }
  }

  val scenario = launchActivity<MainActivity>()

  onView(withId(R.id.progress_bar))
    .check(matches(withEffectiveVisibility(ViewMatchers.Visibility.GONE)))
  onView(withId(R.id.meme_recyclerview))
    .check(matches(withEffectiveVisibility(ViewMatchers.Visibility.GONE)))
  onView(withId(R.id.textview))
    .check(matches(withEffectiveVisibility(ViewMatchers.Visibility.VISIBLE)))
  onView(withId(R.id.textview))
    .check(matches(withText(R.string.something_went_wrong)))

  scenario.close()
}
In the code above, throttleBody() throttles the response by five seconds. This test verifies one extra thing: It checks whether the view with ID R.id.textview contains the text that the string resource R.string.something_went_wrong refers to.
Run MainActivityTest. You’ll see that both tests pass.
Congratulations! You’ve now set up tests to check your app’s success and failure responses on a mock web server.
Where to Go From Here?
Download the final project by using the Download Materials button at the top or bottom of this tutorial.
In this tutorial, you’ve set up MockWebServer, configured it to mock API calls from a remote server and written UI tests to verify how an app functions.
As a further enhancement, make the app display a text saying Oops! Seems like a server error when the API returns a status code of 500. Configure MockWebServer to return a 500 status code and write a UI test to verify that the app displays the text.
To learn more about MockWebServer, refer to the documentation on the MockWebServer repository.
Hopefully, you’ve enjoyed this tutorial! If you have any questions or ideas to share, please join the forum discussion below.