How to Make a Game Like Jetpack Joyride using LevelHelper and SpriteHelper [Cocos2D Edition] – Part 3
This is a post by special contributor Bogdan Vladu, an iOS application developer and aspiring game developer living in Bucharest, Romania. Update 1/9/2013: This tutorial is now deprecated. We now have a newer, updated version of this tutorial, check it out! Welcome back to our Jetpack Joyride tutorial series! In this tutorial series, we are […] By .
Sign up/Sign in
With a free Kodeco account you can download source code, track your progress, bookmark, personalise your learner profile and more!
Create accountAlready a member of Kodeco? Sign in
Sign up/Sign in
With a free Kodeco account you can download source code, track your progress, bookmark, personalise your learner profile and more!
Create accountAlready a member of Kodeco? Sign in
Contents
How to Make a Game Like Jetpack Joyride using LevelHelper and SpriteHelper [Cocos2D Edition] – Part 3
25 mins
This is a post by special contributor Bogdan Vladu, an iOS application developer and aspiring game developer living in Bucharest, Romania.
Update 1/9/2013: This tutorial is now deprecated. We now have a newer, updated version of this tutorial, check it out!
Welcome back to our Jetpack Joyride tutorial series! In this tutorial series, we are making a game similar to Jetpack Joyride using Cocos2D and Box2D, and the LevelHelper and SpriteHelper tools.
So far, we’ve got a mouse that can use his jetpack to fly through a scrolling level, complete with animations and endless scrolling. Check out how we did it in Part One and Part Two.
I hope you enjoyed the first two parts, but, psst… Part Three is where we get to the really fun stuff!
In this part of the series, we’ll make our game fully capable of handling collisions.
In other words, by the end of this part we’ll be able to reward and kill the mouse! :]
We’ll also add sounds, more sophisticated animations, and we’ll iron-out some problems with game play.
So what are you waiting for – time to give our mouse the ride of his life!
Getting Started
To continue with this part of the tutorial series, first make sure that you have the complete project from Part Two, available here.
You will also need to download this sound pack, which we will be using later on.
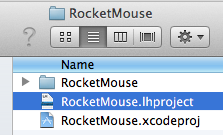
To open our project in LevelHelper, navigate to your last project folder in Finder and double click on the file RocketMouse.lhproject.
LevelHelper should open the last level we were working on. If for some reason LevelHelper opens an earlier version of the level, just go to the Levels section to find and open the latest version.
Implementing Collisions: Overview
Our game has a flying mouse and shooting lasers (with the help of animations), and it also has coins for the player to collect. However, if you run into the coins or lasers nothing happens – so it’s time to add some gameplay for that!
Before we do so, however, let’s take a look at how things are currently set up.
In LevelHelper, right click the coin in the right sidebar (first tab) and select Open SpriteHelper Scene. Select the coin in SpriteHelper, and you’ll see that in the physics section, we have the “Is Sensor” option checked:
We have this checked because we want the player to trigger a collision response when it touches a coin, so that we know to give points to the user, but we don’t want the mouse to behave like it’s colliding with the coin.
What about the laser? If we look at the laser property, this sprite does not have the “Is Sensor” option selected:
Why? Don’t we want the same behavior? We do, but our need to keep track of our lasers’ animation requires us to to handle them differently.
If a sprite has Is Sensor selected, the collision will be triggered only when the mouse first touches the sprite. But for our lasers, we need the possibility of continuous collisions (every frame), because from one frame to another the animation of the laser might change (from off to on, for example) while the player is still in contact with the laser.
If we have Is Sensor enabled for the lasers, and the player makes contact with a laser when the laser is off, we have a collision response – but we wouldn’t fry the mouse, because after all, the laser is off.
But then the laser turns on. But because the collision already has been performed, we have no way of knowing if the player is still touching the laser.
How can we solve this? Well, it’s easy. Using LevelHelper’s collisions behavior together with Box2d, we can disable the collision response so that the mouse will move over the laser without behaving like it’s colliding with it. This way we will have collision trigger on every frame, and we’ll know if we need to kill the player.
Implementing Collisions: Coins
OK, finally time to code! Open up your Xcode project, navigate to HelloWorldScene.mm and declare this new method before init:
-(void) setupCollisionHandling
{
[lh useLevelHelperCollisionHandling];
[lh registerBeginOrEndCollisionCallbackBetweenTagA:PLAYER andTagB:COIN idListener:self selListener:@selector(mouseCoinCollision:)];
}
Next, call this new method at the end of init (right after the call to retrieveRequiredObjects):
[self setupCollisionHandling];
So what have we done here?
In the setupCollisionHandling method, we first tell to the LevelHelperLoader instance that we want to use its collision handling and not create our own collision handling. My advice is: always use this, because its fast, easy and painless.
On the second call, we register a method that we want LevelHelper to call whenever a collision between a sprite with the tag PLAYER (in our case the mouse sprite) and a sprite with the tag COIN (in our case any coin sprite) happens.
Remember how we set up collision tags for these in part two? Well LevelHelper automatically generates constants for these so we can use them in code! You can control-click on one of them and choose “Go to definition” if you’re curious where they are defined.
LevelHelper collision handling has multiple types of collision but here we use beginOrEnd because our coin sprites are defined as sensors and Box2d handles collision for sensor objects only on “begin” collision types.
Now let’s define the methods that will be used for collision responses between the mouse and coin. Add this new method right before setupCollisionHandling:
-(void)mouseCoinCollision:(LHContactInfo*)contact
{
LHSprite* coin = [contact spriteB];
if(nil != coin)
{
if([coin visible])
{
[self scoreHitAtPosition:[coin position] withPoints:100];
}
[coin setVisible:NO];
}
}
As you can see, this method gets a LHContactInfo* object as an argument. This is a special class that will give us info about the collision.
So how do we get the coin sprite from this collision? Well, we register the coin sprite as being tagB in a call to registerBeginOrEndCollisionCallbackBetweenTagA andTagB. So if tag B is the coin, then we take the sprite using [contact spriteB].
If you want to learn more about the LHContactInfo class, check out the official LevelHelper documentation.
Next, we make sure the coin is not nil. This is not strictly necessary, but it’s a good way to avoid errors. As a general note, it’s always good to check against nil.
If the coin is visible, we call a method that we’ll write in a minute to give points to the user for taking the coin. We then make the coin invisible in order to hide it from the screen and give visual feedback to the user that he now has the coin in his virtual wallet.
Compiling now will give an error, because we did not define the scoreHitAtPosition method. Let’s define it now. Put the following before the mouseCoinCollision method:
-(void)scoreHitAtPosition:(CGPoint)position withPoints:(int)points
{
score += points;
}
Declare the variable score inside the HelloWorldScene.h:
int score;
Compile and run the game, and you’ll see that when the mouse collides with the coins, the coins disappear!
Implementing Collisions: Lasers
The next step is to handle the collision between the lasers and the mouse.
Inside the setupCollisionHandling method, add the following at the end:
[lh registerPreCollisionCallbackBetweenTagA:PLAYER andTagB:LASER idListener:self selListener:@selector(mouseLaserCollision:)];
Here we’ve registered a pre collision callback between the player and the lasers. Now we need to define the mouseLaserCollision method.
We did this because the laser sprites are not sensors and we want to receive notification about this collision on every frame in order to kill the mouse when the laser has become active.
Put the following after the mouseCoinCollision:
-(void)mouseLaserCollision:(LHContactInfo*)contact
{
LHSprite* laser = [contact spriteB];
int frame = [laser currentFrame];
// If we make the laser a sensor, the callback will be called only once - at first collision.
// This is not good as we want to kill the player when the laser changes to active.
// So we disable the contact so that the player and laser don't collide, but trigger a collision.
// Disabling the contact is only active for one frame,
// so on the next frame the contact will be active again, triggering the collision.
b2Contact* box2dContact = [contact contact];
box2dContact->SetEnabled(false);
if(playerIsDead)
return;
if(frame != 0)
{
[self killPlayer];
}
}
In the above code, we take the sprite B from the contact info. In our case sprite B is the laser. Then we take the current frame from the sprite, because we need to test if the laser is active and kill the player if it is.
We then take the Box2d contact information from the LevelHelper contact object and disable the contact so that no collision behavior will occur. We check if the player is dead. If so, we do nothing.
Finally, we test if the frame number is not 0. If it is 0, then the laser is not on, so we don’t need to kill the player. If it’s not 0, it means we need to kill the player. We cancel the collision callback because we don’t need it anymore, and kill the player.
Notice we’re using two things that we have not yet defined: the killPlayer method and the playerIsDead variable. So let’s define them.
Inside HelloWorldScene.h, put the following in the class declaration:
bool playerIsDead;
Then define the killPlayer method inside HelloWorldScene.mm (add after mouseCoinCollision):
-(void)killPlayer
{
playerVelocity = 0.0;
playerShouldFly = false;
playerIsDead = true;
playerWasFlying = false;
[rocketFlame setVisible:NO];
[player startAnimationNamed:@"mouseDie"];
[paralaxNode setSpeed:0];
CGSize winSize = [[CCDirector sharedDirector] winSize];
CCLabelTTF *label = [CCLabelTTF labelWithString:@"Game Over" fontName:@"Marker Felt" fontSize:64];
label.color = ccRED;
label.position = ccp(winSize.width*0.5, winSize.height*0.75);
[self addChild:label];
CCMenuItem *item = [CCMenuItemFont itemFromString:@"Restart" target: self selector:@selector(restartGame)];
CCMenu *menu = [CCMenu menuWithItems:item, nil];
[menu alignItemsVertically];
[self addChild:menu];
}
In the killPlayer method above, we set the velocity of the player to 0. If the player was flying, it will now fall to the ground.
We then set the playerIsDead variable to true so we know the player is dead in the methods where this information is a factor. We hide the rocket flame.
Finally, we start the death animation on the player sprite by using a LevelHelper method that will take as arguments the animation’s unique name and the sprite on which we want to perform the animation. We can take the animation name from the Animations section inside LevelHelper.
For more details on using animations with LevelHelper, check out the official LevelHelper documentation.
After that, we stop the parallax from moving by setting its speed to 0.
Now we need to create a Cocos2d menu so that we can restart the game if the player dies. Let’s define the restartGame method before the killPlayer method as follows:
-(void)restartGame
{
[[CCDirector sharedDirector] replaceScene:[HelloWorldScene scene]];
}
Compile and run, and now your mouse can die if he collides with a laser!
Gratuitous Sound Effects
If you’ve read game tutorials on this blog before, you know we’d never leave you hanging without some gratuitous (and awesome) sound effects! :]
Navigate to your Xcode Resources folder in Finder. Then, open a new Finder window and navigate to where you saved the sounds pack that you downloaded at the beginning of this tutorial.
Inside the Resources folder, create a new folder called Music, and drag all the sound files from the sound pack into this new folder.
Now go back to Xcode and include the music folder inside your Resources by right-clicking (or Control-clicking) on the Resources folder and choosing “Add Files to RocketMouse.”
In the new window, navigate to your Resources folder, select the Music folder, and click the Add button.
Your new Resources folder inside Xcode should look something like this:
Now that we’ve added our sound files to our project, let’s code the sound so we can make some noise!
At the top of HelloWorldScene.mm import the audio engine:
#import "SimpleAudioEngine.h"
Then add this new method that will load our sounds (put this right above the init method):
-(void) setupAudio
{
[[SimpleAudioEngine sharedEngine] playBackgroundMusic:@"backgroundMusic.m4a"];
[[SimpleAudioEngine sharedEngine] preloadEffect:@"coin.wav"];
[[SimpleAudioEngine sharedEngine] preloadEffect:@"fly.wav"];
[[SimpleAudioEngine sharedEngine] preloadEffect:@"ground.wav"];
[[SimpleAudioEngine sharedEngine] preloadEffect:@"hitObject.wav"];
[[SimpleAudioEngine sharedEngine] preloadEffect:@"laser.wav"];
[[SimpleAudioEngine sharedEngine] preloadEffect:@"lose.wav"];
[[SimpleAudioEngine sharedEngine] preloadEffect:@"bunnyHit.wav"];
}
Then call this method in init (right after the call to setupCollisionHandling):
[self setupAudio];
This is where we load all the sounds in the pack. We load backgroundMusic.m4a as a music asset and we preload the rest of the files as effects.
Now we have to match the effects with the methods that will generate them. In the mouseCoinCollision method add the following:
[[SimpleAudioEngine sharedEngine] playEffect:@"coin.wav"];
In the mouseLaserCollision method add the following inside the if(frame != 0) statement:
[[SimpleAudioEngine sharedEngine] playEffect:@"laser.wav"];
Let’s also add the flying sound. Inside the tick method, add the following inside the if playerShouldFly block:
[[SimpleAudioEngine sharedEngine] playEffect:@"fly.wav"];
Compile and run the game, and enjoy the new music and sound effects! :]
The complete project up to this point can be downloaded here.
Collisions Between Mouse, Cats and Dogs
So far our mouse can die if he hits a laser, but he’s getting off to easy when it comes to the cats and dogs! So let’s add some collision handling for them as well.
Add the following at the end of setupCollsionHandling method:
[lh registerPreCollisionCallbackBetweenTagA:PLAYER andTagB:DOG idListener:self selListener:@selector(mouseDogCatCollision:)];
[lh registerPreCollisionCallbackBetweenTagA:PLAYER andTagB:CAT idListener:self selListener:@selector(mouseDogCatCollision:)];
Let’s now define the method for the callback. Because our game will perform the same action for collisions with cats and dogs, we only need one method. Add this somewhere before the setupCollisionHandling method:
-(void)mouseDogCatCollision:(LHContactInfo*)contact
{
[[SimpleAudioEngine sharedEngine] playEffect:@"hitObject.wav"];
[lh cancelPreCollisionCallbackBetweenTagA:PLAYER andTagB:DOG];
[lh cancelPreCollisionCallbackBetweenTagA:PLAYER andTagB:CAT];
[self killPlayer];
}
Here we play the needed sound, then we cancel the callback between the player and the cat or dog, because we no longer need them. Then we kill the player.
Compile and run the game, and now your mouse can die when he hits a cat or dog too – so watch out! :]
Tweaking Gameplay
Our game is looking good so far, but there are still a number of problems.
The first of these problems is that if you touch the screen after the mouse dies, he starts flying around like he’s been resurrected! Although “Zombie Mouse” might make for a popular game on the App Store, this is not the effect we’re going for ;]
Let’s put a stop to this zombie behavior before it gets out of hand! Just add the following check to the beginning of ccTouchesBegan:
if(playerIsDead)
return;
The only thing we’re doing differently here is testing to see if the player is dead. If they are, then we do nothing.
If we run the game now, the zombie behavior won’t occur anymore. But there are other issues.
For example, in my level there are places where the player can’t get past a laser because it’s active, but he can’t go under it because there’s a cat in the way. Your level may have similar problems.
It’s time to play-test the level and make any necessary modifications to be sure it’s possible for the player to successfully finish the game.
Open up LevelHelper with our level03 level, and drag the cats, dogs and laser sprites as necessary so that the player has a way through. (But don’t make it too easy!)
Make sure to save the level!
Since we’re modifying the level anyway, let’s create a way to know when the player touches the ground. To do this we’ll define a new tag and add that tag to the bottom border of the physic boundary. Click the Define Tag button (as we did in Part Two) and add the tag “GROUND.”
Now that we have this new tag, let’s assign it to the bottom part of the Physic Boundary shape.
To do this click the Physic Boundaries button.
Save your level in LevelHelper.
We still have to define the collision callback between the player and the ground. Add the following at the end of setupCollisionHandling method:
[lh registerPreCollisionCallbackBetweenTagA:PLAYER andTagB:GROUND idListener:self selListener:@selector(mouseGroundCollision:)];
Define the mouseGroundCollision method somewhere above the setupCollisionHandling method, as follows:
-(void)mouseGroundCollision:(LHContactInfo*)contact
{
if(playerIsDead)
return;
if(playerWasFlying)
{
[[SimpleAudioEngine sharedEngine] playEffect:@"ground.wav"];
[player startAnimationNamed:@"mouseFall"
endObserverObj:self
endObserverSel:@selector(fallAnimHasEnded:animName:)
shouldObserverLoopForever:FALSE];
}
playerWasFlying = false;
}
We test if the player is dead so we can return if they are. We then test if the player was flying when they touched the ground. If they were, we play landing sound.
Then we start the mouseFall animation, but we start it using a notification. That way when the animation ends, we get notified so that we can set another animation on the player sprite.
So let’s define the method that gets called when the mouseFall animation ends. Add it above mouseGroundCollision, as follows:
-(void) fallAnimHasEnded:(LHSprite*)spr animName:(NSString*)animName
{
[player startAnimationNamed:@"mouseRun"];
}
This new method takes as arguments the sprite that had the animation and the animation name. It then starts the animation “mouseRun” on the player sprite the normal way.
Playing the game now, it looks like we have almost everything in place. But there is still one thing we need to fix!
You may have noticed that if we run the game now, coins taken from the level don’t reappear when the parallax restarts. We hid them, remember, after player collisions, so we need to add a way to make them visible again when the parallax starts over.
Inside the retrieveRequiredObjects method declaration, add the following line, after you’ve taken the pointer to the parallax node:
-(void) retrieveRequiredObjects
{
// existing lines
paralaxNode = [lh paralaxNodeWithUniqueName:@"Parallax_1"];
NSAssert(paralaxNode!=nil, @"Couldn't find the parallax!");
// add this new line
[paralaxNode registerSpriteHasMovedToEndListener:self
selector:@selector(spriteInParallaxHasReset:)];
// rest of code...
This new method registers on the parallax another new method (spriteInParallaxHasReset) that will be called whenever a sprite in the parallax is reset to the back of the parallax. This method gets called when the sprite exits the view.
Define spriteInParallaxHasReset before the retrieveRequiredObjects declaration:
-(void) spriteInParallaxHasReset:(LHSprite*)sprite
{
if(COIN == [sprite tag]){
[sprite setVisible:YES];
}
}
Here we test the tag of the sprite that was reset by the parallax, and if it’s tagged as a COIN we make it visible again.
Compile and run your game, and see how long you can play without dying! :]
Where to Go From Here?
If you’ve followed along this far, you should have a smoothly-functioning game that is very similar to Jetpack Joyride! It’s not quite complete (that happens in for Part Four), but very close, with animations, collisions, sounds, and correct gameplay.
In case you need it, here is an example project that includes all of the code for this tutorial series up to this point.
In the fourth and final part of this tutorial series, we’ll increase the difficulty of the game by making some of the lasers rotate. But we’ll also add another point-scoring opportunity in the form of bunnies running through the level that the player can kill, and display the score as it increases.
Finally, as the crowning touch for our game, we’ll create a second scene in SpriteHelper and add it to our level as a background, so that the user will be able to look through the windows at the “outside” world.
Until then, feel free to participate in forum discussion both below and on the LevelHelper site.
This is a post by special contributor Bogdan Vladu, an iOS application developer and aspiring game developer living in Bucharest, Romania.