PaintCode Tutorial: Bezier Paths
In the third and final part of our PaintCode tutorial series, learn how to create dynamic, movable arrows with curved bezier paths! By Felipe Laso-Marsetti.
Putting Your Bezier Arrows to Work
To put your BezierView to use, you’re going to make a simple quiz app where your users have to drag the arrow to the correct answer.
Open Mainstoryboard.storyboard and drag some Label objects from the Object Library to the Bezier View Controller to represent some simple math questions and answers. The focus here is on your dynamic bezier arrows and making them work, rather than challenging the user!
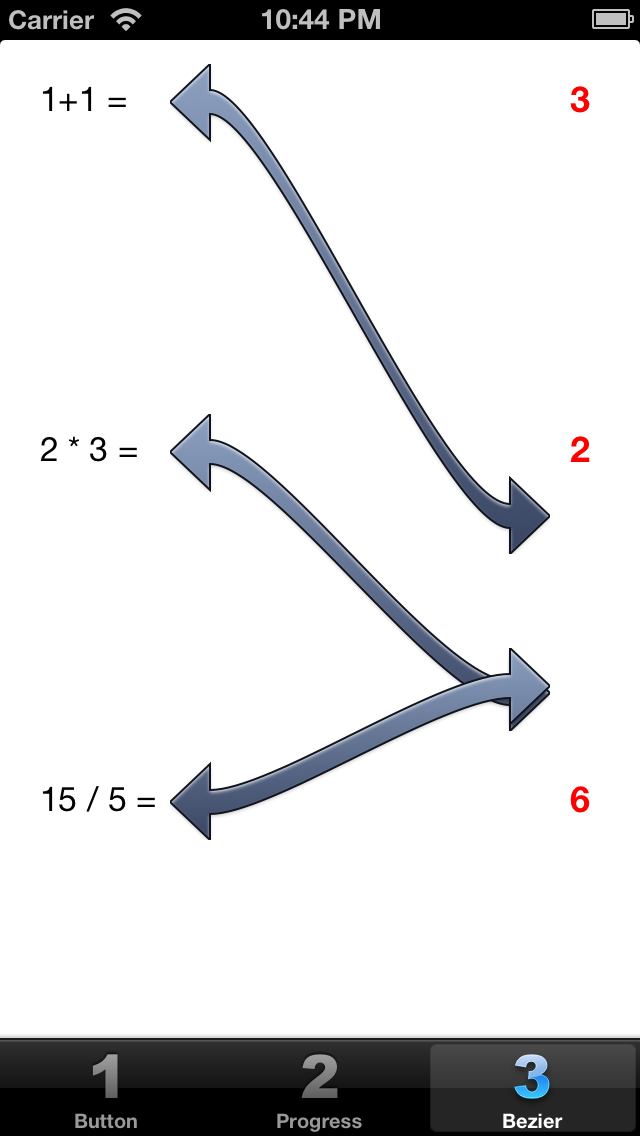
Arrange your scene to look like the following:

Set the width of all the left-hand labels the same. Then set the height for the right-hand labels to around 40 points or so. The reason for making the right labels so tall is to give the user more real estate to drop their arrow on. With a smaller label, the user would have to be a little more precise to drop the arrow on target.
Set the color of the right-hand labels to red, indicating that each answer is incorrect. You’ll change the color of each label as the user makes a correct selection.
Finally, set the tag for the right-hand labels as follows:
- Top label: 1
- Middle label: 2
- Bottom label: 3
Now you need some outlets referencing the labels.
Open BezierViewController.m and add the following class extension above the @implementation line:
@interface BezierViewController () {
    NSMutableArray *_answersArray;
}

@property (weak, nonatomic) IBOutlet UILabel *bottomAnswerLabel;
@property (weak, nonatomic) IBOutlet UILabel *midAnswerLabel;
@property (weak, nonatomic) IBOutlet UILabel *topAnswerLabel;

@end
The above code adds an internal array which will hold the current answer state for each question, along with three outlets for the right-hand answer labels. With the labels identified by tags and the corresponding answer state in an array, you can use the same release handler code to handle all three answer labels.
Switch back to the storyboard and connect each right-hand label to the matching outlet, as shown in the screenshot below:

Back in BezierViewController.m, replace the current viewDidLoad implementation with the following code:
-(void)viewDidLoad {
    [super viewDidLoad];

    // 1
    _answersArray = [NSMutableArray arrayWithObjects:@0, @0, @0, nil];

    // 2
    __weak BezierViewController *weakSelf = self;

    // 3
    BezierView *topArrow = [[BezierView alloc] initWithLeftArrowTipPoint:CGPointMake(85, 31)
                                                      rightArrowTipPoint:CGPointMake(275, 91)
                                                          releaseHandler:^(CGPoint releasePoint) {
                                [weakSelf processInteractionWithReleasePoint:releasePoint
                                                              forViewWithTag:2];
                                                          }];
    [self.view addSubview:topArrow];

    BezierView *midArrow = [[BezierView alloc] initWithLeftArrowTipPoint:CGPointMake(85, 206)
                                                      rightArrowTipPoint:CGPointMake(275, 206)
                                                          releaseHandler:^(CGPoint releasePoint) {
                                [weakSelf processInteractionWithReleasePoint:releasePoint
                                                              forViewWithTag:3];
                                                          }];
    [self.view addSubview:midArrow];

    BezierView *bottomArrow = [[BezierView alloc] initWithLeftArrowTipPoint:CGPointMake(85, 381)
                                                         rightArrowTipPoint:CGPointMake(275, 321)
                                                             releaseHandler:^(CGPoint releasePoint) {
                                [weakSelf processInteractionWithReleasePoint:releasePoint
                                                              forViewWithTag:1];
                                                             }];
    [self.view addSubview:bottomArrow];
}
Here’s a breakdown of the above code:
- Initialize the array with three zero values, since the user hasn’t attempted any answers yet and all the answer states are false.
- Create a weak pointer to self. This is to avoid retain cycles inside the release handler block.
- Create three
BezierViewinstances to match the questions. Set the left arrowhead point of each arrow to the center of the left question labels, and the right arrow tip to a point between the answers. For the release handler, callprocessInteractionWithReleasePoint:forViewWithTag:, which determines where the arrow was released, and checks the answer to see if it is correct.
Note: The left arrowhead points specified in the above code might not match the layout you set up. So calculate the center point for each of your left-hand labels and modify the above code accordingly.
Note: The left arrowhead points specified in the above code might not match the layout you set up. So calculate the center point for each of your left-hand labels and modify the above code accordingly.
Right now you will notice a few Xcode errors because you haven’t implemented the release handler method.
Add the following code to (still in BezierView.m):
-(void)processInteractionWithReleasePoint:(CGPoint)releasePoint forViewWithTag:(NSInteger)tag {
UILabel *answerLabel = (UILabel *)[self.view viewWithTag:tag];
CGPoint updatedReleasePoint = CGPointMake(CGRectGetMidX(answerLabel.frame), releasePoint.y);
if (CGRectContainsPoint(answerLabel.frame, updatedReleasePoint)) {
answerLabel.textColor = [UIColor greenColor];
_answersArray[tag - 1] = @1;
} else {
answerLabel.textColor = [UIColor redColor];
_answersArray[tag - 1] = @0;
}
__block NSInteger correctAnswers = 0;
[_answersArray enumerateObjectsUsingBlock:^(id obj, NSUInteger idx, BOOL *stop) {
correctAnswers += [obj integerValue];
}];
if (correctAnswers == 3) {
UIAlertView *alertView = [[UIAlertView alloc] initWithTitle:@"Yay"
message:@"You've successully answered all the questions!"
delegate:nil
cancelButtonTitle:@"OK"
otherButtonTitles:nil];
[alertView show];
}
}
In the code above, you retrieve the label matching the passed-in tag. If the arrow was released within the label’s frame, update the answers array and set the label’s color to green to indicate a correct answer. Otherwise, update the answers array and set the label’s color to red.
Finally, add up the number of correct answers and check if all questions have been answered. If so, show an alert with a message indicating success.
Build and run the project, switch to the Bezier tab, and drag the arrows to the correct answers as shown below:
If you play with the app for any length of time, you may notice a small problem where you tap on an arrow, but nothing happends. This is because the topmost arrow in the Z-order always detects touches — but that may not be the arrow your user intended to move.
To fix this, add the following code to BezierView.m:
-(BOOL)pointInside:(CGPoint)point withEvent:(UIEvent *)event {
    if (CGRectContainsPoint(self.rightArrowFrame, point)) {
        return YES;
    }

    return NO;
}
The above code limits touch detection to only the right arrowhead, instead of the complete view.
pointInside:withEvent: is a UIView method which, as the name implies, returns whether a given point is inside the frame of the view. You override it to check whether the touch point received by the view is inside the right arrow’s frame. If so, then return YES so that a touch on the arrow registers properly. Otherwise, return NO and pass the touch to other subviews of BezierViewController.
Build and run your app again, and again drag the arrows to the correct answers:

Hey, that works a lot better. You can now drag the arrows regardless of their order in the view and view hierarchy.
Where To Go From Here?
You can download the final project with the PaintCode file and Xcode project here.
Take a moment to reflect on how far you’ve come in this tutorial series. You’ve worked on three different projects, each with its own characteristics and challenges; you’ve learned how to use a new development tool — PaintCode; and you’ve learned how to take the code generated by PaintCode and use it in your iOS projects.
If you didn’t know anything about PaintCode coming into this series, then you should feel pretty proud about what you’ve accomplished!
PaintCode is a fantastic application that will save you hours of work and let you unleash your creativity. The best part is that you don’t have to be an artist to get great-looking results!
Thanks so much for joining me in this series of tutorials, and I hope you’ve enjoyed yourself along the way! As always, if you have any suggestions, questions, or other comments, or you want to share your PaintCode creations, feel free to join the forum discussion below.