OpenGL ES Particle System Tutorial: Part 1/3

Learn how to develop a particle system using OpenGL ES 2.0 and GLKit! This three-part tutorial covers point sprites, particle effects, and game integration. By Ricardo Rendon Cepeda.

Leave a rating/review
Save for later
Share

In this three part OpenGL ES particle system tutorial series, you’ll learn how to make a cool and fun particle system from scratch, and integrate it into an iOS app!

Here’s how the series will be organized:

  • Part 1: You are here! You’ll start by learning all about particle systems and point sprites, and create a small app to help you learn as you go.
  • Part 2: In the next part, you’ll learn to create a generic particle-emitter paired system. That’s code word for “awesome and reusable”.
  • Part 3: Finally, you’ll use your newly developed skills to integrate particle effects into a simple 2D game.

This tutorial series assumes you have some prior familiarity with OpenGL ES 2.0 and GLKit. If you are new to these, you should first read our Beginning OpenGL ES 2.0 with GLKit and How To Create A Simple 2D iPhone Game with OpenGL ES 2.0 and GLKit tutorial series.

Without further ado, let’s spawn some particles!

What’s a Particle System?

New to particle systems? Don’t worry — we’ve got you covered.

You can think of a particle system as having two levels:

  • At the top you have the emitter which is the source, or generator, which controls the overall behaviour of the particles.
  • At the bottom you have the particles themselves, a large collection of small objects which share very similar characteristics, but are all unique independent entities.

Precipitation is a great example of a particle system. At the top, you have a cloud which is the emitter in this system. Depending on weather conditions, the cloud may produce rain, hail, or snow, which would be the particles.

Particle Systems Explained

Each particle in the system has a different size, consistency, and starting position. Together, their properties form a particle system.

That should give you a basic understanding of particle systems, but there’s another concept to discuss as well — point sprites.

What are Point Sprites?

In computer graphics, a sprite is simply a stand-alone 2D image within a scene. For example, a single block in Tetris is a sprite, as well as a coin in Super Mario. If you’ve developed graphics applications before, you may be familiar with sprites as textured quads which are essentially a set of two triangles which form a rectangular area for a 2D texture.

A great example of a sprite is the little creature below, taken from the tutorial How To Create A Simple 2D iPhone Game with OpenGL ES 2.0 and GLKit:

Textured Quad

Using this triangle-based implementation of textured quads requires at least 4 vertices per sprite. Particle systems routinely deal with hundreds of units — that means a LOT of vertices!

Thankfully, OpenGL ES 2.0 makes sprite rendering a lot easier with GL_POINTS. This command tells the GPU to draw every vertex as a square point, which reduces your 4-vertices-per-sprite problem to just 1!

So while GL_TRIANGLES draws filled triangles and GL_LINES draws line segments, GL_PONTS is a completely different beast – it draws a single point (which you can map a texture to).

GL Drawing Modes

Now that you’re well-versed in particle system lingo and GL_POINTS, it’s time to get started building your first particle system.

Getting Started

Although Xcode comes with an OpenGL game template, the code mixes GLKBaseEffect with OpenGL ES 2.0, and is generally confusing and overwhelming.


Instead, you’ll start from scratch which will be a nearly painless process thanks to GLKit.

Open Xcode and go to File\New\Project…. Select iOS\Application\Empty Application, name your project GLParticles1, and choose iPhone for device family. Make sure Use Automatic Reference Counting is selected, click Next, choose a folder to save your project to, and click Create.

You want this app to run in portrait orientation only, so click on your GLParticles1 project in the Project Navigator and select GLParticles1 under TARGETS. In the Summary tab, under Supported Interface Orientations, make sure only the Portrait option is selected, as shown below:

Portrait Orientation

As the tutorial title indicates, you’ll be using both OpenGL ES 2.0 and GLKit, so you need to add both frameworks to your project.


In the Project Navigator, click on your GLParticles1 project and select GLParticles1 under TARGETS. In the Build Phases tab, expand the Link Binary With Libraries section, click the + button, find OpenGLES.framework, and click Add, as shown in the screenshot below:

Frameworks

Repeat the steps above, but this time for GLKit.framework.

Now that you have the requisite frameworks in place, you’ll do some basic setup to color your screen green with OpenGL ES.

Basic Drawing

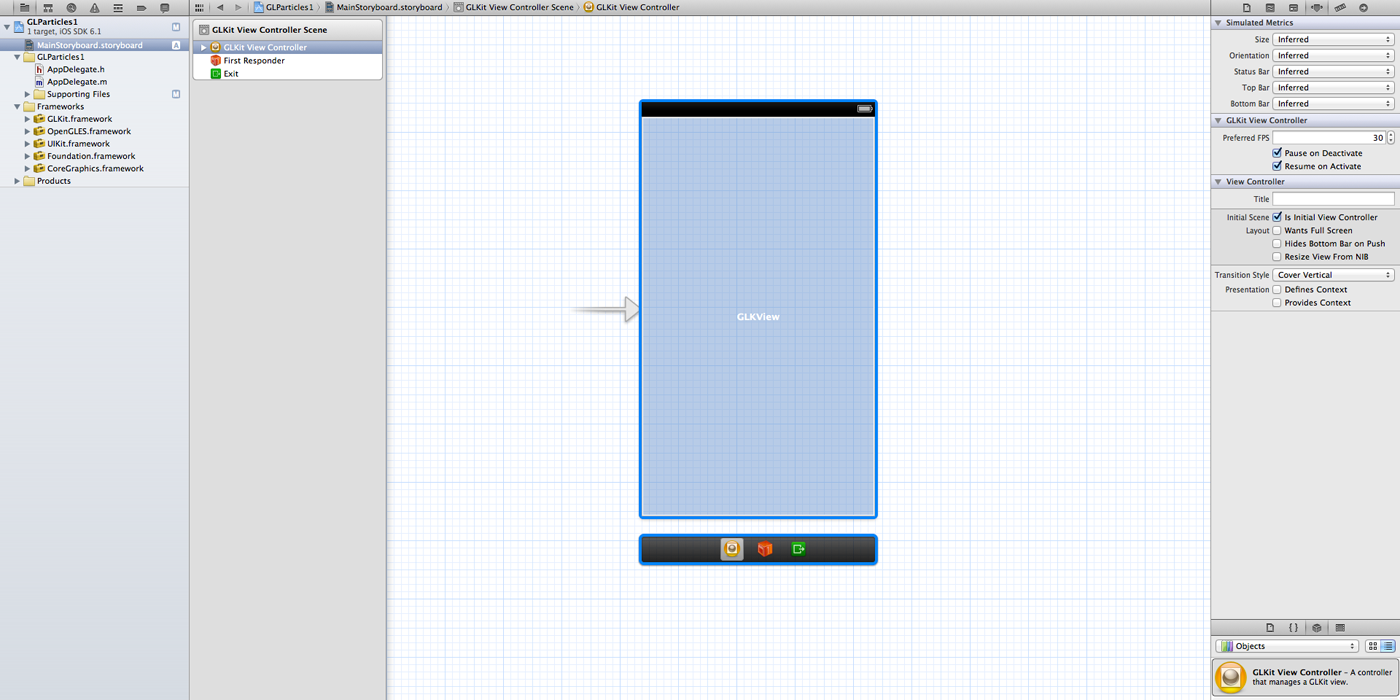
Go to File\New\File…, choose the iOS\User Interface\Storyboard template and name it MainStoryboard.storyboard. Open MainStoryboard.storyboard and drag a GLKit View Controller onto the storyboard. You can find GLKit View Controller in the Object Library in the lower right of the screen, as shown in the following image:

Storyboard

As this is your first and only view controller, Xcode will automatically set it up as the initial view controller.

This view controller will be governed by your custom code, so you’ll need a subclass.

Go to File\New\File… and choose the iOS\Cocoa Touch\Objective-C class subclass template. Enter MainViewController for the Class and GLKViewController for the subclass. Make sure Targeted for iPad and With XIB for user interface are unchecked, click Next, and click Create.

To remove the warning, open up MainViewController.h and add the following import:

#import <GLKit/GLKit.h>

Now open MainStoryboard.storyboard, select your GLKit View Controller, and find the Custom Class in the Identity Inspector. Set the Class to MainViewController, as shown below:

Storyboard Class

So far so good, but you still need to configure your project to use this storyboard.

In the Project Navigator, click on your GLParticles1 project and select GLParticles1 under TARGETS. In the Summary tab, find iPhone / iPod Deployment Info, and set the Main Storyboard to MainStoryboard.

Next, open AppDelegate.m and replace application:didFinishLaunchingWithOptions: with the following code:

- (BOOL)application:(UIApplication *)application didFinishLaunchingWithOptions:(NSDictionary *)launchOptions
{
    return YES;
}

This basically removes the boilerplate code that creates an empty window, since you’re now loading your user interface from the Storyboard instead.

You’re almost done – GLKit just requires just a tiny bit of setup code in order to work with your app.

Open MainViewController.m and replace its contents with the following code:

#import "MainViewController.h"

@implementation MainViewController

- (void)viewDidLoad
{
    [super viewDidLoad];
    
    // Set up context
    EAGLContext* context = [[EAGLContext alloc] initWithAPI:kEAGLRenderingAPIOpenGLES2];
    [EAGLContext setCurrentContext:context];
    
    // Set up view
    GLKView* view = (GLKView*)self.view;
    view.context = context;
}

#pragma mark - GLKViewDelegate

- (void)glkView:(GLKView *)view drawInRect:(CGRect)rect
{
    // Set the background color (green)
    glClearColor(0.30f, 0.74f, 0.20f, 1.0f);
    glClear(GL_COLOR_BUFFER_BIT);
}

@end

In this very simple GLKViewController implementation, an OpenGL ES 2.0 context is created and associated with the view. The code also implements glkView:drawInRect: to clear the screen to a green color.

Believe it or not, that’s all you need to do to implement GLKit in an app. See — told you it would be painless! :]

Build and run your app — you should see the stunning image below:

Run1

Admittedly, it’s just a green screen — but that tells you that GLKit is up and running, and ready for you to implement your particle system.

Designing Your Particle System

Now that GLKViewController is set up, it’s time to design your particle system. But first, you need to think about how you want your particle system to behave.

Particle systems usually simulate natural phenomena, such as explosions, dust clouds, rain or fire. They can also help optimize the calculations required when rendering large numbers of identical objects. These particle systems can lead to highly complex models, with incredibly sophisticated and exciting physics and mathematics flying around…

srslydude

…okay, we’ll leave that advanced stuff to the film and gaming experts! :]

This OpenGL ES particle system tutorial won’t require anything as complicated as that, but it still uses a bit of basic math to create the beautiful Polar Rose as shown below:

8-Petal Rose, from http://en.wikipedia.org/wiki/Rose_(mathematics)

8-Petal Rose, from Wikipedia

The general equation for these curves can be expressed as:

r = cos(kθ)

This is the polar form of the equation — which is where the name “polar rose” comes from. In this tutorial, you’ll be using the alternative cartesian form:

  • x = cos(kθ)sin(θ)
  • y = cos(kθ)cos(θ)

In both polar and coordinate forms, k is a constant and θ (called “theta”) is a variable angle. Pop quiz — can you tell which is controlled by the emitter, and which is controlled by the individual particle?

[spoiler title=”Emitter or Particles?”]
k: emitter
θ: particles

Remember that k is a constant, so the emitter stores it and uses it for all particles in the system.
θ is a variable, and each particle in the system will have its own unique angle.
[/spoiler]

Okay, that’s the end of the math lesson. Time to build your particle system!

Note: Don’t worry if you don’t understand the math in the above section – you’ll still be able to follow along with the tutorial. However, if you’d like to learn more about htis, check out our Trigonometry for Game Programming series!

Implementing Your Particle System

Go to File\New\File…, choose the iOS\C and C++\Header File template, and click Next. Name the new header file EmitterTemplate.h and click Create.

Replace the contents of EmitterTemplate.h with the following:

#define NUM_PARTICLES 360

typedef struct Particle
{
    float       theta;
}
Particle;

typedef struct Emitter
{
    Particle    particles[NUM_PARTICLES];
    int         k;
}
Emitter;

Emitter emitter = {0.0f};

Here, you create a particle-emitter template using the basic C-style header file implementation. NUM_PARTICLES defines the number of particles generated by the emitter. 360 is an ideal choice in this situation as it allows θ to cycle through 0-359 degrees around the origin.

The Particle structure contains the individual θ for each particle, while the Emitter structure contains all the particles along with the system’s constant k.

Note: While the particle system in this tutorial only has a single emitter, particle systems in general are not limited to just one emitter. You can have any number of emitters in your system — you’re only limited by your hardware!

Open MainViewController.m and import your emitter by adding the following code:

#import "EmitterTemplate.h"

Next, add the following methods to MainViewController.m, just above @end:

- (void)loadParticles
{
    for(int i=0; i<NUM_PARTICLES; i++)
    {
        // Assign each particle its theta value (in radians)
        emitter.particles[i].theta = GLKMathDegreesToRadians(i);
    }
}

- (void)loadEmitter
{
    emitter.k = 4.0f;   // Constant k
}

The loadParticles method above sets the theta angles on the particles. Each particle gets a value from 0-359. The loadEmitter method simply sets the value of the emitter constant k on the emitter.

Now add the following code to MainViewController.m at the end of viewDidLoad:

// Load Particle System
[self loadParticles];
[self loadEmitter];

Your loader methods will then be called to set up your particle system when the view loads.

Your particle system is now all set up — however, it won't draw anything on the screen at this point. The next section discusses the vertex and shaders that will bring your particles to life!

Adding Vertex and Fragment Shaders

Shaders are the essence of programmable graphics; they give you full control of your final rendered scene using GLSL (OpenGL Shading Language) programming.

Here's a quick refresher on vertex and fragment shaders, taken from the tutorial OpenGL ES 2.0 for iPhone:

  • Vertex shaders are programs that get called once per vertex in your scene. So if you are rendering a simple scene with a single rectangle, with one vertex at each corner, this would be called at least four times. (The actual number can vary for implementation-dependent reasons. It could be as high as six.) Its job is to perform some calculations such as lighting, geometry transforms, etc., figure out the final position of the vertex, and also pass on some data to the fragment shader.
  • Fragment shaders are programs that get called once per pixel (sort of) in your scene. So if you’re rendering the same simple scene with a single rectangle, it will be called at least once for each pixel that the rectangle covers. Fragment shaders can also perform lighting calculations, etc., but their most important job is to set the final color for the pixel.

For the sake of completeness, here's a quick explanation on the difference between fragments and pixels:

  • A pixel is simply the smallest measured unit of an image or screen.
  • The graphics pipeline produces fragments which are then converted (or not) to actual pixels, depending on their visibility, depth, stencil, colour, etc.

Note: It's important to realize that fragment shaders are called many times when rendering a scene. Imagine a single rectangle with 4 vertices. If the rectangle was very small, say about 32x32 pixels, the vertex shader would be called roughly 4 times. However, the fragment shader would be called 1024 times — once for each pixel in the rectangle.

Now imagine rendering the pixels of a 3D view that covers the entire screen. On an iPhone 5, that's 1136 x 640 pixels, resulting in 727,040 separate calls to the fragment shader. And shaders are called for...Every. Single. Frame. Plus, if there are transparent objects in your view, some shaders will need to run more than once per frame.

The moral of this story? Be careful when writing shaders, because inefficient shaders are a fast track to a slow app!

Enough theory — time to get started writing the shaders for your particle system.

Go to File\New\File..., choose the iOS\Other\Empty template, and click Next. Name the new file Emitter.vsh, uncheck the box next to your GLParticles1 target, and click Create, as shown in the screenshot below:

New Shader

Repeat this process, but name this second file Emitter.fsh.

These files will be read by OpenGL ES 2.0 as strings, so the filename extension doesn’t really matter. However, it’s good practice to use .vsh for vertex shaders and .fsh for fragment shaders to help keep things organized.

Creating Shaders as GLSL Programs

Next open Emitter.vsh and add the following code:

// Vertex Shader

static const char* EmitterVS = STRINGIFY
(

// Attributes
attribute float aTheta;

// Uniforms
uniform mat4 uProjectionMatrix;
uniform float uK;

void main(void)
{
    float x = cos(uK*aTheta)*sin(aTheta);
    float y = cos(uK*aTheta)*cos(aTheta);
    
    gl_Position = uProjectionMatrix * vec4(x, y, 0.0, 1.0);
    gl_PointSize = 16.0;
}

);

The code above simply plugs θ into the polar rose equation to obtain x and y coordinates. This coordinate position is then multiplied by a Projection Matrix, resulting in the final XYZW position needed by gl_Position.

Finally, it sets a point size of 16 pixels. When working with GL_POINTS, shaders must always include a value for gl_PointSize.

Note: Don't know what an XYZW coordinate or a Projection Matrix is? If you're curious, check out homogeneous coordinates on Wikipedia for more information. Without getting too deep into the math, the extra W value allows you to represent all types and any number of affine transformations — that is, a series of translations, rotations, and scales — as a single matrix multiplication.

The GPU is optimized for matrix math, so OpenGL uses XYZW coordinates. You can specify both points and vectors using XYZW values; in the case of points, the W value will always be 1, while the W value for vectors will always be 0.

Now, add the following code to Emitter.fsh:

// Fragment Shader

static const char* EmitterFS = STRINGIFY
(

void main(void)
{    
    gl_FragColor = vec4(1.0, 0.0, 0.0, 1.0);
}

);

This is a one-line program that simply sets the color of all relevant fragments to red, and is sent to gl_FragColor as a 4-channel RGBA representation.

In general, all shader programs have the following characteristics:

  • They are very short programs written in GLSL, which is quite similar to C. Why so short? Recall that they are called with every single frame change.
  • They have special variable prefixes that determine the type and source of data the shader will receive from the main program:
    • Attributes typically change per-vertex (variable θ). Due to their per-vertex nature, they are exclusive to the vertex shader.
    • Uniforms typically change per-frame or per-object (constant k). They are accessible to both vertex and fragment shaders.
  • They are wrapped in a call to something called STRINGIFY. That's a macro you will add later that just returns a pointer to a string containing the text provided to the macro.

Why are you just returning pointers to strings here? That's because your shader code isn't compiled by Xcode. Instead, the file is compiled at runtime when your app is building its shaders. The shader files are actually defining strings that you point to in the app and are handed to the GPU to be compiled and executed.

If your .vsh and .fsh files doesn't seem to be automatically highlighting with GLSL syntax, you'll need to set the filetype for both files in Xcode. Look to the Utilities bar on the right; in the File Inspector set the File Type to OpenGL Shading Language source, as shown below:

Shader Syntax

You may have to re-open your project to see the syntax highlighting change take effect.

Since shaders run on the GPU, and your app runs on the CPU, you'll need some sort of a “bridge” to feed your shaders the necessary data from the CPU.

Time to switch back to Objective-C!

Building Obj-C Bridges

Click File\New\File... and choose the iOS\Cocoa Touch\Objective-C class subclass template. Enter EmitterShader for the Class and NSObject for the subclass. Make sure both checkboxes are unchecked, click Next, and click Create.

Open up EmitterShader.h and replace the existing file contents with the following:

#import <GLKit/GLKit.h>

@interface EmitterShader : NSObject

// Program Handle
@property (readwrite) GLint program;

// Attribute Handles
@property (readwrite) GLint aTheta;

// Uniform Handles
@property (readwrite) GLint uProjectionMatrix;
@property (readwrite) GLint uK;

// Methods
- (void)loadShader;

@end

Here you create some shader “handles” which tell your Objective-C variables where to find their GPU counterparts. The program handle will point to the compiled vertex-fragment shader pair. The uProjectionMatrix handle will point to the view's projection matrix. The other handles correspond to the θ and k values you'll pass to the shader's attributes and uniforms.

Open up EmitterShader.m and replace the existing contents of the file with the following:

#import "EmitterShader.h"

@implementation EmitterShader

- (void)loadShader
{
    // Attributes
    self.aTheta = glGetAttribLocation(self.program, "aTheta");
    
    // Uniforms
    self.uProjectionMatrix = glGetUniformLocation(self.program, "uProjectionMatrix");
    self.uK = glGetUniformLocation(self.program, "uK");
}

@end

In the code above, you attach the handles to the shader programs so your app knows where to store data for your shaders. For both glGetAttribLocation and glGetUniformLocation, the first parameter specifies the shader program to be queried (a vertex-fragment pair) and the second parameter points to the name of the attribute/uniform within the same program.

This is why it’s a good idea to give your GPU and CPU variables the same name — it's a lot easier to keep track of them.

Ok, so your attributes and uniforms are set, but what about the actual program? Since your shaders run on the GPU, they’re only readable at runtime with OpenGL ES 2.0. This means that the CPU needs to give the GPU special instructions to compile and link your shaders and create the program handle.

Note: If you have an error in any of your shader code, Xcode won't warn you. Remember — your shader code isn't compiled, but simply passes them to the GPU as strings for compiling and linking there.

The tutorial OpenGL ES 2.0 for iPhone covers shader compilation in more detail, so give that section a read if you need a refresher. Otherwise, the necessary files are available below for a simple copy and paste into your project.

Go to File\New\File... and choose the iOS\Cocoa Touch\Objective-C class subclass template. Enter ShaderProcessor for the Class and NSObject for the subclass. Make sure both checkboxes are unchecked, click Next, and click Create.

Replace the contents of ShaderProcessor.h with the following:

#import <GLKit/GLKit.h>

@interface ShaderProcessor : NSObject

- (GLuint)BuildProgram:(const char*)vertexShaderSource with:(const char*)fragmentShaderSource;

@end

Now, rename ShaderProcessor.m to ShaderProcessor.mm to enable C++ processing. Open up ShaderProcessor.mm and replace the file contents with the following:

#import "ShaderProcessor.h"
#include <iostream>

@implementation ShaderProcessor

- (GLuint)BuildProgram:(const char*)vertexShaderSource with:(const char*)fragmentShaderSource
{
    // Build shaders
    GLuint vertexShader = [self BuildShader:vertexShaderSource with:GL_VERTEX_SHADER];
    GLuint fragmentShader = [self BuildShader:fragmentShaderSource with:GL_FRAGMENT_SHADER];
    
    // Create program
    GLuint programHandle = glCreateProgram();
    
    // Attach shaders
    glAttachShader(programHandle, vertexShader);
    glAttachShader(programHandle, fragmentShader);
    
    // Link program
    glLinkProgram(programHandle);
    
    // Check for errors
    GLint linkSuccess;
    glGetProgramiv(programHandle, GL_LINK_STATUS, &linkSuccess);
    if (linkSuccess == GL_FALSE)
    {
        NSLog(@"GLSL Program Error");
        GLchar messages[1024];
        glGetProgramInfoLog(programHandle, sizeof(messages), 0, &messages[0]);
        std::cout << messages;
        exit(1);
    }
    
    // Delete shaders
    glDeleteShader(vertexShader);
    glDeleteShader(fragmentShader);
    
    return programHandle;
}

- (GLuint)BuildShader:(const char*)source with:(GLenum)shaderType
{
    // Create the shader object
    GLuint shaderHandle = glCreateShader(shaderType);
    
    // Load the shader source
    glShaderSource(shaderHandle, 1, &source, 0);
    
    // Compile the shader
    glCompileShader(shaderHandle);
    
    // Check for errors
    GLint compileSuccess;
    glGetShaderiv(shaderHandle, GL_COMPILE_STATUS, &compileSuccess);
    if (compileSuccess == GL_FALSE)
    {
        NSLog(@"GLSL Shader Error");
        GLchar messages[1024];
        glGetShaderInfoLog(shaderHandle, sizeof(messages), 0, &messages[0]);
        std::cout << messages;
        exit(1);
    }
    
    return shaderHandle;
}

@end

This code is a straightforward class that carries out a generic process for all shaders: it compiles the shaders and returns a handle to them so they can be executed when required. This class will be used to complete your shader bridge.

Open up EmitterShader.m and add the following lines to the top of the file, just after the first #import statement:

#import "ShaderProcessor.h"

// Shaders
#define STRINGIFY(A) #A
#include "Emitter.vsh"
#include "Emitter.fsh"

Again in EmitterShader.m, add the following code to the beginning of loadShader:

// Program
ShaderProcessor* shaderProcessor = [[ShaderProcessor alloc] init];
self.program = [shaderProcessor BuildProgram:EmitterVS with:EmitterFS];

This creates an instance of the ShaderProcessor you just wrote and uses it to compile and link your shaders.

That's the end of your CPU-GPU shader bridge. If you haven't already, build your program to check for errors. Once again, running your app still produces that same, lovely green screen you've been looking at since you started.

You're almost to the point where you'll actually see the graphics on the screen — there's just a few more pieces of code to add.

Sending Shader Data to the GPU


Time to send your shaders some meaningful data from your rendering loop.

Open up MainViewController.m and add the following code just below the other #import statements:

#import "EmitterShader.h"

@interface MainViewController ()

// Properties
@property (strong) EmitterShader* emitterShader;

@end

This gives your class access to an instance of the new EmitterShader class you just wrote.

Add the following method to MainViewController.m, just above the @end line:

#pragma mark - Load Shader

- (void)loadShader
{
    self.emitterShader = [[EmitterShader alloc] init];
    [self.emitterShader loadShader];
    glUseProgram(self.emitterShader.program);
}

Here you load your newly created shaders from your bridge class, then you tell the GPU to use the resulting program for future rendering. You'll have to tell the GPU every time it should switch shaders, but it's a relatively fast operation.

Now add the following code to MainViewController.m, inside viewDidLoad just before the call to loadParticles:

// Load Shader
[self loadShader];

This simply calls the loadShader method you implemented above.

Add the following code to the end of loadParticles in MainViewController.m:

// Create Vertex Buffer Object (VBO)
GLuint particleBuffer = 0;
glGenBuffers(1, &particleBuffer);                   // Generate particle buffer
glBindBuffer(GL_ARRAY_BUFFER, particleBuffer);      // Bind particle buffer
glBufferData(                                       // Fill bound buffer with particles
             GL_ARRAY_BUFFER,                       // Buffer target
             sizeof(emitter.particles),             // Buffer data size
             emitter.particles,                     // Buffer data pointer
             GL_STATIC_DRAW);                       // Usage - Data never changes; used for drawing

In the code above, the particle vertices are sent to the GPU so that the GPU knows what geometry it needs to render. The most efficient way to do this is through the use of a Vertex Buffer Object (VBO) — data storage units — which you create for your particles.

Note: For a more detailed overview of VBOs, or for a quick refresher, check out the “Creating Vertex Buffer Objects” section in the OpenGL ES 2.0 for iPhone tutorial.

Add the following to the end of glkView:drawInRect: in MainViewController.m:

// 1
// Create Projection Matrix
float aspectRatio = view.frame.size.width / view.frame.size.height;
GLKMatrix4 projectionMatrix = GLKMatrix4MakeScale(1.0f, aspectRatio, 1.0f);
    
// 2
// Uniforms
glUniformMatrix4fv(self.emitterShader.uProjectionMatrix, 1, 0, projectionMatrix.m);
glUniform1f(self.emitterShader.uK, emitter.k);
    
// 3
// Attributes
glEnableVertexAttribArray(self.emitterShader.aTheta);
glVertexAttribPointer(self.emitterShader.aTheta,                // Set pointer
                      1,                                        // One component per particle
                      GL_FLOAT,                                 // Data is floating point type
                      GL_FALSE,                                 // No fixed point scaling
                      sizeof(Particle),                         // No gaps in data
                      (void*)(offsetof(Particle, theta)));      // Start from "theta" offset within bound buffer
    
// 4
// Draw particles
glDrawArrays(GL_POINTS, 0, NUM_PARTICLES);
glDisableVertexAttribArray(self.emitterShader.aTheta);

The above code may look a bit complex, but here's what it's doing:

  1. By default, your OpenGL ES 2.0 screen coordinates range from -1 to +1 for x and y. The iPhone screen is not square, so a Projection Matrix calculated from the GLKView aspect ratio is used to scale the view to the right proportions.
  2. Here, you send your Uniform data to the shader program. For all the glUniform calls, the first parameter tells OpenGL ES 2.0 where to find the shader handle to your data, and the last parameter sends the actual data.
  3. In a similar fashion, you send your attribute data. This is a slightly more complicated process since you are pointing to a larger batch of data. The parameters of glVertexAttribPointer are as follows:
    1. index: pointer to the shader variable (using your bridge object)
    2. size: 1 component per particle (θ is a single float)
    3. type: floating point
    4. normalized: false
    5. stride: no gaps in your Particle structure (single block of data)
    6. pointer: start from the theta offset within the bound particle buffer (useful once you expand your Particle structure)
  4. Finally, you tell the GPU how many points to draw: all of your particles!

The last line of code to glDisableVertexAttribArray is basically a closing tag to the function you called a few lines up, glEnableVertexAttribArray. By default, the glDrawArrays function has no access to this vertex attribute array; this function pair enables access for this call. In OpenGL, you set up the rendering state when you need it, and it's good practice to clean up your settings when you're done.

Build and run your app — you should now be rewarded for your patience with an 8-petal polar rose made up of small red squares, as shown below:

Run2

Adding Particle Shader Variances

It's really rewarding to see something on the screen in that last build and run step, but it looks a little plain. Particle systems are meant to be exciting, dynamic organisms, so adding some color should bring a little more life to your rose.

Open up EmitterTemplate.h and add the following line to your Particle structure:

float shade[3];

Again in EmitterTemplate.h, add the following line to your Emitter structure:

float color[3];

In your particle-emitter hierarchy, the emitter's color will determine the overall RGB color of the rose, while the particle's shade will determine its own individual RGB color shade. Think of is as a tree in Autumn; you could say its overall color is orange, but in fact it’s a mix of leaves with tones ranging from yellow to red.

Now you will complete the shader-side implementation of these new properties.

Open Emitter.vsh and add the following attribute just under the aTheta attribute:

attribute vec3 aShade;

Still in Emitter.vsh, add the following code just below your uniforms and before main:

// Output to Fragment Shader
varying vec3 vShade;

This is a new type of variable called a varying. All coloring is carried out by the fragment shader but the attributes you defined (like aShade) aren't accessible to the shader. Therefore, a varying acts as an output from the vertex shader into the fragment shader and creates an outlet for attributes to be passed along the OpenGL ES 2.0 pipeline.

Again in Emitter.vhs, add the following line to the very end of main:

vShade = aShade;

Each particle’s shade is now passed straight through to the fragment shader.

Open Emitter.fsh and replace its contents with the following code:

// Fragment Shader

static const char* EmitterFS = STRINGIFY
(
 
// Input from Vertex Shader
varying highp vec3 vShade;
 
// Uniforms
uniform highp vec3 uColor;
 
void main(void)
{    
    highp vec4 color = vec4((uColor+vShade), 1.0);
    color.rgb = clamp(color.rgb, vec3(0.0), vec3(1.0));
    gl_FragColor = color;
}

);

The code above simply adds or subtracts the particle’s shade from the emitter color. The result then uses the clamp function to stay within the bounds of 0.0 (black) and 1.0 (white).

You'll notice another new term above: highp. Variables in the fragment shader require precision qualifiers because they process a lot more data than the vertex shaders do. Choosing the correct modifiers is very important when optimizing large programs, but since the app in this tutorial series is rather lightweight, you’ll be using highp all the way.

Note: Take a look at the Best Practices for Shaders section of Apple's OpenGL ES Programming Guide for iOS for more details about writing well behaved, high-performance shaders.

With your shaders all set, it’s time to complete the obligatory bridge.

Open up EmitterShader.h and add the following properties to your list of attributes and uniforms:

// with other attribute handles
@property (readwrite) GLint aShade;

// with other uniform handles
@property (readwrite) GLint uColor;

Then, open up EmitterShader.m and add the two lines of code below to loadShader; add the first line as indicated with the other attributes, and add the second line the other uniforms, as indicated:

// with the other attributes
self.aShade = glGetAttribLocation(self.program, "aShade");

// with the other uniforms
self.uColor = glGetUniformLocation(self.program, "uColor");

Finally, you need to create the actual data for the shaders.

Open MainViewController.m and add the following method above the @end line:

- (float)randomFloatBetween:(float)min and:(float)max
{
    float range = max - min;
    return (((float) (arc4random() % ((unsigned)RAND_MAX + 1)) / RAND_MAX) * range) + min;
}

This is a random float generator which creates a unique shade for each particle.

Still inside MainViewController.m, add the following code within loadParticles, inside the for loop:

// Assign a random shade offset to each particle, for each RGB channel
emitter.particles[i].shade[0] = [self randomFloatBetween:-0.25f and:0.25f];
emitter.particles[i].shade[1] = [self randomFloatBetween:-0.25f and:0.25f];
emitter.particles[i].shade[2] = [self randomFloatBetween:-0.25f and:0.25f];

As you can see, each particle will have a shade offset between -0.25 and +0.25 for each channel.

With that, your particles are all ready to go — now onto the emitter!

Add the following code to MainViewController.m inside loadEmitter:

emitter.color[0] = 0.76f;   // Color: R
emitter.color[1] = 0.12f;   // Color: G
emitter.color[2] = 0.34f;   // Color: B

This sets the base color of the particles generated by the emitter which will later be modified by each particle's unique shade.

Still inside MainViewController.m, add the following line to glkView:drawInRect:, with the other glUniform... calls:

glUniform3f(self.emitterShader.uColor, emitter.color[0], emitter.color[1], emitter.color[2]);

Once again, you're passing uniform data to the shader program — this time, for the emitter color.

Still in glkView:drawInRect:, add the following code just after the existing call to glVertexAttribPointer:

glEnableVertexAttribArray(self.emitterShader.aShade);
glVertexAttribPointer(self.emitterShader.aShade,                // Set pointer
                      3,                                        // Three components per particle
                      GL_FLOAT,                                 // Data is floating point type
                      GL_FALSE,                                 // No fixed point scaling
                      sizeof(Particle),                         // No gaps in data
                      (void*)(offsetof(Particle, shade)));      // Start from "shade" offset within bound buffer

Here you pass the shade values to the particles, just as when you passed the theta values to the individual particles.

Finally, add the following line to the end of glkView:drawInRect: to close off the glEnable/glDisable pair:

glDisableVertexAttribArray(self.emitterShader.aShade);

Build and run — your rose should now be made up of small pink-toned squares, as shown in the screenshot below:

Run3

Animating Your Polar Rose

Your particle system is looking great, but it needs a little something else. Most particle systems are organic, simulate natural phenomena, and change over time. Okay, enough suspense — your next step is to animate your system!

Animation, in its simplest form, moves an object linearly from point A to point B. In this case, you will animate your rose by expanding and contracting the particles to and from the emitter origin.

Open Emitter.vsh and add the following uniform next to the others:

uniform float uTime;

Still working in Emitter.vsh, replace the first two lines of main with the following code:

float x = uTime * cos(uK*aTheta)*sin(aTheta);
float y = uTime * cos(uK*aTheta)*cos(aTheta);

The code above multiplies the particle position (x,y) by uTime, which will vary the particle's position in relation to time.

As always, you need an Objective-C bridge to get these values to the particles.
Open EmitterShader.h and add the following property:

@property (readwrite) GLint uTime;

This is a handle to the time uniform that you can pass to the shader.

Open EmitterShader.m and add the following line to the end of loadShader:

self.uTime = glGetUniformLocation(self.program, "uTime");

This finds the location of the uniform in the shader and saves a reference to it's name so you can set the value later.

Now, open MainViewController.m and find the line that reads @implementation MainViewController. Declare the following private instance variables by changing MainViewController to look like this:

@implementation MainViewController
{
    // Instance variables
    float   _timeCurrent;
    float   _timeMax;
    int     _timeDirection;
}

Then, add the following code that initializes the above variables to viewDidLoad, just before the call to loadShader:

// Initialize variables
_timeCurrent = 0.0f;
_timeMax = 3.0f;
_timeDirection = 1;

Now, add the following method to the bottom of MainViewController.m:

- (void)update
{
    if(_timeCurrent > _timeMax)
        _timeDirection = -1;
    else if(_timeCurrent < 0.0f)
        _timeDirection = 1;

    _timeCurrent += _timeDirection * self.timeSinceLastUpdate;
}

The above method contains your program’s animation instructions, and performs the following actions:

  1. If the current time variable (_timeCurrent) exceeds the maximum time (3 seconds), then reverse the animation direction from expansion to contraction.
  2. If the current time variable reaches zero, switch the animation direction back to an expansion.
  3. For each frame, the code increments or decrements the current time variable by the amount of time that has passed since the last frame was drawn. This moves the animation at a constant speed, so that if one frame takes longer to redraw than another, it will move farther as well to make up for it.

The net effect of all this is that the rose grows continuously for 3 seconds and then shrinks continuously for 3 seconds — and the cycle then repeats.

Finally, you need to send the normalized current time to your shader.

In MainViewController.m's rendering loop glkView:drawInRect:, add the following line to the bottom of your uniform block, just before the attribute commands:

glUniform1f(self.emitterShader.uTime, (_timeCurrent/_timeMax));

Build and run — your rose should now be fully and continuously animated!

Run4

Using Textures and Point Sprites

Pixel artists may be happy with the current state of the rose, but you can make it look a lot nicer using textures. In this final stage of the tutorial, you will replace the square-shaped particles with point sprites of smaller flowers — cue the soundtrack to Inception! :]

First, download the following image file: texture_32.png. Right-click the link and choose to save the file somewhere on your computer.

Go to File\Add Files to "GLParticles1"... and select the texture_32.png file you downloaded. Be sure to check Copy items into destination group's folder (if needed) and GLParticles1 in the Add to targets section, and click Add, as shown in the following screenshot:

glp_add_to_project

Here's a larger version of the texture so you can have a better look:

glp_texture

As you can see, it's just a white flower-like shape, the rest of which is transparent. The transparent part has been colored gray here so that you can see the white area against the background of a white webpage.

You'll be using this texture as the shape for your particles, but the color will still be calculated using the values in the emitter and particle.

With the texture added to your project, you now need to tell your fragment shader to expect a texture and how to process it.

Open Emitter.fsh and add the following uniform with the others:

uniform sampler2D uTexture;

Then, add the following line to the beginning of main:

highp vec4 texture = texture2D(uTexture, gl_PointCoord);

Here’s how this all works:

  • sampler2D is a special variable exclusively used for texture access.
  • texture2D extracts the value of a texture at a certain texel point. What's a "texel"? Just as pixel = picture element, texel = texture element.
  • gl_PointCoord contains the coordinate of a fragment within each point.

Recall from the introduction to this tutorial that a point sprite is a texture rendered as a single unit. The functions above combine to produce this single unit.

Now texture contains the color value taken directly from the texture file for a given point; for this texture, it's either white or clear.

Change the last line of main from this:

gl_FragColor = color;

to this:

gl_FragColor = texture * color;

Here you multiply the texture color by the color calculated by the emitter and particle. Since the texture color is either white or clear, this will result in either the combination of the emitter and particle colors, or simply clear. This results in the white areas of the texture becoming colored, while the remaining area of the texture remains transparent.

Once again, you must now complete the Objective-C bridge.

Open EmitterShader.h and add the following property:

@property (readwrite) GLint uTexture;

By now, you should recognize a handle when you see it — the above line is just another handle for your bridge.

Open EmitterShader.m and add the following line to the end of loadShader:

self.uTexture = glGetUniformLocation(self.program, "uTexture");

Now, open MainViewController.m and add the following method just above the @end line:

#pragma mark - Load Texture

- (void)loadTexture:(NSString *)fileName
{
    NSDictionary* options = @{[NSNumber numberWithBool:YES] : GLKTextureLoaderOriginBottomLeft};
    
    NSError* error;
    NSString* path = [[NSBundle mainBundle] pathForResource:fileName ofType:nil];
    GLKTextureInfo* texture = [GLKTextureLoader textureWithContentsOfFile:path options:options error:&error];
    if(texture == nil)
    {
        NSLog(@"Error loading file: %@", [error localizedDescription]);
    }

    glBindTexture(GL_TEXTURE_2D, texture.name);
}

This method uses Apple’s new GLKTextureLoader to load your texture data, which saves you from using the more complex OpenGL ES 2.0 manual loading operations.

You'll now need to call this new loadTexturemethod from within viewDidLoad.

Add the following line to viewDidLoad, just after the call to loadShader:

// Load Texture
[self loadTexture:@"texture_32.png"];

Now you've loaded your texture, but in order to see the texture properly you must enable and set the proper blending function.

Inside glkView:drawInRect: in MainViewController.m, add the following lines just after the calls to glClear:

// Set the blending function (normal w/ premultiplied alpha)
glEnable(GL_BLEND);
glBlendFunc(GL_SRC_ALPHA, GL_ONE_MINUS_SRC_ALPHA);

This tutorial doesn't cover all of the possible blending functions in OpenGL, but a quick explanation of the above code is that you are allowing the transparent pixels in your textures to work correctly.

Note: To learn more about blend modes, check out our How to Create Dynamic Textures with CCRenderTexture in Cocos2D 2.X tutorial.

Add the following line to the bottom of your uniform block inside glkView:drawInRect: just before the attribute commands:

glUniform1i(self.emitterShader.uTexture, 0);

This code sends the texture to your shader. You send a value of 0 because you only have one active texture in your program, at the first position of 0.

Build and run! Your flower made of flowers should now be in full bloom, as shown below:

Run5

Where To Go From Here?


You can find the completed project with all of the code and resources from this tutorial on GitHub. Keep an eye on the repository for any updates!

Congratulations, you have made your first particle system in OpenGL ES!

You should now be comfortable working with a particle-emitter hierarchy, as well as working with point sprites in OpenGL ES 2.0. We’ve barely touched upon shaders, but you should have a good grasp of what they are and how to communicate with them.

For a detailed reference of GLSL, checkout out the official site.

In Part 2 of this tutorial series, you're going to blow the roof off your app by constructing a generic particle system for explosions! And you won't look back afterwards :]

If you have any questions, comments or suggestions, feel free to join the discussion below!

Ricardo Rendon Cepeda

Contributors

Ricardo Rendon Cepeda

Author

Over 300 content creators. Join our team.