OpenGL ES Particle System Tutorial: Part 3/3

In this third part of our OpenGL ES particle system tutorial series, learn how to add your particle system into a simple 2D game! By Ricardo Rendon Cepeda.

Leave a rating/review
Save for later
Share

Welcome back to our 3-part OpenGL ES particle system tutorial series! Here you’ll learn how to make a cool and fun particle system from scratch, and integrate it into an iOS app.

Here’s an overview of the series:

  • Part 1: In the first part, you learned all about particle systems and point sprites, and created a small app to help you learn as you go.
  • Part 2: In the second part, you learned to create a generic particle-emitter paired system. That’s code word for “awesome and reusable”.
  • Part 3: You are here! In this final part, you’ll use your newly developed skills to integrate particle effects into a simple 2D game.

Keep reading for a quick review, then we’ll dive right in.

Particle System and 2D Game Series Review

The first two parts of this OpenGL ES particle system tutorial series covered the following concepts:

  • Particle-Emitter Hierarchies
  • Point Sprites
  • Vertex and Fragment Shaders
  • GPU-CPU Communication
  • Basic Math and Physics
  • Linear Animation
  • Abstracted Graphics Objects

The 2D game you will be integrating the particle system into comes from the simple OpenGL game series. This two part series covered the following concepts:

  • OpenGL ES 2.0 and GLKit: The project chassis is essentially the same as the one in your particle system. It uses a GLKit View Controller and implements the relevant delegate methods. However, the greatest difference between the tutorials is that the 2D Game series uses GLKBaseEffect instead of custom shaders.
  • Sprites: The 2D Game series uses points to draw sprites instead of textured quads.
  • Subclasses and Nodes: All classes in the 2D Game project are prefixed with SGG, which stands for Simple GLKit Game. Most classes in that series are subclasses of SGGNode, which provides the interface for the render and update cycles which are accessed through the SGGViewController’s GLKit delegate methods.
  • Linear Animation: In the 2D game, monsters and ninja stars move in straight lines as a function of time. Locations of the monsters are generated randomly, while the ninja stars are generated by tapping the screen.
  • Collision Detection: If a ninja star hits a monster’s bounding box, then both the ninja star and the monster sprites are removed from play.
  • Scene Hierarchies and Game Logic: The entire game belongs to a master scene, which controls the individual rendering, animation, and lifecycle of all sprites in the game.
  • Audio Playback: The project uses the CocosDenshion audio library from Cocos2D to handle background music and sound effects.

It’s highly recommended that you complete the simple OpenGL game series if you haven’t already done so. Both parts of the 2D Game series are great tutorials with plenty of valuable OpenGL ES 2.0, GLKit, and gaming information. As well, you’ll feel much more comfortable navigating the starter project for this last tutorial.

To those of you wondering why the particle system series didn’t use GLKBaseEffect, and to those who have worked through the previous tutorials in this series using OpenGL ES 2.0, I offer up the following image as an explanation:

20BE

Getting Started

First, download the starter code for this tutorial.

The starter project is essentially the finished and refactored project from the simple 2D game series: SimpleGLKitGame3. However, the project has been renamed to GLParticles3 for the sake of continuity and contains the ShaderProcessor files from the previous parts of this particle system series. It also includes some texture and sound resources you’ll use later.

Open up your project in Xcode. Now build and run — bet you weren’t expecting that so soon, were you? :]

Play around with the game — it should function just as it did at the end of the second part of the 2D game series. However, nothing really exciting happens when a ninja star hits a monster: both sprites simply disappear from the screen. You can use your knowledge of particle systems to add some spectacular effects each time you hit the monster!

Deciphering the Game Hierarchy

Open up SGGViewController.h and SGGViewController.m and read through each of them. You’ll notice that an SGGNode property named scene, which is initialized as an SGGActionScene, handles the touch events as well as the rendering and update cycles.

Now open up SGGNode.h and SGGNode.m and read through those two files. These form the parent class for every sprite and scene — also known as nodes — in the game. This class contains many properties relevant to the nodes and visuals that it contains, but no actual rendering or game logic is involved. Instead, these tasks are handled by the nodes themselves as subclasses of SGGNode.

Take a close look at the following methods in SGGNode.m:

- (void)renderWithModelViewMatrix:(GLKMatrix4)modelViewMatrix 
{
    GLKMatrix4 childModelViewMatrix = GLKMatrix4Multiply(modelViewMatrix, [self modelMatrix:NO]);

    for (SGGNode * node in self.children) 
    {
        [node renderWithModelViewMatrix:childModelViewMatrix];
    }
}

(void)update:(float)dt 
{    
    for (SGGNode * node in self.children) 
    {
        [node update:dt];
    }
    
    GLKVector2 curMove = GLKVector2MultiplyScalar(self.moveVelocity, dt);
    self.position = GLKVector2Add(self.position, curMove);
    
    float curRotate = self.rotationVelocity * dt;
    self.rotation = self.rotation + curRotate;

    float curScale = self.scaleVelocity * dt;
    self.scale = self.scale + curScale;
}

In particular, you’ll be interested in the following lines:

for (SGGNode * node in self.children)
{
    [node renderWithModelViewMatrix:childModelViewMatrix];
}

As well as:

for (SGGNode * node in self.children) 
{
    [node update:dt];
}

Note that the nodes run their own methods that are called from within these rendering and update cycles.

To see this in more detail, open up SGGSprite.m and examine the method renderWithModelViewMatrix: which renders a sprite. As well, open up SGGActionScene.m and take a look at the method update:, which handles the game logic and animation.

If you’re wondering why handleTap: in SGGNode has an empty implementation, that’s because it’s passed along the node chain to SGGActionScene, and you need at least a stub implementation to avoid compiler errors.

By looking through the files, it should be clear that in order to render and animate your particle effects you will need to create a subclass of SGGNode that implements the methods renderWithModelViewMatrix: and update:.

Creating the Emitter

Go to File\New\File… and create a new file with the iOS\Cocoa Touch\Objective-C class subclass template. Enter SGGEmitter for the class and SGGNode for the subclass. Make sure both checkboxes are unchecked, click Next, and click Create.

There’s no need to modify these new files yet. Before you do anything, you’ll first need to create a home for your SGGEmitter.

If you paid close attention to the SGGActionScene files, you will have noticed that this is where sprites are added to and removed from the game.

Open up SGGActionScene.m and add the following line near the top of the file with the other #import statements:

#import "SGGEmitter.h"

Just a little further down SGGActionScene.m, add the following line inside the property declarations:

@property (strong) NSMutableArray* emitters;

Still working in SGGActionScene.m, add the following line to initWithEffect:, just after the line self.targets = [NSMutableArray array];:

self.emitters = [NSMutableArray array];

The stage is now set for your emitters — you now need a method to add these emitter objects to your game.

Add the following code to SGGActionScene.m just above the @end statement at the bottom of the file:

- (void)addEmitter
{
    SGGEmitter* emitter = [[SGGEmitter alloc] init];
    [self.children addObject:emitter];
    [self.emitters addObject:emitter];
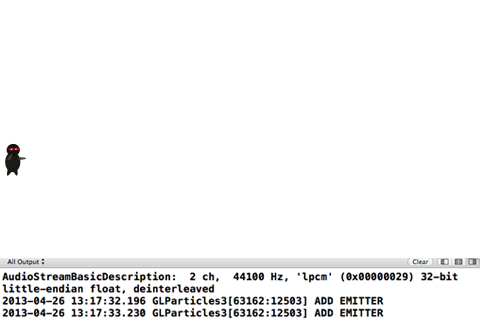
    NSLog(@"ADD EMITTER");
}

This code initializes a new SGGEmitter object and adds it to your emitters array as well as to this object’s children array.

Finally, locate the following loop within the update: method of SGGActionScene.m:

for (SGGSprite * target in targetsToDelete)

Add the following line to the very beginning of the loop:

[self addEmitter];

This simple line adds an emitter object to your game whenever a target — that is, an enemy — is removed from the game when it has been hit by a ninja star.

Build and run your project — you won’t notice any visual changes, but you should see an ADD EMITTER message on your console output whenever you hit a target, as shown below:

Run2

Rendering Your Emitter Object

The console output is interesting, but it certainly isn’t terribly exciting. Your task is to add some graphics to the collision event using textures.

Open up SGGEmitter.h and add the following method declaration:

- (id)initWithFile:(NSString *)fileName projectionMatrix:(GLKMatrix4)projectionMatrix position:(GLKVector2)position;

Now open up SGGEmitter.m and add the following method just above the @end statement at the bottom of the file:

- (id)initWithFile:(NSString *)fileName projectionMatrix:(GLKMatrix4)projectionMatrix position:(GLKVector2)position
{
   self = [super init];
   return self;
}

The compiler won’t give you any warnings or errors, but this method and class is incomplete – right now there’s no emitter code yet!

You’ll return to this method shortly to add the remaining code — but first, you need to create the OpenGL ES 2.0 elements.

Go to File\New\File…, create a new file with the iOS\Other\Empty template, and click Next. Name the new file Emitter.vsh, uncheck the box next to your GLParticles3 target, and click Create.

Repeat the above process for another new file, but this time name it Emitter.fsh.

Copy the following code into Emitter.vsh:

// Vertex Shader

static const char* EmitterVS = STRINGIFY
(

// Attributes
attribute float     a_pID;

// Uniforms
uniform mat4        u_ProjectionMatrix;
uniform mat4        u_ModelViewMatrix;
uniform vec2        u_ePosition;

void main(void)
{        
    float dummy = a_pID;
    vec4 position = vec4(u_ePosition, 0.0, 1.0);
    gl_Position = u_ProjectionMatrix * u_ModelViewMatrix * position;
    gl_PointSize = 16.0;
}

);

Next, add the following code to Emitter.fsh:

// Fragment Shader

static const char* EmitterFS = STRINGIFY
(

// Uniforms
uniform sampler2D       u_Texture;

void main(void)
{
    highp vec4 texture = texture2D(u_Texture, gl_PointCoord);
    gl_FragColor = texture;
}

);

After working through Parts 1 and 2 of this tutorial, this shader pair should seem relatively straightforward:

  • Your vertex shader simply determines a position for your 16-pixel point sprite, which is adjusted by a projection and model-view matrix.
  • Your fragment shader then renders a texture for the above point sprite.

You may have noticed there’s a variable called dummy in your vertex shader that doesn’t actually do anything. This is simply a placeholder as OpenGL ES 2.0 will crash if you send unprocessed attribute data to your vertex shader.

Note: If your shader code is completely black, simply turn on GLSL syntax highlighting under the Editor\Syntax Coloring\GLSL menu item.

Creating the GPU-CPU Bridge

It’s time to head back to Objective-C to create the GPU-CPU bridge.

Choose File\New\File… and create a new file with the iOS\Cocoa Touch\Objective-C class subclass template. Enter EmitterShader for the Class and NSObject for the subclass. Make sure both checkboxes are unchecked, click Next, and finally click Create.

Open up EmitterShader.h and replace the contents of the file with the following:

#import <GLKit/GLKit.h>

@interface EmitterShader : NSObject

// Program Handle
@property (readwrite) GLuint    program;

// Attribute Handles
@property (readwrite) GLint     a_pID;

// Uniform Handles
@property (readwrite) GLint     u_ProjectionMatrix;
@property (readwrite) GLint     u_ModelViewMatrix;
@property (readwrite) GLint     u_Texture;
@property (readwrite) GLint     u_ePosition;

// Methods
- (void)loadShader;

@end

Now, open up EmitterShader.m replace the entire contents of that file with the following:

#import "EmitterShader.h"
#import "ShaderProcessor.h"

// Shaders
#define STRINGIFY(A) #A
#include "Emitter.vsh"
#include "Emitter.fsh"

@implementation EmitterShader

- (void)loadShader
{
    // Program
    ShaderProcessor* shaderProcessor = [[ShaderProcessor alloc] init];
    self.program = [shaderProcessor BuildProgram:EmitterVS with:EmitterFS];
    
    // Attributes
    self.a_pID = glGetAttribLocation(self.program, "a_pID");
    
    // Uniforms
    self.u_ProjectionMatrix = glGetUniformLocation(self.program, "u_ProjectionMatrix");
    self.u_ModelViewMatrix = glGetUniformLocation(self.program, "u_ModelViewMatrix");
    self.u_Texture = glGetUniformLocation(self.program, "u_Texture");
    self.u_ePosition = glGetUniformLocation(self.program, "u_ePosition");
}

@end

This setup should look pretty familiar by now. You are simply creating Objective-C variables as counterparts to your GLSL variables. Along with the shader program, this class forms your CPU-GPU bridge.

Generating Data for Your Particle System

Now that your shaders are setup, you can start to work on your particle system.

Open up SGGEmitter.m and add the following line along with the other #import statements at the top of your file:

#import "EmitterShader.h"

Next, add the following structures just below the #import statements in SGGEmitter.m:

#define NUM_PARTICLES 1

typedef struct Particle
{
    float       pID;
}
Particle;

typedef struct Emitter
{
    Particle    eParticles[NUM_PARTICLES];
    GLKVector2  ePosition;
}
Emitter;

At this stage your particle system will simply consist of a single point with a position. Yes, a single point is not very spectacular, but it will show you that you have the positioning element of your particle system coded properly before moving on.

Directly following the code you added above in SGGEmitter.m, replace the line that reads @implementation SGGEmitter with the following bit of code:

@interface SGGEmitter ()

@property (assign) Emitter emitter;
@property (strong) EmitterShader* shader;

@end

@implementation SGGEmitter
{
    // Instance variables
    GLuint      _particleBuffer;
    GLuint      _texture;
    GLKMatrix4  _projectionMatrix;
    GLKVector2  _position;
}

The emitter property stores your emitter-specific data, while the shader property and the various GL instance variables will be used for communicating with the GPU.

Add the following methods to SGGEmitter.m, just above the @end statement at the bottom of the file:

- (void)loadShader
{
    self.shader = [[EmitterShader alloc] init];
    [self.shader loadShader];
    glUseProgram(self.shader.program);
}

- (void)loadEmitter
{
    Emitter newEmitter = {0.0f};
    
    // Load Particles
    for(int i=0; i<NUM_PARTICLES; i++)
    {
        newEmitter.eParticles[i].pID = 0.0f;
    }
    
    // Load Properties
    newEmitter.ePosition = _position;   // Source position
    
    // Set Emitter & VBO
    self.emitter = newEmitter;
    glGenBuffers(1, &_particleBuffer);
    glBindBuffer(GL_ARRAY_BUFFER, _particleBuffer);
    glBufferData(GL_ARRAY_BUFFER, sizeof(self.emitter.eParticles), self.emitter.eParticles, GL_STATIC_DRAW);
}

The above methods contain code that you've seen in the previous two parts of this tutorial. loadShader creates an EmitterShader, compiles the vertex and fragment shaders and loads the resulting shader program. loadEmitter creates an Emitter, sets the emitter's variables and finally sets up the Vertex Buffer Object (VBO) to pass the data to the GPU.

Still working in SGGEmitter.m, add the following method for loading textures, just above the @end statement at the bottom of the file:

- (void)loadTexture:(NSString *)fileName
{
    NSDictionary* options = [NSDictionary dictionaryWithObjectsAndKeys:
                             [NSNumber numberWithBool:YES],
                             GLKTextureLoaderOriginBottomLeft,
                             nil];
    
    NSError* error;
    NSString* path = [[NSBundle mainBundle] pathForResource:fileName ofType:nil];
    GLKTextureInfo* texture = [GLKTextureLoader textureWithContentsOfFile:path options:options error:&error];
    if(texture == nil)
    {
        NSLog(@"Error loading file: %@", [error localizedDescription]);
    }
    
    _texture = texture.name;
    glBindTexture(GL_TEXTURE_2D, _texture);
}

This is basically the same loadTexture: method you've used in the past two parts of this tutorial. The one difference is that it stores a handle to the texture in _texture. You'll need that later.

Stay with SGGEmitter.m and replacing the contents of initWithFile:projectionMatrix:position: with the following code:

if((self = [super init]))
{
    _particleBuffer = 0;
    _texture = 0;
    _projectionMatrix = projectionMatrix;
    _position = position;
        
    [self loadShader];
    [self loadEmitter];
    [self loadTexture:fileName];
}
return self;

Once again, this is the standard emitter initialization that should be familiar to you from Part 1 and Part 2 of this tutorial series.

Sending Shader Data to the GPU

With your emitters initialized, shaders ready, and GPU-CPU bridge all set, it’s time to actually send some data to OpenGL ES 2.0.

Inside SGGEmitter.m, add the following method just above the @end statement at the bottom of the file:

- (void)renderWithModelViewMatrix:(GLKMatrix4)modelViewMatrix
{
    [super renderWithModelViewMatrix:modelViewMatrix];
    
    // Uniforms
    glUniform1i(self.shader.u_Texture, 0);
    glUniformMatrix4fv(self.shader.u_ProjectionMatrix, 1, 0, _projectionMatrix.m);
    glUniformMatrix4fv(self.shader.u_ModelViewMatrix, 1, 0, modelViewMatrix.m);
    glUniform2f(self.shader.u_ePosition, self.emitter.ePosition.x, self.emitter.ePosition.y);
    
    // Attributes
    glEnableVertexAttribArray(self.shader.a_pID);
    glVertexAttribPointer(self.shader.a_pID, 1, GL_FLOAT, GL_FALSE, sizeof(Particle), (void*)(offsetof(Particle, pID)));
    
    // Draw particles
    glDrawArrays(GL_POINTS, 0, NUM_PARTICLES);
    glDisableVertexAttribArray(self.shader.a_pID);
}

This simply sends your particle data to the GPU. It sounds like you're ready to render your new particle effect...or are you?

While creating all these new particle system files, keep in mind that your modifications need to co-exist with the base code which already includes OpenGL ES 2.0 elements.

Although the SimpleGLKitGame graphics use GLKBaseEffect, texture binding, shader programs, and other OpenGL elements are hiding under the hood. Therefore, you must set and reset particular OpenGL ES 2.0 elements in your rendering cycle to avoid ugly clashes with the existing code.

Open up SGGEmitter.m and locate renderWithModelViewMatrix:. Add the following lines to the top of renderWithModelViewMatrix:, immediately following the call to super:

// "Set"
glUseProgram(self.shader.program);
glBindTexture(GL_TEXTURE_2D, _texture);
glBindBuffer(GL_ARRAY_BUFFER, _particleBuffer);

Now add the following lines to the very bottom of renderWithModelViewMatrix::

// "Reset"
glUseProgram(0);
glBindTexture(GL_TEXTURE_2D, 0);
glBindBuffer(GL_ARRAY_BUFFER, 0);

Programs, textures, and VBOs are processing-heavy; you can’t assume that your graphics pipeline will “work itself out” when rendering multiple objects in different rendering cycles. The code above helps OpenGL ES 2.0 know what instructions to use and when to use them.

Now you need to complete a similar process with the loading methods in SGGEmitter.m. Add the following line to the end of loadShader:

glUseProgram(0);

Next, add the following code to the end of loadEmitter in SGGEmitter.m:

glBindBuffer(GL_ARRAY_BUFFER, 0);

Finally, add the following line to the end of loadTexture: in SGGEmitter.m:

glBindTexture(GL_TEXTURE_2D, 0);

Now your particle effect is ready to be rendered — without any nasty clashes.

Initializing Your Emitter

Time to move back to the SGG hierarchy and properly initialize your emitter object.

Open up SGGActionScene.m and replace addEmitter with the following:

- (void)addEmitter:(GLKVector2)position
{
    SGGEmitter* emitter = [[SGGEmitter alloc] initWithFile:@"particle_32.png" projectionMatrix:self.effect.transform.projectionMatrix position:position];
    [self.children addObject:emitter];
    [self.emitters addObject:emitter];
}

This new declaration creates your emitter objects with the game’s projection matrix at the given position. It passes particle_32.png to load as a texture; this is an image file that was included in the starter project.

Still working in SGGActionScene.m, locate the for loop that deals with targetsToDelete in update:. Replace the following line:

[self addEmitter];

with:

[self addEmitter:target.position];

This loop removes targets, or enemies, from play if they are hit by a ninja star. Each target is a subclass of SGGNode, which conveniently stores a position for each of its children. This position is updated as the targets move about, so you can use the position of the target’s collision as the point to initialize your emitter object.

You've been a very patient code ninja to get through all of this without a break, but here's where you can take out your coding frustrations on some monsters! :]

Build and run your app — each you hit an enemy target, the enemy will disappear and its last position will be marked with a single star, as shown in the screenshot below:

Run3

Creating Your Particle Effect

You know, you could simply replace the stars with a tombstone or a crater and call it a day. However, you're now a particle system aficionado, and you know you can do better than that! In this section, you’re going to take things to the next level and render a cool particle effect every time you hit a monster with a ninja star.

Your particle effect won’t be as complex as the explosion from Part 2, but it will definitely be a little more sophisticated than the polar rose from Part 1. You need something flashy, yet something that maintains the game’s simple 2D charm. How about an animated ring of colorful stars that slowly fade away?

Open up SGGEmitter.m and add the following field to your Particle structure:

GLKVector3  pColorOffset;

Now, add the following fields to your Emitter structure in SGGEmitter.m:

float       eRadius;
float       eGrowth;
float       eDecay;
float       eSize;
GLKVector3  eColor;

Add the following time variable to your list of instance variables in SGGEmitter.m, immediately below the line that reads GLKVector2 _position;:

float       _time;

Finally, add the following initialization statement to initWithFile:projectionMatrix:position: in SGGEmitter.m, immediately below the line that initializes the _position variable:

_time = 0.0f;

Okay, that completes the setup of the new emitter variables for your particle system. As a challenge to yourself, see if you can port these new variables to your GLSL code all on your own — with all the correct types and qualifiers. As a hint, you'll need a single varying variable.

If you get stuck, check out the solution below:

[spoiler title="Adding GLSL Variables"]
Add the following vertex shader variables to Emitter.vsh, before main:

// Attributes
attribute vec3      a_pColorOffset;

// Uniforms
uniform float       u_Time;
uniform float       u_eRadius;
uniform float       u_eGrowth;
uniform float       u_eDecay;
uniform float       u_eSize;

// Varying
varying vec3        v_pColorOffset;

Add the following fragment shader variables to Emitter.fsh, also before main:

// Varying
varying highp vec3      v_pColorOffset;
 
// Uniforms
uniform highp float     u_Time;
uniform highp float     u_eGrowth;
uniform highp float     u_eDecay;
uniform highp vec3      u_eColor;

[/spoiler]

How did you do?

It's time to put these new variables to use. Open up Emitter.vsh and replace main with the following:

void main(void)
{        
    // 1
    // Convert polar angle to cartesian coordinates and calculate radius
    float x = cos(a_pID);
    float y = sin(a_pID);
    float r = u_eRadius;
    
    // Size
    float s = u_eSize;

    // 2
    // If blast is growing
    if(u_Time < u_eGrowth)
    {
        float t = u_Time / u_eGrowth;
        x = x * r * t;
        y = y * r * t;
    }
    
    // 3
    // Else if blast is decaying
    else
    {
        float t = (u_Time - u_eGrowth) / u_eDecay;
        x = x * r;
        y = y * r;
        s = (1.0 - t) * u_eSize;
    }
    
    // 4
    // Calculate position with respect to emitter source
    vec2 position = vec2(x,y) + u_ePosition;
    
    // Required OpenGL ES 2.0 outputs
    gl_Position = u_ProjectionMatrix * u_ModelViewMatrix * vec4(position, 0.0, 1.0);
    gl_PointSize = s;
    
    // Fragment Shader outputs
    v_pColorOffset = a_pColorOffset;
}

Similarly, open up Emitter.fsh and replace main with:

void main(void)
{
    highp vec4 texture = texture2D(u_Texture, gl_PointCoord);
    highp vec4 color = vec4(1.0);
    
    // 5
    // Calculate color with offset
    color.rgb = u_eColor + v_pColorOffset;
    color.rgb = clamp(color.rgb, vec3(0.0), vec3(1.0));
    
    // 6
    // If blast is growing
    if(u_Time < u_eGrowth)
    {
        color.a = 1.0;
    }
    
    // 7
    // Else if blast is decaying
    else
    {
        highp float t = (u_Time - u_eGrowth) / u_eDecay;
        color.a = 1.0 - t;
    }
    
    // Required OpenGL ES 2.0 outputs
    gl_FragColor = texture * color;
}

In terms of complexity, the shader code is a nice balance of the simplicity of Part 1 and the showiness of Part 2. Take a moment and walk through the code of the two files, comment by comment:

  1. Each particle’s unique ID is used to calculate the particle's position on the ring’s circumference.
  2. If the blast is growing, the particles travel from the source center towards the final ring position, relative to the growth time.
  3. If the blast is decaying, the particles hold their position on the ring. However, the size of the particles gradually decreases relative to the decay size, down to 1 pixel.
  4. The final position is calculated relative to the emitter source.
  5. Each particle’s RGB color is calculated by adding/subtracting its offset to the overall emitter color, using the clamp function to stay within the bounds of 0.0 (black) and 1.0 (white).
  6. If the blast is growing, the particles remain fully visible.
  7. If the blast is decaying, the particles’ opacity gradually decays to full transparency, relative to the decay time.

With your shaders all ready to rock and roll, it’s time to complete the obligatory EmitterShader bridge. You've done this several times before — see if you can complete this step all on your own! If you need a little help, check out the solution below:

[spoiler title="CPU-GPU Bridge"]
Open up EmitterShader.h and add the following properties:

// Attribute Handles
@property (readwrite) GLint     a_pColorOffset;

// Uniform Handles
@property (readwrite) GLint     u_Time;
@property (readwrite) GLint     u_eRadius;
@property (readwrite) GLint     u_eGrowth;
@property (readwrite) GLint     u_eDecay;
@property (readwrite) GLint     u_eSize;
@property (readwrite) GLint     u_eColor;

Then, open EmitterShader.m and complete their implementation within loadShader, by adding the following lines along with the other attribute and uniform initializations:

// Attributes
self.a_pColorOffset = glGetAttribLocation(self.program, "a_pColorOffset");
    
// Uniforms
self.u_Time = glGetUniformLocation(self.program, "u_Time");
self.u_eRadius = glGetUniformLocation(self.program, "u_eRadius");
self.u_eGrowth = glGetUniformLocation(self.program, "u_eGrowth");
self.u_eDecay = glGetUniformLocation(self.program, "u_eDecay");
self.u_eSize = glGetUniformLocation(self.program, "u_eSize");
self.u_eColor = glGetUniformLocation(self.program, "u_eColor");

[/spoiler]

If you feel like a challenge and you think you know what the next step will be, then give it a try on your own! Otherwise, take a look at the solution below:

[spoiler title="Sending Data to OpenGL ES 2.0"]
Open up SGGEmitter.m and add the following lines to renderWithModelViewMatrix:, respecting the OpenGL ES 2.0 command order for attributes:

// Uniforms
glUniform1f(self.shader.u_Time, _time);
glUniform1f(self.shader.u_eRadius, self.emitter.eRadius);
glUniform1f(self.shader.u_eGrowth, self.emitter.eGrowth);
glUniform1f(self.shader.u_eDecay, self.emitter.eDecay);
glUniform1f(self.shader.u_eSize, self.emitter.eSize);
glUniform3f(self.shader.u_eColor, self.emitter.eColor.r, self.emitter.eColor.g, self.emitter.eColor.b);
    
// Attributes
glEnableVertexAttribArray(self.shader.a_pColorOffset);

glVertexAttribPointer(self.shader.a_pColorOffset, 3, GL_FLOAT, GL_FALSE, sizeof(Particle), (void*)(offsetof(Particle, pColorOffset)));

glDisableVertexAttribArray(self.shader.a_pColorOffset);

When you're done, renderWithModelViewMatrix: should look like this:

- (void)renderWithModelViewMatrix:(GLKMatrix4)modelViewMatrix
{    
    [super renderWithModelViewMatrix:modelViewMatrix];
    
    // "Set"
    glUseProgram(self.shader.program);
    glBindTexture(GL_TEXTURE_2D, _texture);
    glBindBuffer(GL_ARRAY_BUFFER, _particleBuffer);
    
    // Uniforms
    glUniform1i(self.shader.u_Texture, 0);
    glUniformMatrix4fv(self.shader.u_ProjectionMatrix, 1, 0, _projectionMatrix.m);
    glUniformMatrix4fv(self.shader.u_ModelViewMatrix, 1, 0, modelViewMatrix.m);
    glUniform1f(self.shader.u_Time, _time); // NEW
    glUniform2f(self.shader.u_ePosition, self.emitter.ePosition.x, self.emitter.ePosition.y);
    glUniform1f(self.shader.u_eRadius, self.emitter.eRadius); // NEW
    glUniform1f(self.shader.u_eGrowth, self.emitter.eGrowth); // NEW
    glUniform1f(self.shader.u_eDecay, self.emitter.eDecay); // NEW
    glUniform1f(self.shader.u_eSize, self.emitter.eSize); // NEW
    glUniform3f(self.shader.u_eColor, self.emitter.eColor.r, self.emitter.eColor.g, self.emitter.eColor.b); // NEW
    
    // Attributes
    glEnableVertexAttribArray(self.shader.a_pID);
    glEnableVertexAttribArray(self.shader.a_pColorOffset); // NEW
    glVertexAttribPointer(self.shader.a_pID, 1, GL_FLOAT, GL_FALSE, sizeof(Particle), (void*)(offsetof(Particle, pID)));
    glVertexAttribPointer(self.shader.a_pColorOffset, 3, GL_FLOAT, GL_FALSE, sizeof(Particle), (void*)(offsetof(Particle, pColorOffset))); // NEW
    
    // Draw particles
    glDrawArrays(GL_POINTS, 0, NUM_PARTICLES);
    glDisableVertexAttribArray(self.shader.a_pID);
    glDisableVertexAttribArray(self.shader.a_pColorOffset); // NEW
    
    // "Reset"
    glUseProgram(0);
    glBindTexture(GL_TEXTURE_2D, 0);
    glBindBuffer(GL_ARRAY_BUFFER, 0);
}

[/spoiler]

Now you need to populate all these new variables. Add the following method to SGGEmitter.m, just above the @end statement at the bottom of the file:

- (float)randomFloatBetween:(float)min and:(float)max
{
    float range = max - min;
    return (((float) (arc4random() % ((unsigned)RAND_MAX + 1)) / RAND_MAX) * range) + min;
}

Then, replace the current loadEmitter method with the following code:

- (void)loadEmitter
{
    Emitter newEmitter = {0.0f};
    
    // Offset bounds
    float oColor = 0.25f;   // 0.5 = 50% shade offset
    
    // Load Particles
    for(int i=0; i<NUM_PARTICLES; i++)
    {
        // Assign a unique ID to each particle, between 0 and 360 (in radians)
        newEmitter.eParticles[i].pID = GLKMathDegreesToRadians(((float)i/(float)NUM_PARTICLES)*360.0f);
        
        // Assign random offsets within bounds
        float r = [self randomFloatBetween:-oColor and:oColor];
        float g = [self randomFloatBetween:-oColor and:oColor];
        float b = [self randomFloatBetween:-oColor and:oColor];
        newEmitter.eParticles[i].pColorOffset = GLKVector3Make(r, g, b);
    }
    
    // Load Properties
    newEmitter.ePosition = _position;                       // Source position
    newEmitter.eRadius = 50.0f;                             // Blast radius
    newEmitter.eGrowth = 0.25f;                             // Growth time
    newEmitter.eDecay = 0.75f;                              // Decay time
    newEmitter.eSize = 32.00f;                              // Fragment size
    newEmitter.eColor = GLKVector3Make(0.5f, 0.0f, 0.0f);   // Fragment color
    
    // Set Emitter & VBO
    self.emitter = newEmitter;
    glGenBuffers(1, &_particleBuffer);
    glBindBuffer(GL_ARRAY_BUFFER, _particleBuffer);
    glBufferData(GL_ARRAY_BUFFER, sizeof(self.emitter.eParticles), self.emitter.eParticles, GL_STATIC_DRAW);
    glBindBuffer(GL_ARRAY_BUFFER, 0);
}

This new version of loadEmitter is quite similar to the old version. It sets the particle's pID within the for loop along with a random color offset. It then sets the various new emitter properties, such as eRadius and eGrowth, among others.

To animate your blast, you need to implement update: that was defined in the SGGNode interface. Add the following method to SGGEmitter.m, just above the @end statement at the bottom of the file:

- (void)update:(float)dt
{
  const float life = self.emitter.eGrowth + self.emitter.eDecay;

  if(_time < life)
      _time += dt;
}

This method simply keeps track of the total time that this emitter has been alive. Once the time exceeds the emitter's allowed life span, it stops.

Of course, what would a particle system be without more than one particle flying around? At the top of SGGEmitter.m, change the line:

#define NUM_PARTICLES 1

To:

#define NUM_PARTICLES 18

Build and run — your targets will now be blown up into rings of stars when hit, as in the screenshot below:

Run4

That adds a great little 2D special effect to the game, doesn't it?

Deleting Your Emitter Objects

You may have noticed that your game’s frame rate drops drastically after the 3rd or 4th hit. What's going on?

Even though the particles disappear once their lifespan is over, they’re still being rendered in-memory — and taking up a large chunk of your graphics processing power. You need a way to tell your game to remove your emitter objects upon their “death”.

Open up SGGEmitter.h and add the following property just below the line that begins with @interface:

@property (nonatomic,readonly,getter=isDead) BOOL dead;

Open SGGEmitter.m and add the following else clause to the existing if statement in update::

else
    _dead = YES;

With that, you have set up a “death” flag for your emitter object that gets triggered at the end of its lifecycle. Now, you need to add the code to perform the actual removal within your game logic.

Open up SGGActionScene.m and turn your attention to the update: method. Locate the following for loop:

for (SGGSprite * projectile in projectilesToDelete)
{
    [self.projectiles removeObject:projectile];
    [self.children removeObject:projectile];
}

...and add the following lines just below it:

if([self.emitters count] != 0)
{
    NSMutableArray * emittersToDelete = [NSMutableArray array];
        
    for(SGGEmitter* emitter in self.emitters)
    {
        if(emitter.isDead)
            [emittersToDelete addObject:emitter];
    }
      
    for(SGGEmitter* emitter in emittersToDelete)
    {
        [self.emitters removeObject:emitter];
        [self.children removeObject:emitter];
        NSLog(@"REMOVE EMITTER");
    }
}

This operation should look familiar from Part 2, but it also mirrors the way that projectiles are removed from the game. The code simply checks if an emitter is dead and if so, removes it from the game.

Build and run — your game should be running a lot more smoothly. In addition, you should see a REMOVE EMITTER message on your console output whenever an emitter dies, as shown below:

Run5

Gratuitous Sound Effects

That’s it for your particle effects - you did a great job to get this far!

However, this is also a gaming tutorial and you can't have dazzling visuals without some accompanying sound effects! There won't be much background on the behind-the-scenes details of the rendering of the sound effects in this section. It's recommended that you read up on the CocosDenshion sound engine from the simple 2D game series if you need a refresher.

Open up SGGActionScene.m and add the following line to initWithEffect: just after the line that reads [[SimpleAudioEngine sharedEngine] preloadEffect:@"pew-pew.wav"];:

[[SimpleAudioEngine sharedEngine] preloadEffect:@"blast.caf"];

This command preloads your sound effect so the sound doesn’t lag on its first playback.

Now, locate addEmitter: in and add the following line to the very bottom:

[[SimpleAudioEngine sharedEngine] playEffect:@"blast.caf"];

That’s it! Seriously — that's all you have to do! Two simple lines and you're done, thanks to CocosDenshion.

Build and run — it's much more satisfying to hit those monsters now with the added bonus of sound effects to accompany the kill!

Congratulations, you have completed the entire particle system tutorial series! Time to show off your three new apps and take a well deserved break.

Where To Go From Here?

You can find the completed project with all of the code and resources from this tutorial on GitHub. Keep an eye on the repository for any updates!

Part 3 was particularly rewarding because it involved understanding and extending existing code along with managing the OpenGL ES 2.0 pipeline appropriately.

By completing this 3-part series, you should now have a very good understanding of particle system hierarchies, shader programs, low-level graphics, CPU-GPU communication, game engine logic and extensions, and a host of other useful technologies! These are all advanced programming topics — you should feel very pleased with yourself.

You now definitely have what it takes to build more sophisticated particle systems and visual effects. Perhaps you’ll build a virtual snow globe? Or go all out and create an entire galaxy filled with stars? The choices are limitless!

If you have any questions, comments, or suggestions, or just want to show off your creations, feel free to join in the conversation below!

Ricardo Rendon Cepeda

Contributors

Ricardo Rendon Cepeda

Author

Over 300 content creators. Join our team.