Procedural Level Generation in Games Tutorial: Part 1
A tutorial on procedural level generation using the Drunkard Walk algorithm. By Kim Pedersen.
Adding Walls
Open Map.m and add the following method:
- (void) generateWalls
{
    // 1
    for ( NSInteger y = 0; y < self.tiles.gridSize.height; y++ )
    {
        for ( NSInteger x = 0; x < self.tiles.gridSize.width; x++ )
        {
            CGPoint tileCoordinate = CGPointMake(x, y);

            // 2
            if ( [self.tiles tileTypeAt:tileCoordinate] == MapTileTypeFloor )
            {
                for ( NSInteger neighbourY = -1; neighbourY < 2; neighbourY++ )
                {
                    for ( NSInteger neighbourX = -1; neighbourX < 2; neighbourX++ )
                    {
                        if ( !(neighbourX == 0 && neighbourY == 0) )
                        {
                            CGPoint coordinate = CGPointMake(x + neighbourX, y + neighbourY);

                            // 3
                            if ( [self.tiles tileTypeAt:coordinate] == MapTileTypeNone )
                            {
                                [self.tiles setTileType:MapTileTypeWall at:coordinate];
                            }
                        }
                    }
                }
            }
        }
    }
}
Figure 3: How to identify surrounding tiles in a grid.

Figure 3: How to identify surrounding tiles in a grid.
- The strategy applied by
generateWallsis to first loop through each tile of the grid. - It does this until it identifies a floor tile (
MapTileTypeFloor). - It then checks the surrounding tiles and marks these as walls (
MapTileTypeWall) if no tile is placed there already (MapTileTypeNone).
The inner for loops (after //2) might seem a bit strange at first. It looks at each tile that surrounds the tile at coordinate (x,y). Take a peek at Figure 3 and see how the tiles you want are one less, equal to, and one more than the original index. The two for loop gives just that, starting at -1 and looping through to +1. Adding one of these integers to the original index inside the for loop, you find each neighbor.
What if the tile you're checking is at the border of the grid? In that case, this check would fail, as the index would be invalid, correct?
Yes, but luckily this situation is mitigated by the tileTypeAt: method on the MapTiles class. If an invalid coordinate is sent to tileTypeAt:, the method will return a MapTileTypeInvalid value. Consider the line after //3 in generateWalls and notice it only changes the tile to a wall tile if the returned tile type is MapTileTypeNone.
To generate the wall tiles, go back to generate in Map.m and add the following line of code after [self generateTileGrid] and before [self generateTiles]:
[self generateWalls];
Build and run. You should now see wall tiles surrounding the floor tiles. Try moving the cat around – notice anything strange?
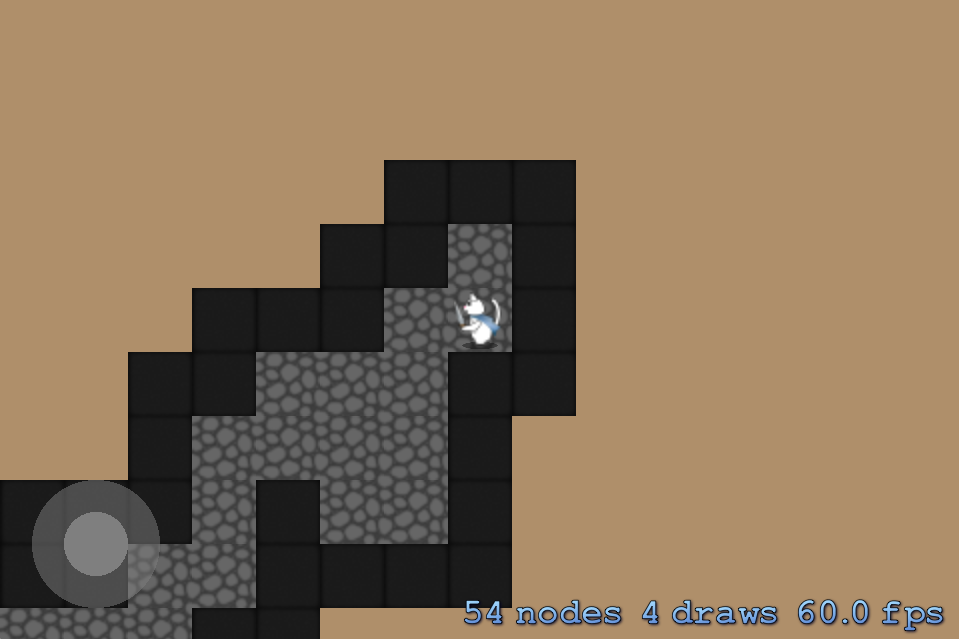
Walls are kind of pointless if you can walk right through them. There are several ways to fix this problem, one of which is described in the Collisions and Collectables: How To Make a Tile-Based Game with Cocos2D 2.X, Part 2 tutorial on this site. In this tutorial you will do it a bit differently by using the build-in physics engine in Sprite Kit. Everyone likes new tech, after all.
Procedural Collision Handling: Theory
There are many ways you could turn wall tiles into collision objects. The most obvious is to add a physicsBody to each wall tile, but that is not the most efficient solution. Another way, as described by Steffen Itterheim, is to use the Moore Neighborhood algorithm, but that is a tutorial in its own right.
Instead, you will implement a fairly simple method where connected wall segments are combined into a single collision object. Figure 4 illustrates this method.
Figure 4: Using a very simple method, the walls are turned into batched collision wall objects.
Figure 4: Using a very simple method, the walls are turned into batched collision wall objects.
The method will iterate over all tiles in the map using the following logic:
- Starting at (0,0), iterate the tile grid until you find a wall tile.
- When you find a wall tile, mark the tile grid position. This is the starting point for the collision wall.
- Move to the next tile in the grid. If this is also a wall tile, then increase the number of tiles in the collision wall by 1.
- Continue step 3 until you reach a non-wall tile or the end of the row.
- When you reach a non-tile or the end of the row, create a collision wall from the starting point with a size of the number of tiles in the collision wall.
- Start the iteration again, go back to step 2 and repeat until you've turned all wall tiles in the grid into collision walls.
Note: The method described here is very basic and could be optimized further. For instance, you could iterate the map both horizontally and vertically. Iterating the map horizontally would omit all collision walls that are the size of one tile. You would then pick these up when iterating the map vertically, further decreasing the number of collision objects, which is always a good thing.
Note: The method described here is very basic and could be optimized further. For instance, you could iterate the map both horizontally and vertically. Iterating the map horizontally would omit all collision walls that are the size of one tile. You would then pick these up when iterating the map vertically, further decreasing the number of collision objects, which is always a good thing.
It's time to put theory into practice.
Procedural Collision Handling: Practice
Look at initWithSize: in MyScene.m and see that the code to activate the physics engine is already in the starter project. Since Ray did an excellent job explaining how to set up the physics engine in the Sprite Kit for Beginners tutorial, I'll only explain it here in the context of procedural level generation.
When the code creates the physicsBody of the player object, it sets it to collide with walls by adding the CollisionTypeWall to the collisionBitMask. That way, the physics engine will automatically bounce the player off any wall objects.
However, when you created the walls in generateWalls, you didn't create them as physics objects – only as simple SKSpriteNodes. Hence, when you build and run the game the player will not collide with the walls.
You're going to simplify wall collision object creation by adding a helper method. Open Map.m and add the following code:
// Add at the top of the file together with the other #import statements
#import "MyScene.h"

// Add with other methods
- (void) addCollisionWallAtPosition:(CGPoint)position withSize:(CGSize)size
{
    SKNode *wall = [SKNode node];

    wall.position = CGPointMake(position.x + size.width * 0.5f - 0.5f * self.tileSize,
                                position.y - size.height * 0.5f + 0.5f * self.tileSize);
    wall.physicsBody = [SKPhysicsBody bodyWithRectangleOfSize:size];
    wall.physicsBody.dynamic = NO;
    wall.physicsBody.categoryBitMask = CollisionTypeWall;
    wall.physicsBody.contactTestBitMask = 0;
    wall.physicsBody.collisionBitMask = CollisionTypePlayer;

    [self addChild:wall];
}
This method creates and adds an SKNode to the map with the passed position and size. It then creates a non-moveable physics body for the node the size of the node, and ensures that the physics engine performs collision handling when the player collides with the node.
It's time to implement the collision wall generation. Add the following method:
- (void) generateCollisionWalls
{
    for ( NSInteger y = 0; y < self.tiles.gridSize.height; y++ )
    {
        CGFloat startPointForWall = 0;
        CGFloat wallLength = 0;
        for ( NSInteger x = 0; x <= self.tiles.gridSize.width; x++ )
        {
            CGPoint tileCoordinate = CGPointMake(x, y);
            // 1
            if ( [self.tiles tileTypeAt:tileCoordinate] == MapTileTypeWall )
            {
                if ( startPointForWall == 0 && wallLength == 0 )
                {
                    startPointForWall = x;
                }
                wallLength += 1;
            }
            // 2
            else if ( wallLength > 0 )
            {
                CGPoint wallOrigin = CGPointMake(startPointForWall, y);
                CGSize wallSize = CGSizeMake(wallLength * self.tileSize, self.tileSize);
                [self addCollisionWallAtPosition:[self convertMapCoordinateToWorldCoordinate:wallOrigin]
                                        withSize:wallSize];
                startPointForWall = 0;
                wallLength = 0;
            }
        }
    }
}
Here you perform the six steps described earlier.
- You iterate through each row until you find a wall tile. You set a starting point (tile coordinate pair) for the collision wall and then increase the
wallLengthby one. Then you move to the next tile. If this is also a wall tile, you repeat these steps. - If the next tile is not a wall tile, you calculate the size of the wall in points by multiplying the tile size, and you convert the starting point into world coordinates. By passing the starting point (as world coordinates in pixels) and size (in pixels), you generate a collision wall using the
addCollisionWallAtPosition:withSize:helper method you added above.
Go to generate in Map.m and add the following line of code after [self generateTiles] to ensure the game generates collision walls when it generates a tile map:
[self generateCollisionWalls];
Build and run. Now the cat is stuck within the walls. The only way out is to find the exit – or is it?
