How To Export Blender Models to OpenGL ES: Part 1/3
Learn how to export blender models to OpenGL ES in this three part tutorial series! By Ricardo Rendon Cepeda.
Building an OBJ to OpenGL ES Command Line Tool
The tool you will build throughout this tutorial series is based on mtl2opengl, a parser I developed as an extension to obj2opengl. Both tools are Perl scripts that you should definitely check out later, but right now you’ll be using Xcode and C++ to take care of business. :]
Project Setup
Open Xcode and go to File\New\Project…. Select OS X\Application\Command Line Tool and click Next.

Name your project blender2opengles, select C++ for Type, make sure Use Automatic Reference Counting is checked and click Next.

Save your project inside the folder /Code/ and click Create. In your new project, open main.cpp, give it a look and then build and run it. A “Hello, World!” message will be output to your console—classic.
Project Directory
Command line tools keep their products and data outside of their Xcode project directory. You don’t need to pull this hidden directory, but you’ll have a much easier time managing your model files if you keep them within sight and reach.
In Xcode, go to Product\Scheme\Edit Scheme…. Click on the Options tab, check the box labeled Use custom working directory:, type ${PROJECT_DIR} into the text field and click OK. Any file references in your program will now default to your Xcode project’s path.

Using Finder, open your project directory (/Code/blender2opengles/) and create two new folders, source and product. Copy your model file cube.obj into the new source folder. Your project now has a very clean directory to reference.

Input/Output, Files and Strings
Speaking of file handling, now’s a good time to add the C++ Standard Library classes necessary for this project. Add the following lines to the top of main.cpp:
// C++ Standard Library
#include <iostream>
#include <fstream>
#include <string>
using namespace std;
These classes enable you to work with input/output, files and strings. The std:: prefix is also accounted for, so remove it from the cout line to leave:
cout << "Hello, World!\n";
Build and run again! Your console output will be the same, but you’ve just saved yourself from writing hundreds of std:: statements when dealing with input/output, files or strings. Maybe you should change your message to, “Hello, Optimization!” On second thought, remove the “Hello, World!” output now.
Command Line Arguments
To make your tool reusable, you’re going to design it in such a way that it can take in command line arguments for any OBJ file simply by specifying the file name, minus the .obj extension.
Go to Product\Scheme\Edit Scheme... and click on the Arguments tab. In the section titled Arguments Passed On Launch, click the + sign, type in cube and then click OK.

Back in main.cpp, add the following lines to main():
// Arguments
cout << argc << endl;
cout << argv[0] << endl;
cout << argv[1] << endl;
Build and run! The console now shows your argument list:

The top line outputs the number of arguments (2), with the first being the blender2opengles product directory on your computer (ugly, isn’t it?) and the second one being the model name you declared (cube).
Add the following lines just below the new code:
// Files
string nameOBJ = argv[1];
string filepathOBJ = "source/" + nameOBJ + ".obj";
string filepathH = "product/" + nameOBJ + ".h";
string filepathC = "product/" + nameOBJ + ".c";
You now have references to your cube input (cube.obj) and output (cube.h, cube.c) files. You’ve completed your command line tool setup!
The Model Info
After your deep dive into the OBJ file format, you know that you can define your model as a list of vertices with positions, texels, and normals grouped into faces. Each attribute needs its own array, for which you need to find the size by reading through the OBJ file once, so let’s write some code to store the results.
In main.cpp, after the using directive, add the following lines to define the typedef Model:
// Model Structure
typedef struct Model
{
    int vertices;
    int positions;
    int texels;
    int normals;
    int faces;
}
Model;
Each field in Model holds the number of elements for each attribute and thus defines their array size. Now let's write a function to actually read the OBJ file.
In main.cpp, just after your typedef statement, add the following function definition for getOBJinfo:
// 1
Model getOBJinfo(string fp)
{
    // 2
    Model model = {0};

    // 3
    // Open OBJ file
    ifstream inOBJ;
    inOBJ.open(fp);
    if(!inOBJ.good())
    {
        cout << "ERROR OPENING OBJ FILE" << endl;
        exit(1);
    }

    // 4
    // Read OBJ file
    while(!inOBJ.eof())
    {
        // 5
        string line;
        getline(inOBJ, line);
        string type = line.substr(0,2);

        // 6
        if(type.compare("v ") == 0)
            model.positions++;
        else if(type.compare("vt") == 0)
            model.texels++;
        else if(type.compare("vn") == 0)
            model.normals++;
        else if(type.compare("f ") == 0)
            model.faces++;
    }

    // 7
    model.vertices = model.faces*3;

    // 8
    // Close OBJ file
    inOBJ.close();

    // 9
    return model;
}
The function above has many parts worth explaining, so let’s break it down:
-
fpis the path of your OBJ file. - This line creates a new instance of
Modelinitialized to0. -
ifstreamopens your OBJ file for reading (input). - You read through your OBJ file from start to finish.
- After analyzing an OBJ file manually, you know you’re looking for lines starting with
v,vt,vnorf, so the first token to parse will have a maximum of two characters. - You compare this two-character token to the line prefixes listed above, increasing the counter for
positions,texels,normalsorfacesif there is a match. - Even though a 3D model has shared vertex data, in this tutorial OpenGL ES will process all vertices individually instead of as indexed arrays. You already know that OpenGL ES draws triangles, so the total number of vertices will be the total number of faces times their three defining points.
- You close your OBJ file.
- Finally, you return your
Modelinformation.
Awesome—let’s move along. Add the following lines to main():
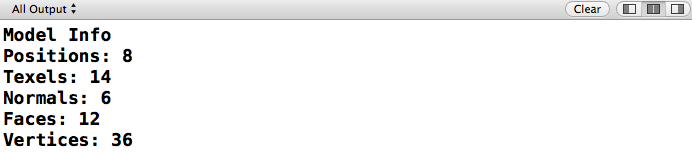
// Model Info
Model model = getOBJinfo(filepathOBJ);
cout << "Model Info" << endl;
cout << "Positions: " << model.positions << endl;
cout << "Texels: " << model.texels << endl;
cout << "Normals: " << model.normals << endl;
cout << "Faces: " << model.faces << endl;
cout << "Vertices: " << model.vertices << endl;
Build and run! You should already know what to expect, but it’s nice to have your console confirm your expectations.