App Mockup Tools Reviews Part 1

Check out our reviews of five of the best app mockup tools to help you make some great mockups! By Riccardo D'Antoni.

Leave a rating/review
Save for later
Share

Mockups and prototypes are incredibly important in the early stages of app development. This is the stage when it’s really cheap and easy to overhaul the app, so you should make the most of it to avoid expensive code rewrites later!

There are a lot of advantages to using app mockups as part of your design process:

  • Mockups are easy to create. This lowers costs and production time if client feedback causes structural or other large changes to the app.
  • Mockups are great for discussion. They give teams something to bat around while they critique the app.
  • Mockups encourage good communication. Mockups facilitate brainstorming in multidisciplinary teams, as they help clarify concepts related to the app during presentations and demos.
  • Mockups help identify design problems early. Mockups let you discover bottlenecks in the app flow and other design issues early on in the process.
  • Mockups are great for usability testing. Interactive mockups allow usability testing to take place before writing any code.

Fortunately, there are tons of tools out there that can help you create mockups in record time. Unfortunately there are way too many to review all of them, so I’ve just chosen 5 to review for this article:

  • BluePrint
  • AppCooker
  • FluidUI
  • Photoshop
  • Handmade Sketches

So that you’re comparing apples to apples, I’ve created a mockup in each tool for a simple tracking app that lets you record interesting places, add followers, and look at interesting places on your followers’ lists.

Keep reading for an in-depth look at each app mockup tool, as well as my personal opinion on which is best for which situation!

Blueprint by Groosoft

blueprint

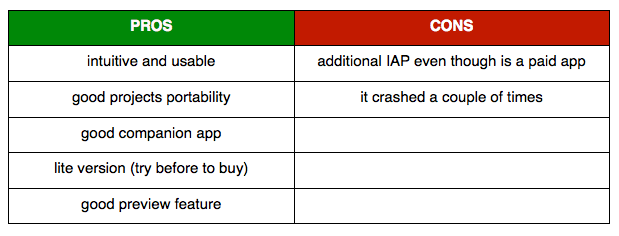
Blueprint is a $19.99 iPad application optimized for iOS 7 that makes prototyping a breeze. You can view your projects on the go with the free companion app Blueprint Viewer, and back up all of your work with either iTunes File Sharing or Dropbox Sync. Blueprint also has auto-save functionality that helps keep your work secure.

Note: If you don’t want to shell out the twenty bucks just yet, you can try a demo version of Blueprint with Blueprint Lite.

You can also send your mockups via email and open them in Blueprint or Blueprint Viewer directly from your inbox. Blueprint supports exporting to PDF and PNG so that you can print your mockups and share them without using Blueprint.

Blueprint

If you always have a lot of projects on the go, you’ll love the fact that Blueprint supports multiple projects with ease. If you need to migrate your apps from iOS 6 to iOS 7, Blueprint offers an iOS 7 project conversion tool priced separately at $9.99 as an In-App Purchase.

Blueprint’s UI is quite intuitive and all the tools you need are at your fingertips. You can create mockups for iPad and iPhone applications, and it’s easy to compensate for the various screen sizes of iPhones as all the mockups components stretch or shrink accordingly.

Blueprint also has a comprehensive library of widgets that faithfully emulate the Apple default design components, including buttons, spinners, table views, and map views. You’ll also find composite components ready to be used right away, such as popovers and action sheets. Widgets can easily be recolored, resized, or repositioned to suit the needs of your app.

Flow

With Blueprint you can create either single app views or a complete app experience via Actions. Actions trigger transitions between views; you simply associate any gesture to a specific widget and choose the transition style between the two views.

At any time you can look at your app’s flow and organize it by setting different colors for different actions link styles. For instance, I used black arrows for simple navigation transitions, purple arrows for tab bar navigation, sky-blue arrows for segmented control value changes navigation and red arrows for popping back. This kind of organization is crucial in a complex multi-view app.

blueprint viewer

How Does Blueprint Stack Up?

It took me twenty minutes to get the mockup done for my sample app — and that was without watching any Blueprint tutorials. However, Groosoft provides some good video tutorials on its website that would have been quite useful before I started designing my mockup!

Initially, I struggled a little bit with Actions and views linkage, but all the other tasks were smooth and enjoyable. The app is intuitive, and the Blueprint Viewer makes sharing projects a breeze.

It’s possible to import projects using the “+” button and play with them just like a real app; a decent play guide is provided to help you understand what parts of the mockup you can interact with.

You can watch the video of my final result here Blueprint Viewer – Play. If you want to try Blueprint Viewer for yourself, you can download this file. Upload it to a Dropbox folder and give it a try!

Blueprint - pros and cons

Blueprint – More Info

Groosoft’s Blueprint main app is only compatible with the iPad, although it is possible to use Blueprint Viewer on your iPhone.

  • Blueprint is a PAID app $19.99 with a paid option of a iOS 6 / iOS 7 project converter.
  • Blueprint Lite is a free app that allows users to try most of the features in Blueprint before they buy.
  • Blueprint Viewer is the free Blueprint companion app that lets you view mockups created with Blueprint.

AppCooker by Hot Apps Factory

AppCooker

AppCooker is a $14.99 iPad application completely optimized for iOS 7. Not only is it a mockup and prototyping tool, it also offers a toolbox lets you pursue an idea from conception, through icon sketching and prototyping, right up to App Store information gathering and business model creation.

Managing the whole cycle of application project planning can be a tricky task, but AppCooker makes it really easy by keeping everything collected in one app while helping you achieve professional results.

The components of the toolbox are as follows:

  • Notepad
  • Ideas definition
  • Mockup editor
  • Icon factory
  • AppStore info manager
  • Pricing and business model tool

Although there are tons of tools there, I’ll focus on the Mockup editor tool to keep this review on track! :]

Toolbox

Like Blueprint Viewer, AppCooker also has a free companion app AppTaster that lets yousave and share playable mockups, screens, or your entire project via email, Dropbox, Box or iTunes File Sharing. AppCooker allows you to create and manage multiple projects with ease.

Workspaces

The first interface of the mockup editor is an infinite workspace where you structure your application. It’s possible to create up to 200 separate screens simply by double-tapping. You can modify app flow in an interactive fashion by linking screens and setting up transition triggers; a white arrow provides a visual representation linking the two screens. The advanced linking features and transition previews really blew me away.

workspace

It’s possible to use several kind of gestures in your mockups, including single-tap, double-tap, and long press. AppCooker provides four different link types: Simple Link, which moves between screens; Smart Back, which pops you back to the right screen automagically; Swipe Area, which lets you swipe between screens; and Timer Tag, which lets you perform timed actions. It’s quite easy to preview the style and duration of the transitions you create.

transitions

AppCooker provides a complete set of UI elements both for iPad and iPhone. Real iOS components function dynamically; for instance, map views allow you to select which part of the world you would like to display and which zoom level you’d like to use.

As well as providing a lot of flexibility and realism, this makes it possible to render iOS 7 blurs while maintaining pixel perfect graphics. You can also draw squares, circles, stars and other customizable shapes, draw freehand objects, or use images from your Dropbox or Photo libraries.

tools

A big library of icons — which includes your standard system icons and over 200 others — are included along with a generous collection of of fonts provided by Hot Apps Factory. In future versions, AppCooker will be able to leverage the Subtle Patterns database for some awesome backgrounds.

How Does AppCooker Stack Up?

It took me twenty-five minutes to get my mockup done in AppCooker. Like Blueprint, AppCooker also provides some good video tutorials on its website. The overall user experience is great, and I find that AppCooker is even easier to use than desktop design programs.

Just as in Blueprint, all of your progress is saved automatically so you can focus on your mockups without worrying about whether you saved your work.

export

It’s possible to export your project to three file formats: AppCooker, AppTaster or PDF. The project file contains not only your mockup, but also the icon, App store and pricing info of your app. As well, you can export either PDFs or JPGs of specific workspaces. It’s possible to view the mockup interactively via AppTaster and leave feedback.

You can watch the video of my final result here. If If you want to try AppTaster for yourself, download this file and upload it to your Dropbox folder!

pros cons appcooker

AppCooker – More Info

Hot Apps Factory’s AppCooker main app is compatible only with the iPad, although it’s possible to use the companion app AppTaster from your iPhone.

  • AppCooker is a PAID app $14.99.
  • AppTaster is the AppCooker FREE companion app that allows to play mockups and prototypes made in AppCooker.

FluidUI by Fluid Software

FluidUI logo

FluidUI is a browser-based application that works on Mac, Windows, and Linux. It’s a paid service, but it offers a free plan which allows you to create one project, limited to a maximum of 10 screens, and doesn’t provide the more advanced functionality of the service. However, the free plan should be enough to decide if the product suits your needs.

Paid plans range from $12 to $89 per month; for more details, check out the pricing page here.

One of the great features of this service is that you can create mockups for iOS applications as well as Android and Windows Phone apps. This is great news for anyone looking to go cross-platform!

workspace

The FluidUI interface is clean and well ordered, although sometimes it felt clumsy when performing certain tasks, such as creating a segmented control with two segments. However, the overall experience is pleasurable. There are over 2000 iOS, Android, Windows 8 widgets for phone and tablet prototyping that are always up to date with the latest OS standards.

It’s possible to choose low fidelity wireframes for speed, or high fidelity components that emulate the actual OS in pixel-perfect detail. Every UI element is at your reach with a fully integrated library search, and if 2000 elements aren’t enough, you can even upload your own images.

workspace linking

Like the other tools I’ve reviewed, building interactive prototypes is fairly easy. You can zoom in and out of a workspace and link screens simply by dragging a line between them. However, I really missed the simplicity and advanced features of AppCooker Smart Back links that aren’t available in FluidUI.

Cloning screens and other conveniences such as notes, add grids guidance, and snap alignment are really easy to use and will save you tons of time. The transition animations between screens aren’t customizable as far as I have seen.

Screen flows are playable anytime using the Fluid player that is integrated into the workspace. Fluid Player simulates how your prototype will work in a mobile device, although you can always try your mockup on an actual physical device.

If you want to give this really cool feature a try, scan the QR code below and follow the instructions, or simply follow the link that FluidUI provides with your mockup project.

QR Code - FluidUI

How Does FluidUI Stack Up?

It took me 25 minutes to get my mockup done in FluidUI. Although FluidUI doesn’t have a companion app, its projects are highly portable thanks to the Fluid Player. You can even share your mockup links via email and the recipients won’t need to install any additional software in order to watch the final result.

With a premium FluidUI account, you can export your project as PNG screens, an interactive HTML mockup, a PNG screenflow diagram, or even print it out. With the the simple free plan, it’s possible to share your project on Twitter and Facebook. Finally, there is a really neat feature that allows you to move projects between accounts with the teleport utility.

pros and cons - fluidui

FluidUI – More Info

Fluid Software’s FluidUI is a great choice for cross-platform development, and the Fluid Player makes it incredibly easy to preview mockups.

Photoshop by Adobe

photoshop logo

Photoshop is a well-known desktop application for Windows and Mac. It’s not the simplest mockup and prototyping tool, but it’s the most complete design software package out there by far. It is expensive, to be sure, but if you’re a designer it’s worth every penny.

You can either buy Photoshop Creative Cloud for $19.99/month, or you can get the complete Creative Cloud package with all of Adobe’s software packages for $49.99/month. If you’re interested in more details, you can find the complete list of Adobe’s products here.

Photoshop has a steep learning curve, but once you learn the basics you’ll have a lot of flexibility at your fingertips and an outstanding prototyping companion at your disposal. Most of the basic features of Photoshop features will serve you well when prototyping your workflow, including layers, guides, clone stamp, horizontal type tool, shapes, and the good old paint bucket.

devrocket

To speed up your iOS graphic design workflow there’s a really useful Photoshop plugin named DevRocket. It’s compatible with Photoshop CS5 and better, so you’re covered with your Photoshop Creative Cloud license. Otherwise, it’s priced at $19 for a single licence. This plugin is always up to date and makes your workflow more efficient with the following built-in tools:

  • Instant view templates: lets you easily create iOS view templates — in any orientation — for both iPad and iPhone.
  • Smart icon workflow: generates all iOS icon sizes from a single piece of artwork.
  • Native look previews: displays a preview your prototype design.
  • Export both resolutions: generates standard and retina artwork versions for your UI elements.

devrocket plugin

I found the instant view template feature really handy, as it generated the starting point for all of my app’s screens — pre-optimized for iOS 7. Easy peasy!

initial screen

To include UI elements in your design, you have two options:

  1. Search online for free or paid PSD files that cover your needs; you’re likely to find a PSD that covers the iOS 7 UI components library.
  2. You can go to the Refill Store via DevRocket and download free or paid UI elements to integrate into your design.
Note: Photoshop saves project files in its own format with the .psd extension.

refill store

Since standard UI elements are never enough, I found a lot of really great component templates on the Teehan+lax free iOS templates site. These guys have created a gorgeous iOS components collection for iPad and iPhone design that brings lots of visual design goodness together in one place. Thanks guys!

How Does Photoshop Stack Up?

With the combination of Photoshop, DevRocket and PSD goodies, I managed to finish the mockup in 40 minutes. Using Photoshop will take a little more time compared to the other dedicated prototyping tools, especially if you aren’t already familiar with photoshop. However, it’s worth the time investment just for the flexibility it gives you alone.

Once you’ve created all your screens — one by one — you can add them to a common workspace if you want to link screens as in other prototyping packages.

photoshop workspace

There’s an ever-growing number of third-party tools that extend Photoshop’s capabilities in amazing ways. To share your Photoshop mockups with customers, Bjango offers Skala Preview, a cross platform utility that has desktop, iOS and Android versions. You can find all of the tools on the Bjango website.

skala apps

It only takes a few steps to share a project via Skala Preview:

  1. Download Skala Preview for desktop.
  2. Create a Remote Connection in Photoshop. Edit > Remote Connections…, and then provide a service name and password. Make sure Enable Remote Connections is ticked.
  3. Share your service name and password with customers that have downloaded the Skala View mobile app (available for iPad and iPhone).
  4. Start the Skala View app. Make sure you have both Skala Preview and Photoshop running at the same time, and ensure your Mac and the iOS devices running Skala Preview are all on the same wifi network.
  5. Enjoy your preview!
Note: to give live previews of the document you’re editing in Photoshop, enter your Photoshop Remote Connection and password into Skala Preview. These settings are found in Settings\Photoshop Settings.

skala view

Skala Preview sends pixel perfect images of your mockup to any iOS or Android device. You can even carry out colour blindness testing sessions.

pros and cons photoshop

Photoshop – More Info

Adobe Photoshop is a great choice if you need flexibility and a powerful tool for your mockup phase.

  • DevRocket by Ui Parade is a great plugin which helps speed up your workflow.
  • PSD goodies by Teehan+lax will save you a lot of time while providing faithful UI elements for your mockups.
  • You can grab some free Gesture Icons from Mobile Tuxedo to conceptually represent gestures in your mockups.
  • Use Skala Preview for Mac and Skala View for iOS by Bjango if you need to share your mockups.

Handmade Sketches — by You!

Last — but certainly not least — handmade sketches are still a tried-and true way to application mockups. More than one app began life as a sketch on a paper napkin! :]

There are several companies that offer some really neat tools that help you make quick work of handmade sketches. Take a look at the offerings from the UIStencils website.

handmade sketches

Although they look simple, don’t underestimate the freedom and flexibility afforded to you by handmade sketches. Wanna know a secret? These are my favourite way to prototype.

How Do Handmade Sketches Stack Up?

I spent a meagre 10 minutes to finish my mockup using a handmade sketch. I made use of some ready-made templates we use internally at Squareomatic; they offer places for information like date and mockup id that are useful if you need to classify your work.

Interface Sketch Templates offers a variety of amazing templates that give you a solid base to begin prototyping, while lending a professional look to your mockup sketches. Furthermore, they offer iPhone and iPad sketch templates as well as ones for Android, Web-based applications, and Windows 8 Phone.

You can check out my results:

first sketch

I typically use highlighters to represent visually abstract information like gestures, actions or selected elements. Not only is this an easy and flexible way for me to sketch this information, it makes the flow of the app quite clear to the person looking at the sketch.

second sketch

Sharing handmade mockups is insanely easy: just take a picture of it with your iPhone and upload it to Dropbox or send it by email!

handmade sketches pros-cons

There are some cons to handmade mockups not listed in this table – there’s no built-in way to save/backup sketches, no easy way to copy/paste elements between sketches, and other advantages that most electronic formats offer.

Prototyping Tools Comparison Table

I’ve given you as much information as I could on the prototyping tools reviewed in this article, but here’s a table that really sums up what the various prototyping tools have to offer:

comparison table

So What’s The Verdict?

In my opinion, AppCooker offers the best value for the price. It offers advanced features while remaining intuitive and highly usable. AppTaster completes the AppCooker package as a highly useful and free viewer.

I find Blueprint really easy to use and portability of projects handled really well by Blueprint Viewer; its best characteristics are intuitiveness and immediacy.

Best FluidUI’s outstanding feature is its cross-platform capability that gives you a lot of flexibility and a rich widgets library. Creating prototypes with this tool is fast and easy.

If you have time to invest in learning how to use a new tool, Photoshop offers a feature-rich environment. Readily-available plugins and free PSD templates make your prototype work enjoyable and fun!

Finally, I still have a place in my heart for handmade sketches. They’re quick, cheap, and easy, and they prompt a lot of feedback as they showcase the app’s main features without hiding it behind the glitz and flash of fancy graphics.

However, always chose the approach that is best for you, and have fun mocking up some amazing apps!

To learn more on this topic, check out part two of this tutorial series.

If you have any questions or comments, feel free to join the discussion in the forums below!

Riccardo D'Antoni

Contributors

Riccardo D'Antoni

Author

Over 300 content creators. Join our team.