RenderEffect in Android 12
Learn how to use the new RenderEffect API in Android 12 to efficiently add custom styles to your views like blurs, saturation, offset, and more. By Diayan Siat.
Applying Fullscreen Blur
Finally, you can blur the entire screen by simply applying the render effect to the root view. To achieve this, replace //TODO 9: Add blur to full screen with:
//1
if (isChecked) {
//2
val blurScreen = createBlurEffect(DEFAULT_BLUR, DEFAULT_BLUR, Shader.TileMode.MIRROR)
//3
binding.root.setRenderEffect(blurScreen)
} else {
//4
binding.root.setRenderEffect(null)
}
Here's a breakdown of the code above:
- Determines if Blur Fullscreen is checked.
- Creates a blur effect object.
- Applies blur to root view.
- Removes blur from root view.
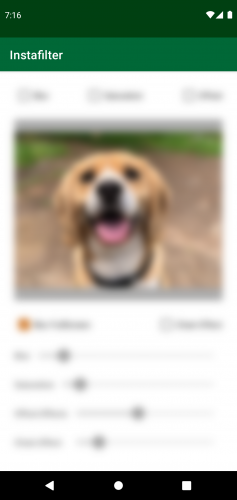
Build and run. Check Fullscreen, and the result should look like this:
Where to Go From Here?
You can download the completed version of the project using Download Materials at the top or bottom of this tutorial.
Congratulations! You now have a better understanding of the RenderEffect API. Just think of all the amazing things you can do with the knowledge you've gained while working through this tutorial. ;]
This is just the tip of the iceberg in terms of what you can achieve with RenderEffect. To learn more, head over to Android's documentation on it.
Also, check out Mark Allison's blog for more content on this topic.
For simplified explanations on rendering and graphics in Android, check out Android Graphics Pipeline: From Button to Framebuffer (Part 1), Android Graphics Pipeline: From Button to Framebuffer (Part 2) and Android rendering mechanism-Display List.
I hope you enjoyed this tutorial. If you have any questions or comments, please join the forum discussion below.