How To Make a Gesture-Driven To-Do List App Like Clear in Swift: Part 2/2
Learn how to make a gesture-driven to-do list app like Clear, complete with table view tricks, swipes, and pinches. By Audrey Tam.
Learn how to make a stylish gesture driven to-do app like Clear!

Learn how to make a stylish gesture driven to-do app like Clear!
Update 04/21/2015: Updated for Xcode 6.3 and Swift 1.2.
Update note: This tutorial was fully updated for iOS 8 and Swift by Audrey Tam. Originally posted as Part 2/3 and Part 3/3 by Colin Eberhardt. Updated December 9 2014 for Xcode 6.1.1.
This is the second in a two-part tutorial series that takes you through developing a to-do list app that is completely free of buttons, toggle switches and other common, increasingly outdated user interface (UI) controls.
It’s nothing but swipes, pulls and pinches for this app! As I’m sure you’ve realized if you’ve been following along, that leaves a lot more room for content.
If you followed the first part of the tutorial, you should now have a stylish and minimalistic to-do list interface. Your users can mark items as complete by swiping them to the right, or delete them by swiping to the left.
Before moving on to adding more gestures to the app, this part of the tutorial will show you how to make a few improvements to the existing interactions.
Right now, the animation that accompanies a delete operation is a “stock” feature of UITableView – when an item is deleted, it fades away, while the items below move up to fill the space. This effect is a little jarring, and the animation a bit dull.
How about if instead, the deleted item continued its motion to the right, while the remaining items shuffled up to fill the space?
Ready to see how easy it can be to do one better than Apple’s stock table view animations? Let’s get started!
A Funky Delete Animation
This part of the tutorial continues on from the previous one. If you did not follow Part 1, or just want to jump in at this stage, make sure you download the code from the first part, since you’ll be building on it in this tutorial.
Open ViewController.swift and find toDoItemDeleted. Presently, the code for animating the deletion of a to-do item is as follows:
tableView.beginUpdates()
let indexPathForRow = NSIndexPath(forRow: index, inSection: 0)
tableView.deleteRowsAtIndexPaths([indexPathForRow], withRowAnimation: .Fade)
tableView.endUpdates()
This uses the “stock” UITableViewRowAnimation.Fade effect, which is a bit boring! I’d much prefer the application to use a more eye-catching animation, where the items shuffle upwards to fill the space that was occupied by the deleted item.
The UITableView manages the lifecycle of your cells, so how do you manually animate their location? It’s surprisingly easy! UITableView includes the visibleCells method, which returns an array of all the cells that are currently visible. You can iterate over these items and do what you like with them!
So, let’s replace the stock animation with something a bit more exciting.
You’re going to use block-based animations, as described in detail in our How to Use UIView Animation tutorial. In ViewController.swift), replace the current todoItemDeleted implementation with the following:
func toDoItemDeleted(toDoItem: ToDoItem) {
  let index = (toDoItems as NSArray).indexOfObject(toDoItem)
  if index == NSNotFound { return }

  // could removeAtIndex in the loop but keep it here for when indexOfObject works
  toDoItems.removeAtIndex(index)

  // loop over the visible cells to animate delete
  let visibleCells = tableView.visibleCells() as! [TableViewCell]
  let lastView = visibleCells[visibleCells.count - 1] as TableViewCell
  var delay = 0.0
  var startAnimating = false
  for i in 0..<visibleCells.count {
    let cell = visibleCells[i]
    if startAnimating {
      UIView.animateWithDuration(0.3, delay: delay, options: .CurveEaseInOut,
        animations: {() in
          cell.frame = CGRectOffset(cell.frame, 0.0,
                       -cell.frame.size.height)},
        completion: {(finished: Bool) in
          if (cell == lastView) {
            self.tableView.reloadData()
          }
        }
      )
      delay += 0.03
    }
    if cell.toDoItem === toDoItem {
      startAnimating = true
      cell.hidden = true
    }
  }

  // use the UITableView to animate the removal of this row
  tableView.beginUpdates()
  let indexPathForRow = NSIndexPath(forRow: index, inSection: 0)
  tableView.deleteRowsAtIndexPaths([indexPathForRow], withRowAnimation: .Fade)
  tableView.endUpdates()
}
The code above is pretty simple. It iterates over the visible cells until it reaches the one that was deleted. From that point on, it applies an animation to each cell. The animation block moves each cell up by the height of one row, with a delay that increases with each iteration.
The effect that is produced is shown in the animated gif below - the original version of this app had a problem with the green completed items flickering if you deleted an item above them, so this gif shows that this doesn't happen now:

That’s pretty groovy, right?
Just a note about reloadData: You might have noticed in the code above that when the animation for the very last cell completes, it calls reloadData on the UITableView. Why is this?
As mentioned previously, UITableView manages the cell lifecycle and position where cells are rendered onscreen. Moving the location of the cells, as you have done here with the delete animation, is something that the UITableView was not designed to accommodate.
If you remove the call to reloadData, delete an item, then scroll the list, you will find that the UI becomes quite unstable, with cells appearing and disappearing unexpectedly.
By sending the reloadData message to the UITableView, this issue is resolved. reloadData forces the UITableView to “dispose” of all of the cells and re-query the datasource. As a result, the cells are all located where the UITableView expects them to be.
Editing Items
Currently the to-do items are rendered using a UILabel subclass – StrikeThroughText. In order to make the items editable, you need to switch to UITextField instead.
Fortunately, this is a very easy change to make. Simply edit StrikeThroughText.swift and, in its opening class line change the superclass from UILabel to UITextField:
class StrikeThroughText: UITextField {
Unfortunately, UITextField is a little dumb, and hitting Return (or Enter) does not close the keyboard. So you have to do a bit more work here if you don't want to be stuck with a keyboard over half of your nice, snazzy UI. :]
Switch to TableViewCell.swift and change its opening class line as follows:
class TableViewCell: UITableViewCell, UITextFieldDelegate {
Since TableViewCell contains the StrikeThroughText instance, you set it to conform to the UITextFieldDelegate protocol so that the text field notifies the table cell when the user taps Return on the keyboard. (Because StrikeThroughText is now a subclass of UITextField, it contains a delegate property that expects a class that conforms to UITextFieldDelegate.)
Still in TableViewCell.swift, add the following code to the init method, right after the call to super.init:
label.delegate = self
label.contentVerticalAlignment = .Center
The above code sets up the label's delegate to be the TableViewCell instance. It also sets the control to center vertically within the cell. If you omit the second line, you'll notice that the text now displays aligned to the top of each row. That just doesn't look right. :]
Now all you need to do is implement the relevant UITextFieldDelegate methods. Add the following code:
// MARK: - UITextFieldDelegate methods

func textFieldShouldReturn(textField: UITextField) -> Bool {
  // close the keyboard on Enter
  textField.resignFirstResponder()
  return false
}

func textFieldShouldBeginEditing(textField: UITextField) -> Bool {
  // disable editing of completed to-do items
  if toDoItem != nil {
    return !toDoItem!.completed
  }
  return false
}

func textFieldDidEndEditing(textField: UITextField) {
  if toDoItem != nil {
    toDoItem!.text = textField.text
  }
}
The above code is pretty self-explanatory, since all it does is close the keyboard when the user taps Enter, not allow the cell to be edited if the item has already been completed, and set the to-do item text once the editing completes.
Build, run, and enjoy the editing experience!
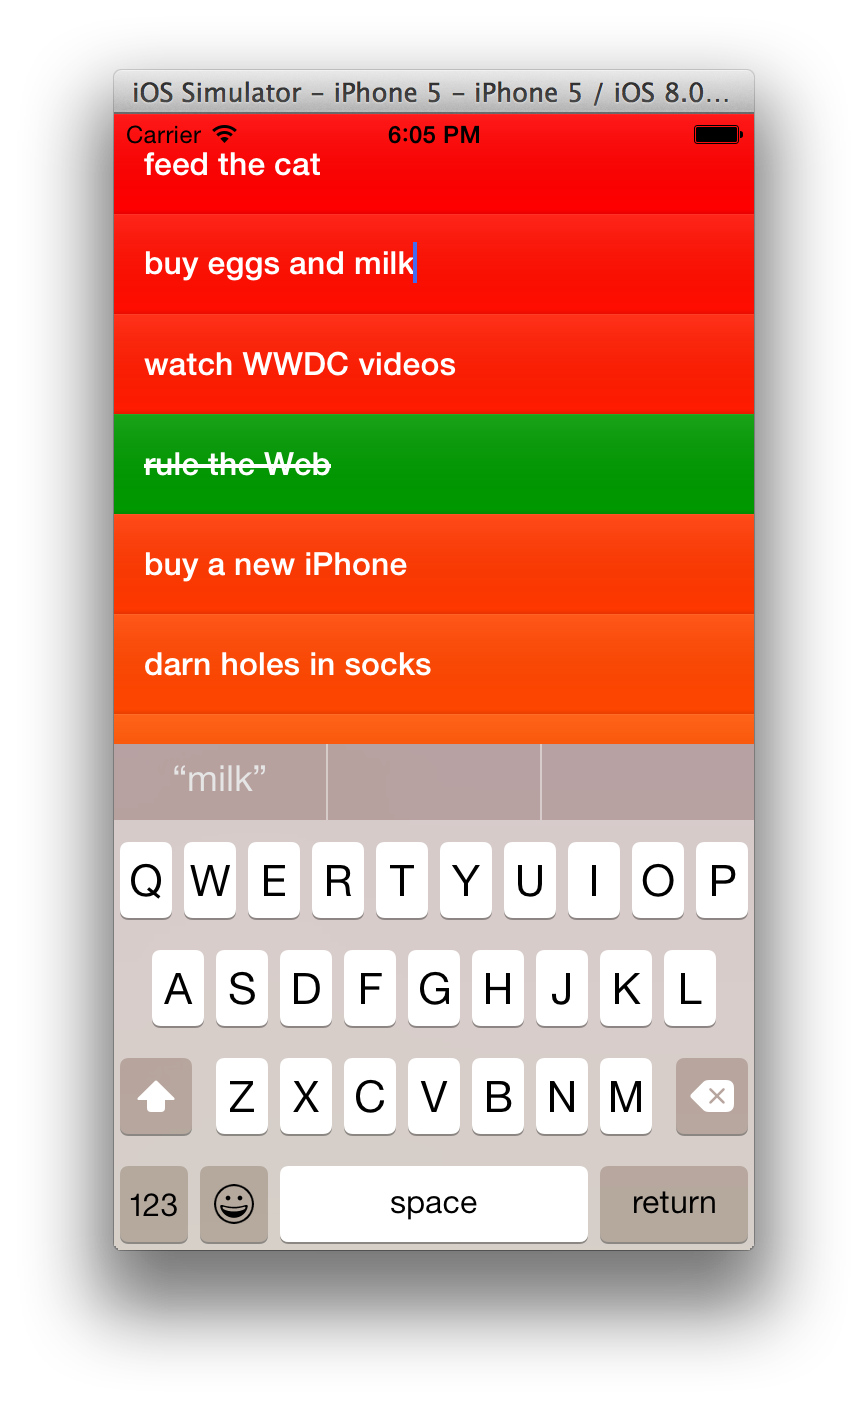
Note: If the Simulator is using your Mac's keyboard instead of displaying an iPhone keyboard, select Hardware\Keyboard\Toggle Software Keyboard or press Command-K to bring up the software keyboard.
Note: If the Simulator is using your Mac's keyboard instead of displaying an iPhone keyboard, select Hardware\Keyboard\Toggle Software Keyboard or press Command-K to bring up the software keyboard.
After a little bit of testing, you will probably notice one small issue. If you edit an item that is in the bottom half of the screen (or less than half for you lucky iPhone 5 or 6 owners!), when the keyboard appears, it covers the item you are editing.
This does not lead to a good user experience. The easiest way to fix this behavior is to scroll the cell being edited to the top of the list. Unfortunately, for cells at the very bottom simply setting the table's contentOffset won't work, as the table will always keep some cells behind the keyboard. Instead, you'll mimic a table scroll with a translation transform on all the visible cells. But first, you'll need the ViewController to know about the edit lifecycle. The edit lifecycle is currently only visible to the TableViewCell, but you can expose it via its protocol.
Open ViewController.swift and add this MARK group above the toDoItemDeleted method:
// MARK: - TableViewCellDelegate methods
Then add two empty methods below the toDoItemDeleted method:
func cellDidBeginEditing(editingCell: TableViewCell) {

}

func cellDidEndEditing(editingCell: TableViewCell) {

}
These will become TableViewCellDelegate editing lifecycle methods: the first will move the visible rows so that editingCell is at the top, while making the other rows more transparent; the second will move the rows back, restoring the other rows to totally opaque. Open TableViewCell.swift and declare these two methods in the protocol TableViewCellDelegate block:
// Indicates that the edit process has begun for the given cell
func cellDidBeginEditing(editingCell: TableViewCell)
// Indicates that the edit process has committed for the given cell
func cellDidEndEditing(editingCell: TableViewCell)
These protocol methods are simply invoked when the relevant UITextFieldDelegate method is invoked in TableViewCell.swift. Add the UITextFieldDelegate method textFieldDidBeginEditing to TableViewCell.swift:
func textFieldDidBeginEditing(textField: UITextField) {
  if delegate != nil {
    delegate!.cellDidBeginEditing(self)
  }
}
And in textFieldDidEndEditing, add a call to the cellDidEndEditing delegate method:
func textFieldDidEndEditing(textField: UITextField!) {
  if toDoItem != nil {
    toDoItem!.text = textField.text
  }
  if delegate != nil {
    delegate!.cellDidEndEditing(self)
  }
}
At this point, it doesn't matter whether you call cellDidEndEditing before, or after, setting the to-do item's text property but, later in this tutorial, it might...
Now, add implementations for the new TableViewCellDelegate editing lifecycle methods:
func cellDidBeginEditing(editingCell: TableViewCell) {
  var editingOffset = tableView.contentOffset.y - editingCell.frame.origin.y as CGFloat
  let visibleCells = tableView.visibleCells() as! [TableViewCell]
  for cell in visibleCells {
    UIView.animateWithDuration(0.3, animations: {() in
      cell.transform = CGAffineTransformMakeTranslation(0, editingOffset)
      if cell !== editingCell {
        cell.alpha = 0.3
      }
    })
  }
}

func cellDidEndEditing(editingCell: TableViewCell) {
  let visibleCells = tableView.visibleCells() as! [TableViewCell]
  for cell: TableViewCell in visibleCells {
    UIView.animateWithDuration(0.3, animations: {() in
      cell.transform = CGAffineTransformIdentity
      if cell !== editingCell {
        cell.alpha = 1.0
      }
    })
  }
}
The above code animates the frame of every cell in the list in order to push the cell being edited to the top. The alpha is also reduced for all the cells other than the one being edited.
In some parts of this tutorial series, you move cells by changing their frame with CGRectOffset, whereas in the above code, you apply a transform instead. Using a transform has the big advantage that it is easy to move a cell back to its original location: you simply “zero” the translation (i.e., apply the identity), instead of having to store the original frame for each and every cell that is moved.
Build, run, and rejoice!
As a user starts editing an item, it is gracefully animated to the top of the screen. When the user hits Enter, the item gracefully slides back into place.

There is one glaring omission in the app’s functionality – the user cannot add new items to the list! Of course, I’m not sure that’s such a bad thing – I hate adding new to-dos to my never-ending list. :]
A conventional approach to this problem would most likely be to add a button with the text “Add new” on a title bar. But remember to ask yourself every time you want to add a new UI control: can I perform the same function via a gesture?
I’m guessing that you know the answer in this case, as in most cases, is YES!