Creating and Publishing a Flutter Package
In this tutorial, you’ll learn how to create and publish your own Dart packages to be used in Flutter apps. By Edson Bueno.
Sign up/Sign in
With a free Kodeco account you can download source code, track your progress, bookmark, personalise your learner profile and more!
Create accountAlready a member of Kodeco? Sign in
Sign up/Sign in
With a free Kodeco account you can download source code, track your progress, bookmark, personalise your learner profile and more!
Create accountAlready a member of Kodeco? Sign in
Sign up/Sign in
With a free Kodeco account you can download source code, track your progress, bookmark, personalise your learner profile and more!
Create accountAlready a member of Kodeco? Sign in
Contents
Creating and Publishing a Flutter Package
30 mins
- Getting Started
- Knowing the Project
- Setting the Goal
- Documenting
- Using Doc Comments
- Creating the Project
- Understanding Packages
- Understanding Libraries
- Understanding the library Keyword
- Adjusting the Pubspec
- Bringing the Code
- Analyzing the Code
- Structuring Packages
- Creating an Example Project
- Specifying the Example’s Dependencies
- Filling the Example
- Hacking the Example Tab
- Crafting an Effective README
- Displaying Badges
- Adding a README File
- Licensing
- Understanding CHANGELOGs
- Adding a CHANGELOG File
- Publishing Your Package
- Understanding Verified Publishers
- Using the Remote Package
- Where to Go From Here?
Every three minutes, a new Flutter package pops up on pub.dev (according to the same source that revealed 73.6% of all statistics are made up on the spot). True or not, it’s very believable. So what are you waiting for? Why not join the club and become a package publisher? :]
Some advantages of being a package publisher:
- You’ll learn a ton about open source project: documentation, versions, releases, issues, licenses, CHANGELOG and README files and more!
- It’s a great accomplishment to add to your resume.
- You’ll meet new people who are using your package or are helping you maintain it.
- Your package can help develop many production apps.
- You’ll be giving back to the Flutter community.
By the end of this tutorial, you’ll learn everything you need to go from package user to package creator, including how to:
- Stand out on pub.dev
- Document your package
- Structure your package files
- Create an example project
- Get package ideas
Getting Started
Download the starter project by clicking the Download Materials button at the top or bottom of the tutorial.
Unzip the downloaded file and, with Android Studio 4.1 or later, open the project folder starter/yes_we_scan. You can use Visual Studio Code instead, but you might need to tweak some instructions to follow along.
Download the dependencies with Pub get, then build and run your project. If everything went OK, you should see something like this:
Knowing the Project
The app above could easily be the most uninteresting bar code scanner if it weren’t for two things:
- The name: Yes We Scan
- The file lib/utils/focus_detector.dart
In this file, you’ll find a widget named FocusDetector
.
When you wrap any widget of yours with FocusDetector
, you can register callbacks to know whenever that widget appears or disappears from the screen — which happens, for example, when the user navigates to another screen or switches to another app.
FocusNode
.
If you’ve done native mobile development, think of FocusDetector
as a Flutter adaptation of Android’s onResume()
and onPause()
or iOS’s viewDidAppear()
and viewDidDisappear()
.
Setting the Goal
Yes We Scan leverages FocusDetector
to turn on and off the camera as the user leaves and returns to the main screen. Other applications of FocusDetector
could include:
- Turning on and off the GPS or Bluetooth
- Syncing data with a remote API
- Pausing and resuming videos
Yes We Scan is here to show that even seemingly boring projects have something to offer to the community.
So from now on, your focus (pun intended) will be on transforming focus_detector.dart, the file, into Focus Detector, the package.
And to put you in a good mood, you’ll start by doing something all developers love: documenting.
Documenting
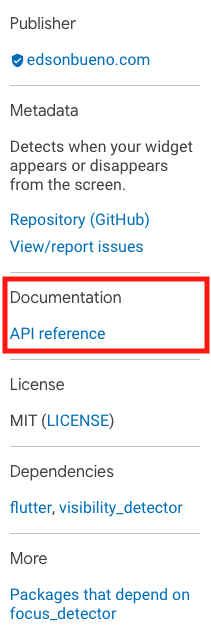
Pub.dev generates a documentation page for every published package. You can find a link to it on the right panel of the package’s pub.dev page:
To enhance this document with your own words, you have to place special comments above your public classes, functions, properties and typedefs in your code. Why special? Because they use three slashes (///
) instead of two.
Using Doc Comments
Open lib/utils/focus_detector.dart and replace the comment:
// TODO: Document [FocusDetector].
with this documentation comment:
/// Fires callbacks every time the widget appears or disappears from the screen.
Doc comments can be as big as you want — you can even include code snippets and hypertext links. The only requirement is that the first paragraph should be a single-sentence descriptive summary like you did above.
To make sure this gets tattooed on your brain, do it once again by replacing:
// TODO: Document [onFocusGained].
with:
/// Called when the widget becomes visible or enters foreground while visible.
You can peek here to see how these comments end up looking in the docs. For more information about documentation comments, check out Effective Dart: Documentation.
It’s time to leave Yes We Scan aside for a while to work on your spinoff project.
Creating the Project
On your Android Studio’s menu bar, click File ▸ New ▸ New Flutter Project. Then, select Flutter Package and click Next.
Now, follow the instructions to fill in the fields:
- Project name: Type in focus_detector.
- Flutter SDK path: Make sure the default value is the right path to your Flutter SDK.
- Project location: Choose where you want to store your project.
- Description: Type in Detects when your widget appears or disappears from the screen.
Click Finish and wait for Android Studio to create and load your new project.
Understanding Packages
You may not know it, but you’ve been creating packages for a while.
A Dart package is nothing but a directory with a pubspec.yaml. Does that remind you of all the apps you’ve created until now? The thing is, there are two types of packages:
- Application Packages: Those you know very well, with a main.dart file.
- Library Packages: Shortened to Packages. These are the subject of this tutorial.
What about Flutter Package vs. Dart Package? Flutter Package is only an alias used by the community when referring to a Dart Library Package for Flutter apps.
This raises the next question: What on Earth is a library?
Understanding Libraries
A library is a collection of functions, classes, typedefs and/or properties.
Every time you create a Dart file, you’re making a library. For example, the public elements of an alert_utils.dart file form an alert_utils library. That’s why your Dart files go under a lib directory.
You can also create a library by creating a file that gathers other libraries. For example, imagine a file called alert_utils.dart with the following content:
export 'src/snackbar_utils.dart';
export 'src/dialog_utils.dart';
The result is an alert_utils library collecting elements from both the snackbar_utils and the dialog_utils libraries.
Wrapping up the definition of Library Packages, you can see its purpose is to define libraries that both types of packages can import and use.
Understanding the library
Keyword
Returning to your focus_detector project, open lib/focus_detector.dart that Android Studio generated for you. Look at the first line:
library focus_detector;
This sets the name of the file’s library to focus_detector. The default library name is the filename, making this line unnecessary. So why have a library
keyword? There are two cases in which you might want to specify a library name:
- Adding library-level documentation to your package. The dartdoc tool requires a
library
directive to generate library-level documentation. For example: - Giving the library a different name.
/// Contains utility functions for displaying dialogs and snackbars.
library alert_utils;
When you import a library, you give the uniform resource identifier (URI) to the import
directive, not the library name. So the only place you can actually see the name is in the documentation page. As you see, there’s little point in changing the name.
That said, the Dart documentation recommends you omit the library directive from your code unless you plan to generate library-level documentation.
Enough with the talk! You’re now ready for some action.
Adjusting the Pubspec
Open your new project’s pubspec.yaml file. Notice that the content of the file is grouped into five sections: metadata, environment
, dependencies
, dev_dependencies
, and flutter
. For this tutorial, you’ll need only the first three:
-
The Metadata
Everything users need to find your package comes out of here.
You already provided parts of this information when creating the project. Now you need only a few adjustments:
-
version: Replace
0.0.1
with1.0.0
. Unless you’re publishing unfinished or experimental code, avoid 0.*.* version numbers. It might scare off some users. - author: This property is no longer used, so delete it.
- homepage: Put https://github.com/EdsonBueno/focus_detector. The URL doesn’t have to be from a git repository, but that’s the most common usage.
Note: Remember: The focus_detector package is already published on pub.dev. The homepage field here is being set to the existing code repository.This should be your result:
name: focus_detector description: Detects when your widget appears or disappears from the screen. version: 1.0.0 homepage: https://github.com/EdsonBueno/focus_detector
-
version: Replace
- The Environment
- The Dependencies
Use this section to restrict the Dart or Flutter SDK versions of your users. This is useful if, for example, your package relies on a feature introduced in an earlier Flutter release or you still haven’t complied with a breaking change in the API.
For this tutorial, the defaults are great.
Packages can also depend on other packages. This section is no different than the one you find in your apps. FocusDetector
uses the 0.1.5 version of a package published by google.dev called VisibilityDetector. Specify the dependency, then make sure your section looks like this:
dependencies:
flutter:
sdk: flutter
visibility_detector: ^0.1.5
Last, click Pub get at the top of your screen to download your new dependency.
Now that FocusDetector
has a new place to call home, it’s finally time to bring it in.
Bringing the Code
Go back to the yes_we_scan project on Android Studio. Copy lib/utils/focus_detector.dart and paste it under the lib folder of the focus_detector project. When presented with the Copy dialog, click Refactor. Then, on the next dialog, click Overwrite.
By replacing the old lib/focus_detector.dart Android Studio had created for you, you broke the tests. Because testing is outside the scope of this article, delete the test directory as a quick fix.
Analyzing the Code
You can’t build and run a package. What you can do is run the flutter analyze
command on your terminal to analyze your code for issues.
Open Android Studio’s shell by clicking Terminal at the bottom of your screen. Then, type in flutter analyze
and press Enter, as shown below.
The command should give you a No issues found! message. If that’s the case, you’re good to go.
Structuring Packages
Focus Detector is a single-class package, so there isn’t much thinking to do about how to organize it. But what if your next package contains many files? Some of them you might want exposed to your users, while others you might prefer to keep private. When that is the case, the convention tells you to follow these simple rules:
- Keep your implementation files under the lib/src directory. All code inside this folder is private and should never be directly imported by your users.
- To make these implementation files public, use the
export
keyword from a file that is directly under lib, like in the previous alert_utils example above.
The main benefit of this approach is being able to change your internal structure later without affecting end users.
An extension of the second rule is that there should be a library file directly under lib with the same name as your project that exports all your public implementation files. Think of it as your “main” library file. The advantage is that users can explore all your functionalities by importing a single file.
It isn’t an anatomy class if it doesn’t have a dissected body. :] So take a look at the internal structure of a more complex package, the Infinite Scroll Pagination:
If you want to know more about the Infinite Scroll Pagination package, check out Infinite Scrolling Pagination in Flutter.
Creating an Example Project
Every good package has an example app. The example app is the first thing your users will turn to if they can’t make your package work right off the bat. It should be as concise as possible while still showcasing every feature.
Create your example project by again clicking File ▸ New ▸ New Flutter Project. This time, select Flutter Application and click Next.
Like you did before, follow the instructions to fill in the fields:
- Project name: Type in example. Don’t change this name, or your example project won’t follow the convention of being in the example folder.
- Flutter SDK path: Make sure the default value is the right path to your Flutter SDK.
- Project location: Choose the root folder of your package’s project.
- Description: Here, you can type anything you want or go with Example app of the Focus Detector package..
Click Next and, in the following window, type com.focusdetector.example in the Package name field. Finally, click Finish and wait until Android Studio opens your example project in a new window.
Specifying the Example’s Dependencies
Open your example project’s pubspec.yaml and replace the entire dependencies section with:
dependencies:
flutter:
sdk: flutter
focus_detector:
path: ../
logger: ^0.9.4
Look at how you specified the focus_detector dependency. Instead of linking to a specific version like you usually do, you’re specifying the local parent path, where the package code is located. That way, all changes on the package are automatically reflected in your example.
The second dependency is a fancier logger the app will use to print to the console every time FocusDetector
fires a callback.
Don’t forget to click Pub get at the top of your screen to download your dependencies.
Filling the Example
You’re here to learn how to create and publish a package, not how to use FocusDetector
. So to spare you unnecessary details, replace your example project’s main.dart with the one in starter/auxiliary in your downloaded materials. Also, take the opportunity to delete the test folder from the root of your example.
Close the focus_detector project on Android Studio and then reopen it. This will cause Android Studio to locate your example app’s main.dart and let you run it without the need to open the project separately.
Make sure it all works by building and running your package’s project as you usually do with your apps. If everything went OK, you should see something like this:
You’ll also see logger messages in the console like this:
Hacking the Example Tab
Every package with an example project gets an Example tab on pub.dev:
Pub.dev automatically shows the contents of the example/lib/main.dart file if it can find one. That’s one reason why it’s essential to follow the convention of placing your example project in an example folder. Two other good reasons are:
- So users know exactly where to look when they need it
- So Android Studio locates it by itself and enables the Run button for your package’s project
But what if you feel like you can’t do justice to your package displaying only your example’s main.dart file in the Example tab? Tell no one, but there’s a way. If pub.dev finds an example.md file in the example folder, it’ll display that file rather than the main.dart. You can leverage this to create a cookbook for your package, like this.
Your package is already fully functional but still isn’t publishable. For that, you first need to work on three essential files: the README.md, the CHANGELOG.md and the LICENSE.
Crafting an Effective README
Code is not the only thing package creators need to know how to write. Your most valuable lines won’t be in a Dart file but a plain-text file: the README.md. The README.md is a Markdown file that uses a lightweight markup language to create formatted text output for viewing. Markdown supports HTML tags, so you can use a mixture of both. If you’re unfamiliar with Markdown, check out Markdown Tutorial.
Your README is your business card. It’s the first, and in the worst case, the only thing users will see when they find you on GitHub or pub.dev. The quality of your README can make or break your package as easily as the quality of your code can.
Fortunately, writing an effective README is not rocket science. It all boils down to selecting some of the following resources:
- Logo.
- Short description of what the package does.
- Screenshot of the example app — suitable for visual packages only.
- Code snippet showcasing the most common usage.
- Feature list.
- Link for a tutorial.
- Table of all properties along with their type and a brief description.
- Quick fixes to the most common problems users face. This section is usually called Troubleshooting.
- Badges — more on these in a second.
Keep the most relevant information at the top, and remember that your goals are to:
- Make users trust you — package fatigue is a real thing.
- Keep users away from needing your example project — as much as possible.
Displaying Badges
Badges are the little rectangles you find at the top of some READMEs:
Badges signal credibility, mostly because some of them require you to do some work to earn the right — and the image URL — to carry them in your README. Good examples of this are creating a chat room on Gitter or setting up a build workflow with GitHub Actions.
Adding a README File
Your README is ready and waiting for you in the downloaded materials. Replace the README.md under your project’s root, focus_detector/README.md, with the one in the starter/auxiliary folder.
Licensing
Another prerequisite for publishing a package is having an open-source license file. This license allows people to use, modify and/or share your code under defined terms and conditions. What terms and conditions? That depends on the license you choose.
For Focus Detector, you’re going with the MIT license. When choosing a license for your next project, consult the Choose a License website.
Go ahead and replace the empty LICENSE in your project’s root with the one in the starter/auxiliary from the downloaded materials.
Understanding CHANGELOGs
You’ve probably been in the situation of knowing there’s a new version of a package you use, but you:
- Don’t know what the benefits of the upgrade are.
- Don’t know what’s the effort for the upgrade.
- Decided to upgrade but are having trouble with some missed property or function.
When you run into this situation, look at the ChangeLog tab:
But today, you’re the creator, not the user. It’s your job to ensure your users won’t be helpless when going through this same situation. You do that by creating a thoughtful CHANGELOG.md file.
Unlike the freestyle of the README, this one follows a specific format:
- One heading for each published version. The headings can be level 1 or level 2.
- The heading text contains nothing but the version number, optionally prefixed with “v”.
Here’s an example of a typical raw CHANGELOG and here’s what your users will see.
Adding a CHANGELOG File
Replace the empty CHANGELOG.md under your project’s root with the one in the starter/auxiliary folder from the downloaded materials.
Notice that your CHANGELOG contains a single entry: 1.0.0. One concern you can expect to have in your next ventures is knowing how to name your subsequent versions: 1.0.0+1? 1.0.1? 1.1.0? 2.0.0? Technically, you can do whatever you want, but it’s good pub.dev citizenship to follow this standard:
When you increase a number, the others to the right should be zeroed. For example, if you both add a feature and fix a bug, you increase the middle number and set the next to 0.
You’re finally ready to claim your piece of real estate on pub.dev. :]
Publishing Your Package
The introduction of this article listed several reasons to create a package. Now, to even things out a bit, take this delicate disclaimer to heart:
If you still want to take this road and become a package parent, the only thing you’ll need is a Google account. If you’re still not sure, don’t fret! Consider the next two steps a rehearsal.
Delete the example/build directory to guarantee your package won’t go over the pub.dev limit of 10 MB after gzip compression. That folder is automatically ignored if your project is in a git repository where the .gitignore includes build/
— which likely will be your case when publishing a package of your own.
Open your Android Studio’s shell again by clicking Terminal at the bottom of your screen. Run the following command:
dart pub publish --dry-run
The command then outputs a tree of the files in your package. If the command gave you a Package has 0 warnings. message, it’s the end of rehearsal for you! You can still execute the next steps to try publishing Focus Detector, but expect an error at the end because the package already exists.
For the real thing, run pub publish
(without the --dry-run
part). After outputting the file tree, the command will warn you that publishing is forever and prompts you to confirm before proceeding. Type y and press Enter. Next, it’ll ask you to open a link in your browser and sign in with your Google account. After signing in, the command will automatically verify your authorization and start the upload.
If you’re trying to publish Focus Detector, you’ll receive a Version 1.0.0 of package focus_detector already exists. error message. If you’re publishing a package of your own, wait a couple of minutes – or don’t, if you’re too anxious – and try accessing your new package’s URL:
https://pub.dev/packages/YOUR_PACKAGE_NAME
Welcome to the club pub!
Understanding Verified Publishers
When you publish a package, your pub.dev page displays your email address to everyone. This not only lacks privacy but may also look unprofessional to users – who knows you’re not some random account? The way around this is to be a Verified Publisher. This works as “your company” on pub.dev, where your Google account is just an employee uploader. All you need is a domain address.
Another great advantage is the credibility boost you get from having a verified publisher badge everywhere your name appears on pub.dev:
If you want to become a verified publisher, read more here.
Using the Remote Package
Now for the easy part. Go back to the Yes We Scan project you haven’t opened since the beginning of the article.
Double-click pubspec.yaml in the left panel and replace visibility_detector: ^0.1.5
with focus_detector: ^1.1.0+1
— which is the current version of Focus Detector, and not the 1.0.0
you just fake published. Download the new dependency with Pub get.
Open lib/pages/scanner_page.dart, and, at the top of the file, replace:
import 'package:yes_we_scan/utils/focus_detector.dart';
with:
import 'package:focus_detector/focus_detector.dart';
Done! Now you’re depending on the version hosted on pub.dev and can delete the lib/utils/focus_detector.dart.
As your last task, build and run the project to make sure everything is safe and sound.
Where to Go From Here?
Download the completed project files by clicking the Download Materials button at the top or bottom of the tutorial.
You couldn’t be more prepared to create your own package. If you don’t have an idea to invest in, check these issues labeled by the Flutter team as “would be a good package”. They do this to encourage us to develop the features they consider outside of the framework scope.
We hope you enjoyed this tutorial. If you have any questions or comments, please join the forum discussion below!
All videos. All books.
One low price.
A Kodeco subscription is the best way to learn and master mobile development — plans start at just $19.99/month! Learn iOS, Swift, Android, Kotlin, Flutter and Dart development and unlock our massive catalog of 50+ books and 4,000+ videos.
Learn more