Introduction to Unity Animation
In this tutorial, you’ll learn the ins and outs of Unity animation by tossing pies at belligerent clowns. By Barbara Reichart.
Sign up/Sign in
With a free Kodeco account you can download source code, track your progress, bookmark, personalise your learner profile and more!
Create accountAlready a member of Kodeco? Sign in
Sign up/Sign in
With a free Kodeco account you can download source code, track your progress, bookmark, personalise your learner profile and more!
Create accountAlready a member of Kodeco? Sign in
Contents
Introduction to Unity Animation
30 mins
- Getting Started
- A Moving Target – Your First Animation
- Editing an Animation Clip
- Animating Sound
- Your Turn
- Manipulating Animation Curves
- Switching Between Animations – State Machines 101
- Your First Transition
- Just do it! – The Any State
- Control State Switches Using Parameters and Conditions
- Types of Parameters and Combining Conditions
- Bull’s Eye – Combine Animations and C# Scripts
- Trigger an Animation From Code
- State Machine Behaviors: React to State Changes in Your Scripts
- Animation Events: Trigger Code From Your Animation
- Where to Go From Here?
Games with animations feel more polished and fun. Fortunately, Mecanim, Unity’s animation system, provides ample possibilities for animating GameObjects. In this tutorial, you will learn the basics of animation by throwing cake at a moving clown.
You’ll learn how to
- Create animations
- Use a state machine to switch between animations
- Connect animations to scripts
By the end of the tutorial, you will be able to spice up your own game — with or without clowns :]
Getting Started
Download the starter project and open it in Unity. It provides you with some initial graphic and audio assets, along with a Scene that already lets you throw cake around. Fun!
Licensed under Creative Commons: By Attribution 3.0
http://creativecommons.org/licenses/by/3.0/
In order to follow the tutorial more easily, select the Default layout from the drop-down menu in the top right corner. Unity should now look something like this:
Double-click on GameScene in the Project Browser, then hit the Play button at the top to run the starter project. You’ll see a colorful background. Click on it to throw a piece of cake! The cake is animated using physics, which is not part of this tutorial. You can learn more about Unity physics here.
Your basic project is now up and running. Ready – Set – Cake!
A Moving Target – Your First Animation
Now to add a clown. Align your Scene View to the Camera’s view by selecting the Main Camera in the Hierarchy and choosing GameObject\Align View to Selected from the menu.
Drag and drop Models\Clown from the Project Browser into the Hierarchy.
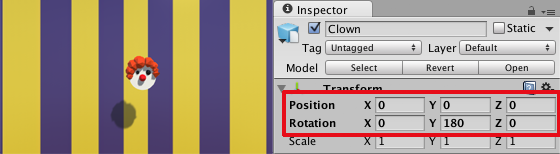
In the Inspector, make sure the Position is set to (0, 0, 0). Change the Rotation to (0, 180, 0):
Time to create your first animation. The clown should move to the left, then to the right and finally back to its starting position.
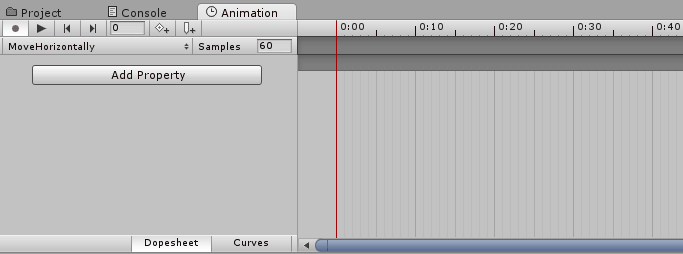
From the menu, select Window\Animation. This view lets you create and manipulate animations. Drag and drop it next to the Console View.
In the Hierarchy, make sure the Clown is still selected. In the Animation View you will see text reading, “To begin animating Clown, create an Animator and an Animation Clip.” Press the Create button below. In the file dialog enter MoveHorizontally as the file name and press Save.
As a result, Unity creates two files: MoveHorizontally.anim and Clown.controller. Additionally, it adds an Animator Component to the Clown (1), which points to the Clown.controller (2):
For now, you only need to focus on MoveHorizontally. This is the Animation Clip that allows you to animate several properties of your clown, such as:
- Position, rotation, and scale
- Material color and light intensity
- Volume of a sound
- Variables in your own scripts
You do this using the Animation View. It is fairly complex, so take a look at the most important areas:
- Property List to add or remove the properties to animate.
- Time Line to preview or modify a specific frame (sample) of the Animation Clip. The numbers correspond to seconds and samples, so 3:14 means 3 seonds and 14 samples.
- Dope Sheet for an overview of the keyframe timing for multiple properties.
Editing an Animation Clip
There are several ways to change property values in an Animation Clip. First, change the property directly to make the clown move to the left.
In the Animation View, click Add Property. From the drop-down menu select Transform\Position and click on the plus sign. In the Property List unfold Clown: Position by clicking on the tiny arrow to its left. Now the position has an x, y, and z coordinate — just what you’d expect for a 3D game.
Click on the animation’s Time Line and select a time around 0:15 to modify the clown’s position at this time during the animation. In the Property List click on the number after Position.x and enter -6. This adds a keyframe that changes the property’s value at this particular time.
Now to check out another way to edit Animation Clips, this time by making the clown move to the right. In the Time Line, select a time around 0:45. Go to the Inspector and set Position x to 6. You will see that Unity adds another keyframe to the timeline.
Play the animation by pressing the play button in the Animator View. Hm, it’s running a bit too fast for our poor cake-throwing skills. Fix this by setting Samples to 12. Run the animation again — the clown’s a much easier target now.
You did it! You created your first animation :] Time to create another.
Animating Sound
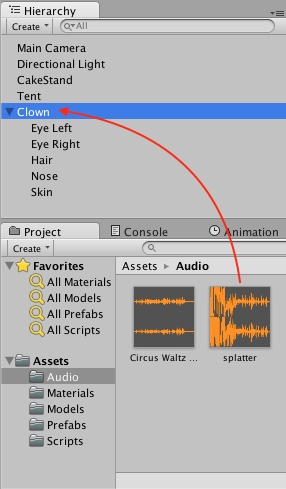
When the clown gets hit, you’ll want to play a sound. Make sure to first stop the animation recording mode, then drag and drop Audio/splatter from the Project Browser onto the Clown GameObject in the Hierarchy.
Select the Clown in the Hierarchy. In the Inspector, you’ll see that this added an Audio Source Component to the Clown. Disable the Audio Source by clicking on the check box in its top left corner. You only want to enable the sound when the clown is actually hit. Also, the sound is a bit loud, so set its Volume to 0.25. The result:
Time to play the sound from within the Animation Clip. In the Animation View, click on MoveHorizontally. From the drop-down select Create new Clip.
In the file dialog, name it Hit and click Save.
Click record in the Animation View. In the Time Line, move the playback head to 0:10, then in the Inspector enable the Audio Source by activating the checkbox in its top left corner. Repeat at 1:00, but now disable it. Take note: when you hit play in the Animation View, you will not hear the sound.
Observing changes to properties other than position and scale can be difficult. Use the Keyframe Navigation highlighted in the image below to check that the Audio Source toggles between enabled and disabled.
Your Turn
Ready for a challenge? Of course you are :]
Create another Animation Clip named MoveVertically. In it, make the clown move up to (0, 3, 0), then down to (0, -3, 0), then back to the center. Also adjust the sample rate.
[spoiler]
Select the Clown in the Hierarchy. In the Animation View, click on Hit and select Create new Clip. Save it as MoveVertically.
Activate the record button. In the Time Line, select 0:15. Change the Clown’s position to (0, 3, 0) in the Inspector. Repeat this at 0:45 with a position of (0, -3, 0). Lastly, set Samples to 12.
The result should look like this:
[/spoiler]
Manipulating Animation Curves
The dope sheet offers a compact view for when properties change, but it is difficult to see what value a property has between keyframes. In Curves mode, you can see and control the precise value for each property over time.
Click on Curves at the bottom of the Animation View. For MoveVertically, it should look something like this:
You can see that Unity derived a nice, smooth-looking curve from the keyframes you specified. In Curves mode, you can change this to create great art like those two curves:
With Curves, you get really detailed control over property changes. Experiment with it, and if you want to understand in detail what is going on, have a peek at the documentation.
Switching Between Animations – State Machines 101
Up to this point, you have created Animation Clips. You can run each of them, but you cannot change which animation plays over the course of your game. This is where state machines come in.
Unity already created a state machine for the Clown when you created the first Animation Clip. You can take a look at it in the Animator View. To do so, select the Clown in the Hierarchy and from the menu select Window\Animator. You should now see the Animator tab right next to the Game tab.
There are several states already: MoveHorizontally, MoveVertically, Hit, Entry, Exit and AnyState. Basically, each state corresponds to an Animation Clip that is playing as long as the state is active.
You’ll also see an arrow that points from Entry to MoveHorizontally. This means MoveHorizontally is the Default State, the state that the state machine is in when first activated. It is colored orange.
The layout of the states doesn’t influence behavior, so feel free to arrange the states in a way that suits you — just drag them around.
Your First Transition
So far, so good. Now you want the clown to switch between MoveHorizontally and MoveVertically as soon as the respective animations end. Switching from one state to another is called a transition.
To create your first transition, right-click on MoveHorizontally. Select Make Transition from the drop-down menu, then click on MoveVertically. This creates a transition between the two states. Do the same for the opposite direction, from MoveVertically to MoveHorizontally.
Play the game: the clown now moves from left to right, then up and down, infinitely.
But there’s something weird happening: the clown is cutting corners when switching between the states. You never told it to do that. What’s going on?
To answer the question, select the Clown in the Inspector while the game is running and switch to the Animator View. You will see a progress bar in the currently active state. Look closely and see that there is a short period when both states, MoveHorizontally and MoveVertically, have a progress bar at the same time. This means that Unity runs both states at once, blending one with the other.
Blending states can be useful; when you have a character that transitions from walking to running, for example, this looks more natural. But there are also cases where you do not want to blend two states. Fortunately, Unity provides you with settings that allow you to control the transition.
In the Animator View, click on the transition arrow from MoveHorizontally to MoveVertically. In the Inspector, you can now see the settings that control the transition. Unfold Settings by clicking on the triangle next to it. Set the Exit Time to 1 and the Transition Duration to 0. Do the same for the transition from MoveVertically to MoveHorizontally.
Run the game. Now the clown will move horizontally and vertically, but never both at the same time.
Take another look at the transition settings:
- Has Exit Time determines whether the transition can be triggered at any time, or only after the specified exit time.
- Exit Time is the earliest time after which the transition can start. It is represented in normalised time. An exit time of 0.75 means the transition starts only when the animation is 75% complete.
- Transition Duration and Fixed Duration allow you to specify how long the transition takes. If Fixed Duration is enabled, specify the duration in seconds. Otherwise, specify the duration in normalised time.
- Transition Offset controls the offset of the time to begin playing in the destination state which is transitioned to. For example, a value of 0.5 would mean the target state will begin playing at 50% of the way through its own timeline.
- Interrupt Source controls whether the transition may be interrupted, for example when another transition is triggered.
Sometimes it can be difficult to imagine what those parameters mean. Thankfully, the Transition Graph, which is directly below the transition settings in the Inspector, shows you precisely how each animation is configured:
Just do it! – The Any State
You’ll want to run a Hit animation whenever the clown is hit by a cake, regardless of which state the clown is currently in. How can you achieve this?
From what you’ve learned so far, you’d probably just create two transitions to the Hit state: one from the MoveHorizontally state, and another from the MoveVertically state. While this will work, it doesn’t scale. Imagine you have a game with a more complex monster using ten states. You could create ten transitions, but it would become confusing, and we want to keep everything as simple as possible.
You might already have noticed the turquoise box that says Any State. It is basically a shorthand way for drawing transitions from all states to a single target state. Perfect!
Right-click on the AnyState, select Make Transition, and click on the Hit state. Now your Animator View should look like this:
When the Hit animation is complete, the state should transition to the MoveHorizontally state.
Try to do this by yourself. If you get stuck, have a peek:
[spoiler]
Right-click on Hit, then select Make Transition and click on MoveHorizontally to create the transition. Select it. In the Inspector, set Exit Time to 1 and Transition Duration to 0.
[/spoiler]
Control State Switches Using Parameters and Conditions
Next you need to tell Unity when it should play the transition between Any State and Hit, as this should not happen automatically. You only want the Animator to switch to the Hit state when the clown is actually hit.
For this, you can use parameters and conditions. A parameter is a variable that you specify on the Animator. You can use it to define a condition for a specific transition to happen.
Here’s how it works in practice:
In the top left corner of the Animator View, select the Parameters tab. Click on the + button. From the drop-down menu, select Trigger. This creates a new trigger. Name it hit. That’s it! You are now the proud owner of your first parameter.
Next, select the transition arrow from Any State to Hit. In the Inspector, scroll to the Conditions section. Right now it reads “List is Empty.” Click on the + button. This adds the hit trigger as a condition.
The transition will now be triggered once the parameter hit
turns to true.
To try it out manually, drag and drop the Animator View right next to the Game View, so that you can see both at the same time. Run the game. In the Hierarchy, select the Clown. In the Animator View, click on the radio button after the hit parameter. You’ll hear the splatter sound, and then the clown resets. Great — your Animator Controller works as intended.
Types of Parameters and Combining Conditions
Triggers are useful, but of course there are more parameter types you can use:
- Float: Fractions (0.1, 0.999, 6.31, …)
- Int: Whole numbers (1, 5, 13, 1005, …)
- Bool: True or False
- Trigger: Boolean parameter that is reset to false once consumed by a transition
Each type can be used depending on your requirements. For example, an Int
could count how often the player hits the clown and play a special animation the 10th time.
Furthermore, you can assign default values to every parameter in the parameter list of the Animator View.
A Condition is used to decide when a transition should happen. You can define more than one condition on a transition. In this case, all conditions have to be met to trigger the transition.
You can also express that, for example, the clown should transition to the hit state if it is hit or if a time limit is up. To do this, create a second transition between the Any State and the Hit state. In the Inspector, you now see two transitions. For each transition, you can separately define the triggering condition.
Bull’s Eye – Combine Animations and C# Scripts
By now you’ve seen how powerful and flexible Unity’s animation system can be, even without a single line of code. But, of course, messing around with code is great fun, so triggering animations from scripts is what you’ll learn next.
Trigger an Animation From Code
Before you can react to a collision, you need to be able to detect it. Unfold the Clown in the Hierarchy and select its child Skin. In the Inspector, click Add Component and choose Physics\Mesh Collider. In the new Mesh Collider Component, tick on Convex.
You can now see a thin green border around the skin of the clown. Granted, the shape does not perfectly fit the clown, but it’s close enough.
Try it out. Run the game — the cake (because it also has a Collider) no longer flies through the clown.
To detect this collision in code, select Skin in the Inspector. Click Add Component, and select New Script. Name the script CollisionBehavior, set Language to C Sharp, and press Create And Add.
When another Collider touches the clown’s Mesh Collider, it triggers OnCollisionEnter
. Open CollisionBehavior in MonoDevelop by double-clicking on the file in the Project Browser.
Add the following code inside CollisionBehavior above the line void Start()
:
// 1
public bool collided;
//2
void OnCollisionEnter(Collision collision) {
if (!collided) {
collided = true;
// 3
GameObject clown = gameObject.transform.parent.gameObject;
Animator clownAnimator = clown.GetComponent<Animator> ();
// 4
clownAnimator.SetTrigger ("hit");
}
}
Here’s what the code does:
- Creates a
bool
variable that remembers whether the clown already collided. - Only triggers the animation if the clown has not collided yet. The next line sets
collided
to true to make sure you will only trigger the Hit animation once. - Fetches the Clown GameObject, which is the parent of the current
gameObject
, then usesGetComponent
to retrieve theAnimator
. - Calls
SetTrigger
on theclownAnimator
. This makes the animator go to the Hit state. For other parameter types, you can useSetFloat
,SetInt
,SetBool
orResetTrigger
.
Run the game. Have a good throw. When you manage to hit the clown, it will make a splash sound!

Gotcha! (Taken by Seth Lemmons published under CC)
State Machine Behaviors: React to State Changes in Your Scripts
State Machine Behaviors allow you to script behavior that is state dependent. For example, you can make the clown shrink as long as it is in the Hit state. Give it a try:
In Unity, go to the Animator View and select the Hit state. In the Inspector, click on Add Behavior. Select New Script, name it ClownHitBehavior and press Create And Add.
Double-click on ClownHitBehavior to open it. You might notice that Unity already added a few methods which are commented out. Don’t worry about them yet — you will learn what each of them does soon enough. Instead focus on scaling the clown!

Unlike Alice, our clown shrinks when it comes in contact with cake. (from pixabay under CC0 Public Domain
To do this, add the startTime
variable inside the ClownHitBehavior.
float startTime;
This variable will store the time when the Hit state was entered. You can use this to control the speed of the animation depending on the actual time instead of the frame rate. This ensures that the clown shrinks at the same rate no matter how fast the game is running.
Next, look for the (commented out) OnStateEnter
method. In this method, you set the value of startTime
. Replace it with this:
override public void OnStateEnter(Animator animator, AnimatorStateInfo stateInfo, int layerIndex) {
startTime = Time.time;
}
OnStateEnter
is called when the state machine enters the Hit state. With Time.time
you retrieve the time in seconds since the start of the game. While not all that great for creating a clock, this is really sufficient for shrinking your clown :]
Next, look for the OnStateUpdate
method and replace it with the following code:
override public void OnStateUpdate(Animator animator, AnimatorStateInfo stateInfo, int layerIndex) {
GameObject clown = animator.gameObject;
clown.transform.localScale *= Mathf.Lerp (1, 0, Time.time - startTime);
}
OnStateUpdate
is called on every frame while the Hit state is active. In every frame, you adjust the scale of the clown.
For this you first need to find the Clown GameObject. As the script is running on the Animator Component, you cannot simply access it via gameObject
like you did before. Instead, ask the animator
variable of the method for its gameObject
and then store this in the clown
variable.
Next, change the Clown GameObject’s scale using Mathf.Lerp
. This method linearly interpolates between two numerical values.
Take for instance two different points on the screen. One is y-positioned on the left at 0 and the other is y-positioned on the right at 20. Passing in a .50 to Math.Lerp
will return a point in the middle.
Call Math.Lerp
with three parameters: the two values it interpolates between, in this case 1 and 0, and the time in seconds since the Hit animation started. Lerp then calculates the resulting scale. For example, at 0 seconds it will return 1, at 1 second it will return 0 and at 0.75 seconds it will return 0.25.
Hit play and toss cake at the clown until you get a hit — the clown shrinks and never reappears. A short game indeed!
-
OnStateEnter
is called on the first frame of the state being played. -
OnStateUpdate
is called afterUpdate
of MonoBehaviors on every frame while the state the behavior it is attached to is playing. -
OnStateExit
is called on the last frame of a transition to another state. -
OnStateMove
is called instead ofOnAnimatorMove
on MonoBehaviors for every frame as long as the state is playing. -
OnStateIK
is called after Unity calculates Inverse Kinematics for a humanoid character — for example, to allow it to grab an item.
Animation Events: Trigger Code From Your Animation
Time to make the clown fit for duty again. A great way to do that is through Animation Events, which allow you to call functions from the game object’s script when an Animation Clip is running.
First, you need a script with a method that resets the clown’s size. Select the Clown in the Hierarchy. In the Inspector, scroll to the bottom and click Add Component. Select New Script and name the script ResetClown with C Sharp as Language. Press Create and Add.
Open the ResetClown script in MonoDevelop and add the following code:
void ResetClownOnHit () {
gameObject.transform.localScale = Vector3.one;
gameObject.GetComponentInChildren<CollisionBehavior> ().collided = false;
}
In this method, you set the localScale
of the clown back to 1 to restore its original size. Then you use GetComponentInChildren()
to reference the CollisionBehavior
on the Skin and make sure that its collided
variable is set to false
. If you leave out this step, your clown will still move, but won’t react to collisions anymore.
Now you need to create an Animation Event that calls this method. Switch to the Animation View while the Clown is selected in the Hierarchy and pick the Hit animation clip. In the Time Line set the playback head to 1:30. If your Time Line is not visible beyond 1:00, use your scroll wheel to scale it down. Then click on the button Add Event.
Double click on the marker for the Animation Event you just created.
In the dialog window, select ResetClownOnHit()
.
This creates an Animation Event that calls the method ResetClownOnHit()
at 1:30.
Run the game. Now the clown shrinks, then resets and begins moving again, ready to be clobbered by cake once more!
Where to Go From Here?
You can download the finished project here.
In this tutorial, you got a glimpse of the possibilities of Unity’s animation system. But much to learn you still have, young padawan. Some reading suggestions:
- Importing animations created with 3D software such as Maya, Cinema 4D, 3D Studio Max or Blender
- Setting up Animation Layers and Sub-State Machines
- Making transitions appear smoother using Blend Trees
For now, enjoy the power you have gained over the animation system and make your games more beautiful and interactive. If you have any questions or comments, please join the discussion below!
All videos. All books.
One low price.
A Kodeco subscription is the best way to learn and master mobile development — plans start at just $19.99/month! Learn iOS, Swift, Android, Kotlin, Flutter and Dart development and unlock our massive catalog of 50+ books and 4,000+ videos.
Learn more