An Introduction to WebSockets
Learn about WebSockets using Swift and Vapor by building a question and answer client and server app. By Jari Koopman.
A WebSocket is a network protocol that allows two-way communication between a server and client. Unlike HTTP, which uses a request and response pattern, WebSocket peers can send messages in either direction at any point in time.
WebSockets are often used for chat-based apps and other apps that need to continuously talk between server and client.
In this WebSockets tutorial you’ll learn how to:
- Initiate a WebSocket handshake including how the connection is upgraded to a WebSocket.
- Send messages through the WebSocket.
- Process received messages sent through the WebSocket.
- Integrate with a Vapor server, iOS application and web page using WebSockets.
In this tutorial you’ll learn how to integrate a simple iOS Question and Answer application with a Vapor Server to send and receive information via WebSockets. The iOS application allows you to create questions and the Vapor application will store these questions along with their status of Unanswered or Answered.
Getting Started
Download the starter project by clicking the Download Materials button at the top or bottom of the tutorial.
In the Starter directory are two folders:
- websockets-backend: Contains the Vapor 4 back end that you’ll use as your WebSocket server.
- websocket-ios: Contains the iOS app that will be the WebSocket client.
In the next section, you’ll set up the server part of the WebSocket and learn more about how a WebSocket works.
Creating a WebSocket Server
A WebSocket connection starts with a handshake. This is a little dance the client and server do to start the connection, like two birds doing a mating dance. :]
The client starts out with a normal HTTP request that contains two special headers: Upgrade: WebSocket and Connection: Upgrade, along with any other required request data like authentication.
The server then sends back an HTTP 101 Switching Protocols status code indication to the client, which basically says: We used to talk in HTTP, but we’ll use something else in the future. Along with this HTTP 101 response, it also sends the Upgrade: WebSocket and Connection: Upgrade headers again.
After this, the handshake is complete and the WebSocket connection is in place!

With the handshake out of the way, you can start setting up the back-end server. Navigate to Starter/websocket-backend and double-click Package.swift. This opens the project in Xcode and starts downloading the dependencies.
When Xcode finishes fetching the dependencies, open QuestionsController.swift, where you’ll add the route the WebSocket client will connect to.
Your first step is to add the following new function above index in QuestionsController:
func webSocket(req: Request, socket: WebSocket) {
  socket.onText { _, text in print(text) }
}
For now, all you want to do is print any text messages you’ve received over your WebSocket connection. To ensure the client can connect to this server, add the following route to the top of boot(routes:):
routes.webSocket("socket", onUpgrade: self.webSocket)
By using routes.webSocket here instead of a usual HTTP method, Vapor takes care of all the handshaking for you… awesome!
Testing the WebSocket
Your server should work now, but it’s a good idea to be sure. To test your new WebSocket server, build and run your code. It worked successfully if the logs show the following:
[ NOTICE ] Server starting on http://127.0.0.1:8080
Now, it’s time to do some WebSocket-ing! Open your browser and navigate to http://www.websocket.org/echo.html.
Next, enter ws://localhost:8080/socket into the Location field and press the Connect button. In the Log field to the right, CONNECTED will appear and your Vapor back end will log:
[ INFO ] GET /socket
Now that you’ve set up the connection, enter some text in the Message field and hit Send. Your message will now magically appear in your Xcode console.
Congratulations, you just created your own WebSocket server!
Writing WebSocket Data
Of course, you can’t expect your users to go to this testing site and enter all their data manually. In this section, you’ll set up the iOS companion app to send WebSocket messages directly to your server. But before you do that, take a moment to learn what exactly a WebSocket message is.
Understanding WebSocket Messages
In the test above, you simply entered some text, but a lot more is going on behind the scenes. Per the WebSocket Protocol RFC: “In the WebSocket Protocol, data is transmitted using a sequence of frames.”
A WebSocket frame consists of some bits that you can compare to HTTP headers, followed by an actual message. If a message is too big, you can use multiple frames to send it.
The following frame parts are especially interesting:
- FIN: This single bit indicates whether this is the final frame of a message or if more frames will follow.
- opcode: These four bits indicate what type of message this is and how to handle the payload data.
- MASK: This single bit indicates whether the message is masked. Client-to-server messages must always be masked.
- Payload length: Use these 7, 23 or 71 bits to explain how big the payload data is in bits, much like HTTP’s Content-Length header.
-
Masking key: These four optional bits contain the key you used to mask the message. You can omit them if the
MASKbit is 0. - Payload data: The rest of the message contains the actual payload.
There are two types of opcodes: ones for non-control frames and for control frames. The non-control frame codes are: continuation, text and binary. These deal with how to decode the payload. The control frame codes are: connection close, ping and pong. These are special types of messages.
As the RFC states, you must mask all client-to-server messages. You mask a message by generating four random bits as the mask key. Every byte in the payload data is than XORed based on the masking key. This doesn’t affect payload length.
Unmasking uses the same process as masking.
Now that you know how WebSocket messages work, it’s time to start creating some.
Setting up the UI
To exchange WebSocket messages with your server, you’ll create a simple SwiftUI app that users can use to ask questions after a conference talk.
Your first step is to set up the app’s UI to let the users send their questions.
Open the iOS project by navigating to Starter/websocket-ios and double-click Conference Q&A.xcodeproj. Build and run and you’ll see a plain “Hello, world” view. You’ll change that next!
Open ContentView.swift and replace the contents of ContentView with the following:
    // 1
    @State var newQuestion: String = ""

    // TODO: Remove following line when socket is implemented.
    @State var questions: [String] = []

    // 2
    @ObservedObject var keyboard: Keyboard = .init()
    @ObservedObject var socket: WebSocketController = .init()

    var body: some View {
      // 3
      VStack(spacing: 8) {
        Text("Your asked questions:")
        Divider()
        // 4
        // TODO: Update list when socket is implemented.
        List(self.questions, id: \.self) { q in
          VStack(alignment: .leading) {
            Text(q)
            Text("Status: Unanswered")
              .foregroundColor(.red)
          }
        }
        Divider()
        // 5
        TextField("Ask a new question", text: $newQuestion, onCommit: {
          guard !self.newQuestion.isEmpty else { return }
          self.socket.addQuestion(self.newQuestion)
          // TODO: Remove following line when socket is implemented.
          self.questions.append(self.newQuestion)
          self.newQuestion = ""
        })
          .textFieldStyle(RoundedBorderTextFieldStyle())
          .padding(.horizontal)
          .padding(.bottom, keyboard.height)
          .edgesIgnoringSafeArea(keyboard.height > 0 ? .bottom : [])
      }
      .padding(.vertical)
      // 6
      .alert(item: $socket.alertWrapper) { $0.alert }
    }
Now, there’s quite a lot going on here:
- At the top are two
Statevariables for the views. One contains the user input for new questions while the other stores those questions temporarily. - Next come the
ObservedObjects.Keyboardmoves the text field up when the keyboard is active.WebSocketControllercontains all the required WebSocket code. - In the body of the view, you start with a simple
VStackto put all the views on top of each other. - The first section of the VStack is a
Listcontaining all asked questions. You’ll connect this to theWebSocketControllerdata later on. - Next is the
TextFieldfor new questions. Once you connect the WebSocket, you’ll remove the localself.questionsarray and store the data in the back end. - Finally, you have a placeholder for an alert that you’ll use when the WebSocket reports an error.
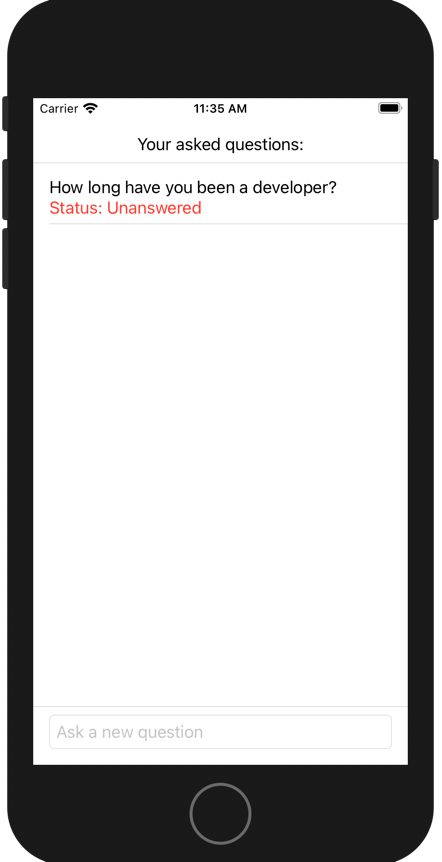
Build and run the app and try entering a question. Press Enter and you’ll see the question appear in the list with a status of Unanswered. Awesome!
Now that the UI is complete, you’re ready to connect to your WebSocket server.